The Dome
In this guide, we will talk about the monument "The Dome" and what you need for a successful trip to gather valuable resources.
General Information About the Monument
The Dome is a fairly rewarding loot location, making it suitable for beginners. For solo players, it's especially convenient for fuel collection, as many solo bases lack an oil refinery. Here, however, there are two: one located near the Dome itself and another situated directly in the dip beneath it.
Additionally, fuel barrels continuously spawn under the Dome, making it a reliable spot for gathering fuel.
There is no resource recycler at the Dome.

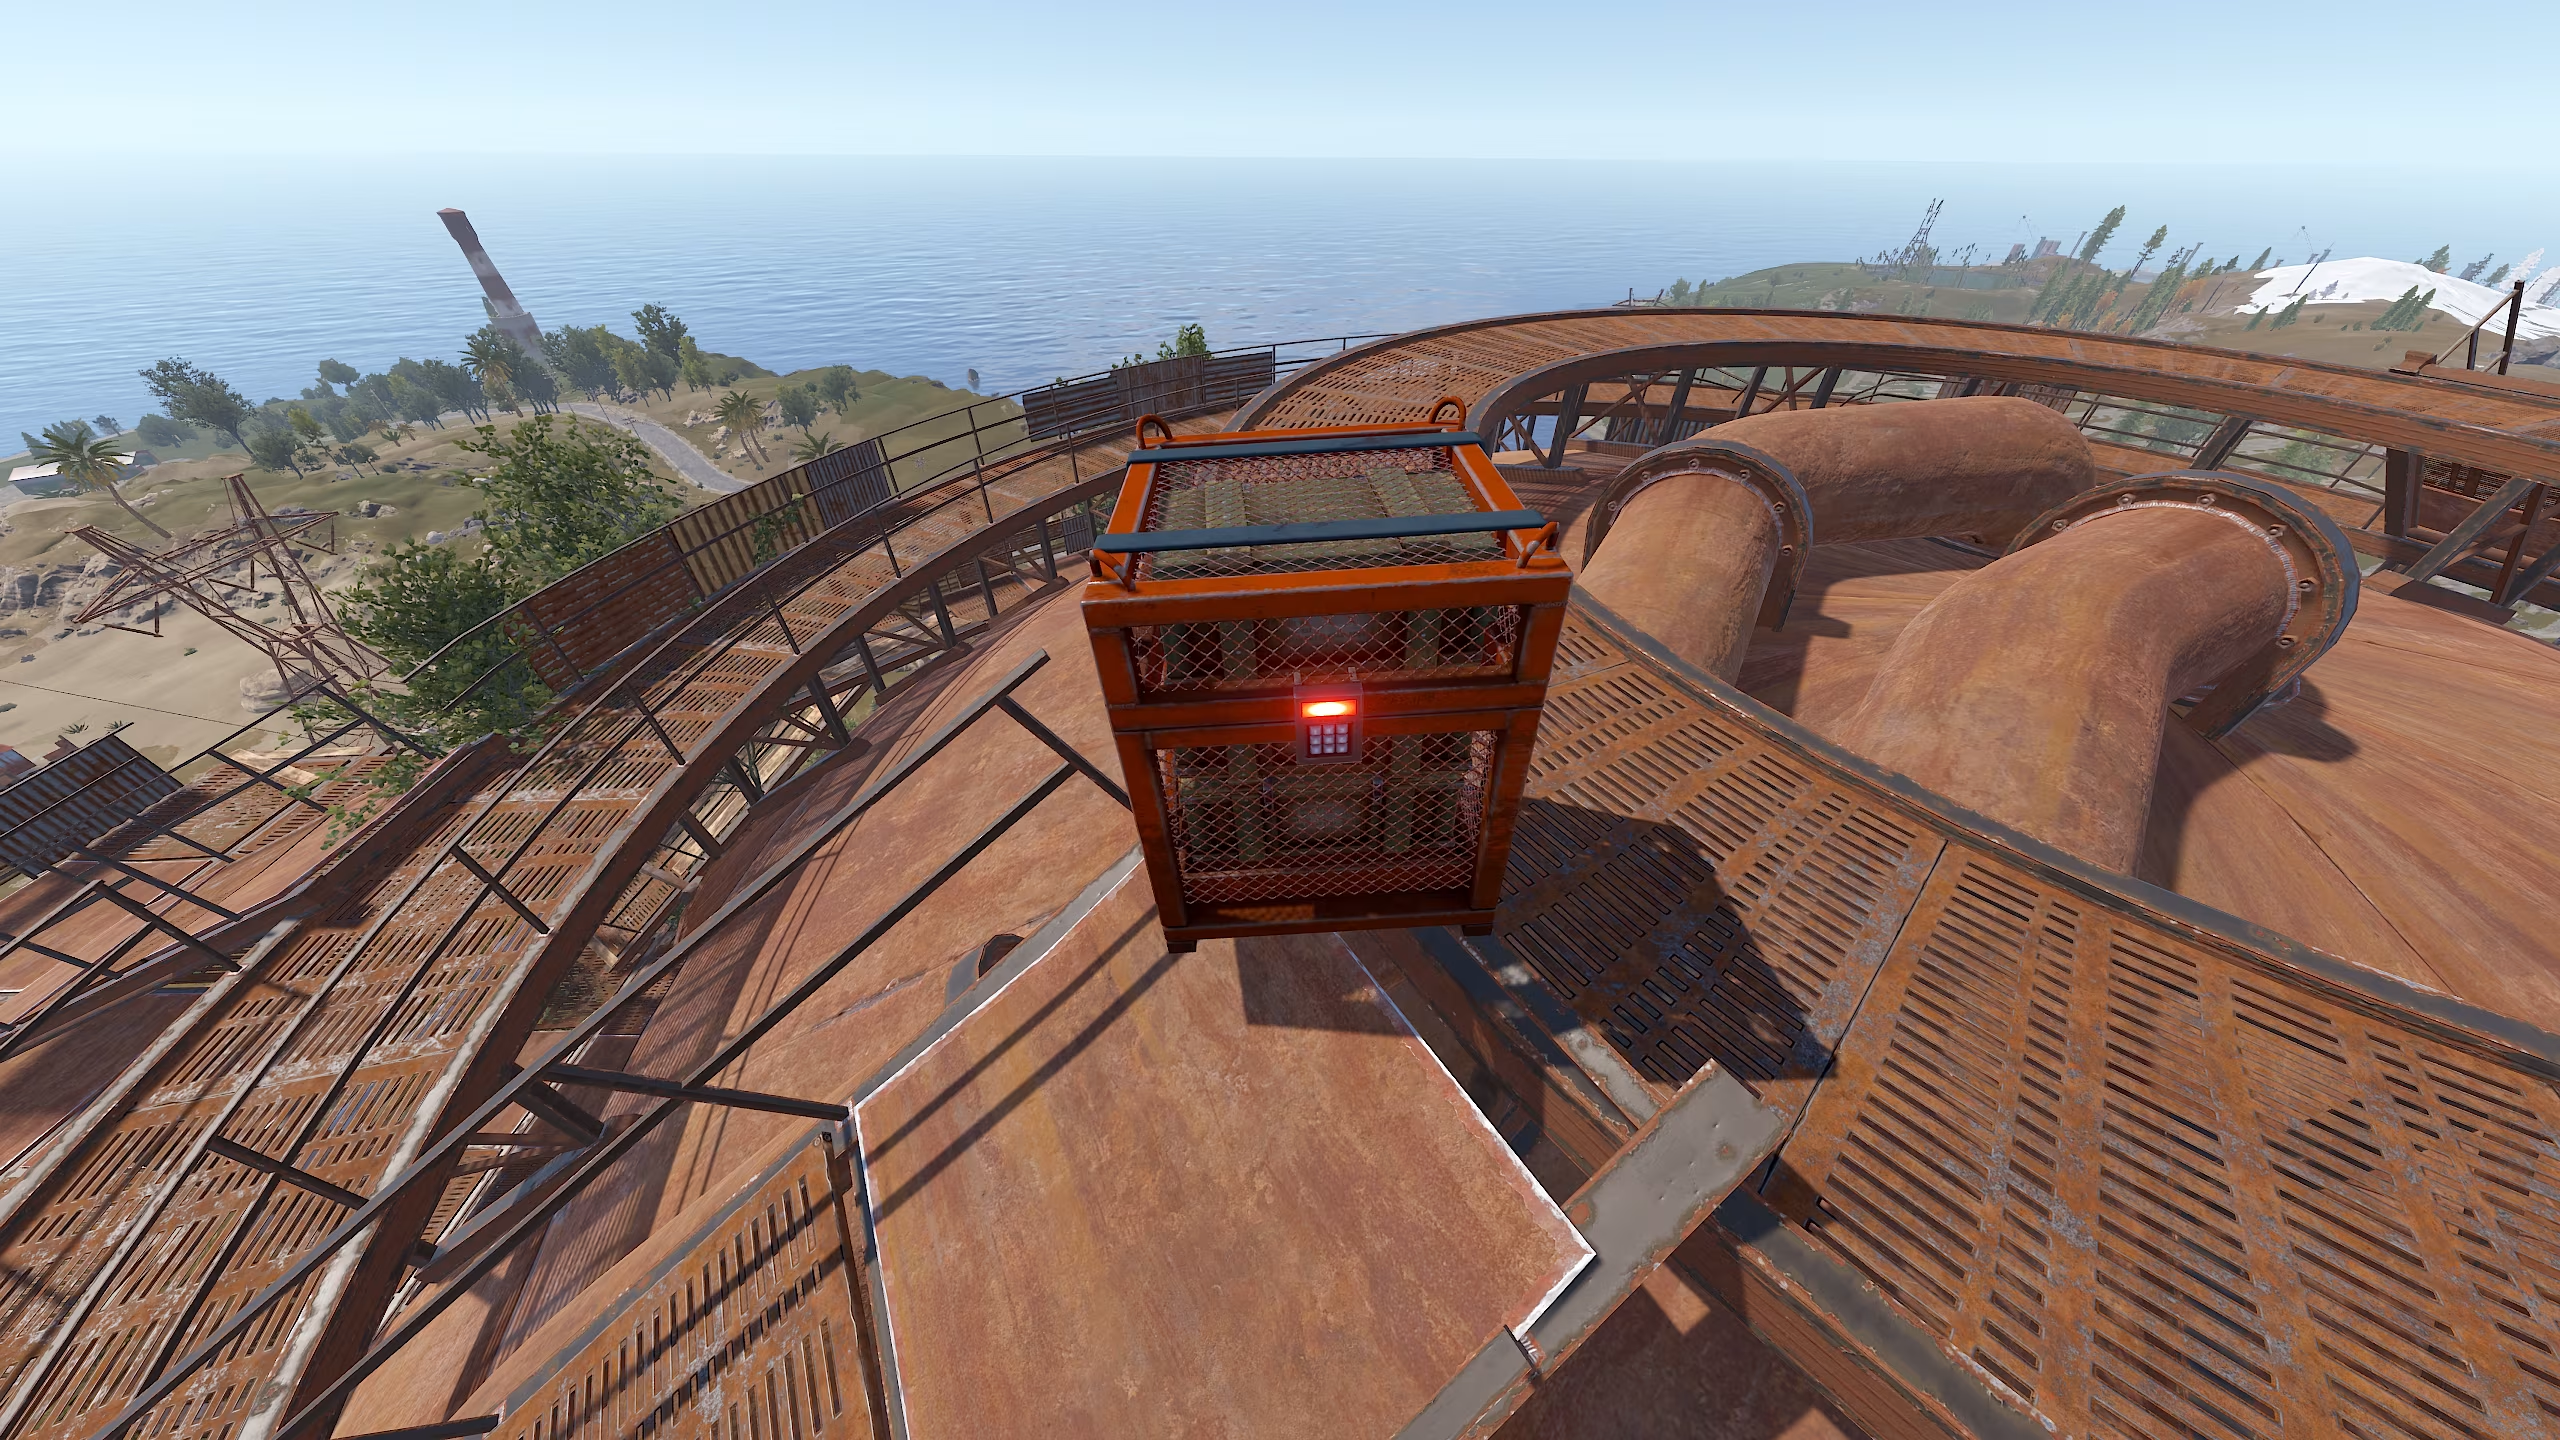
A Chinook helicopter can fly to the Dome and drop a locked crate at its very top. When this happens, players from all around will rush to claim it, leading to an intense firefight.
Bots and Loot
❌ Scientists are absent in this location, meaning the only threats you'll face are wild animals and other players.
✅ Loot:
- ~5-6 normal crates
- 4 military crates
- 2 diesel barrels
- Numerous loot barrels scattered throughout the area
🕦 Occasionally: A locked crate may spawn.
Radiation Protection & Essential Gear
☢️ Radiation Protection – Wear clothing that provides at least 9 radiation resistance. Even less-prepared players can explore this location safely.
🏹 Weapons – You might not need one at all, unless you run into enemies.
💊 Med Supplies – It's recommended to bring at least some bandages, as inexperienced players will likely fall from heights—probably more than once!
These are the bare minimum essentials, but keep in mind that you're unlikely to be alone at the Dome. Be prepared to fight… or die trying.
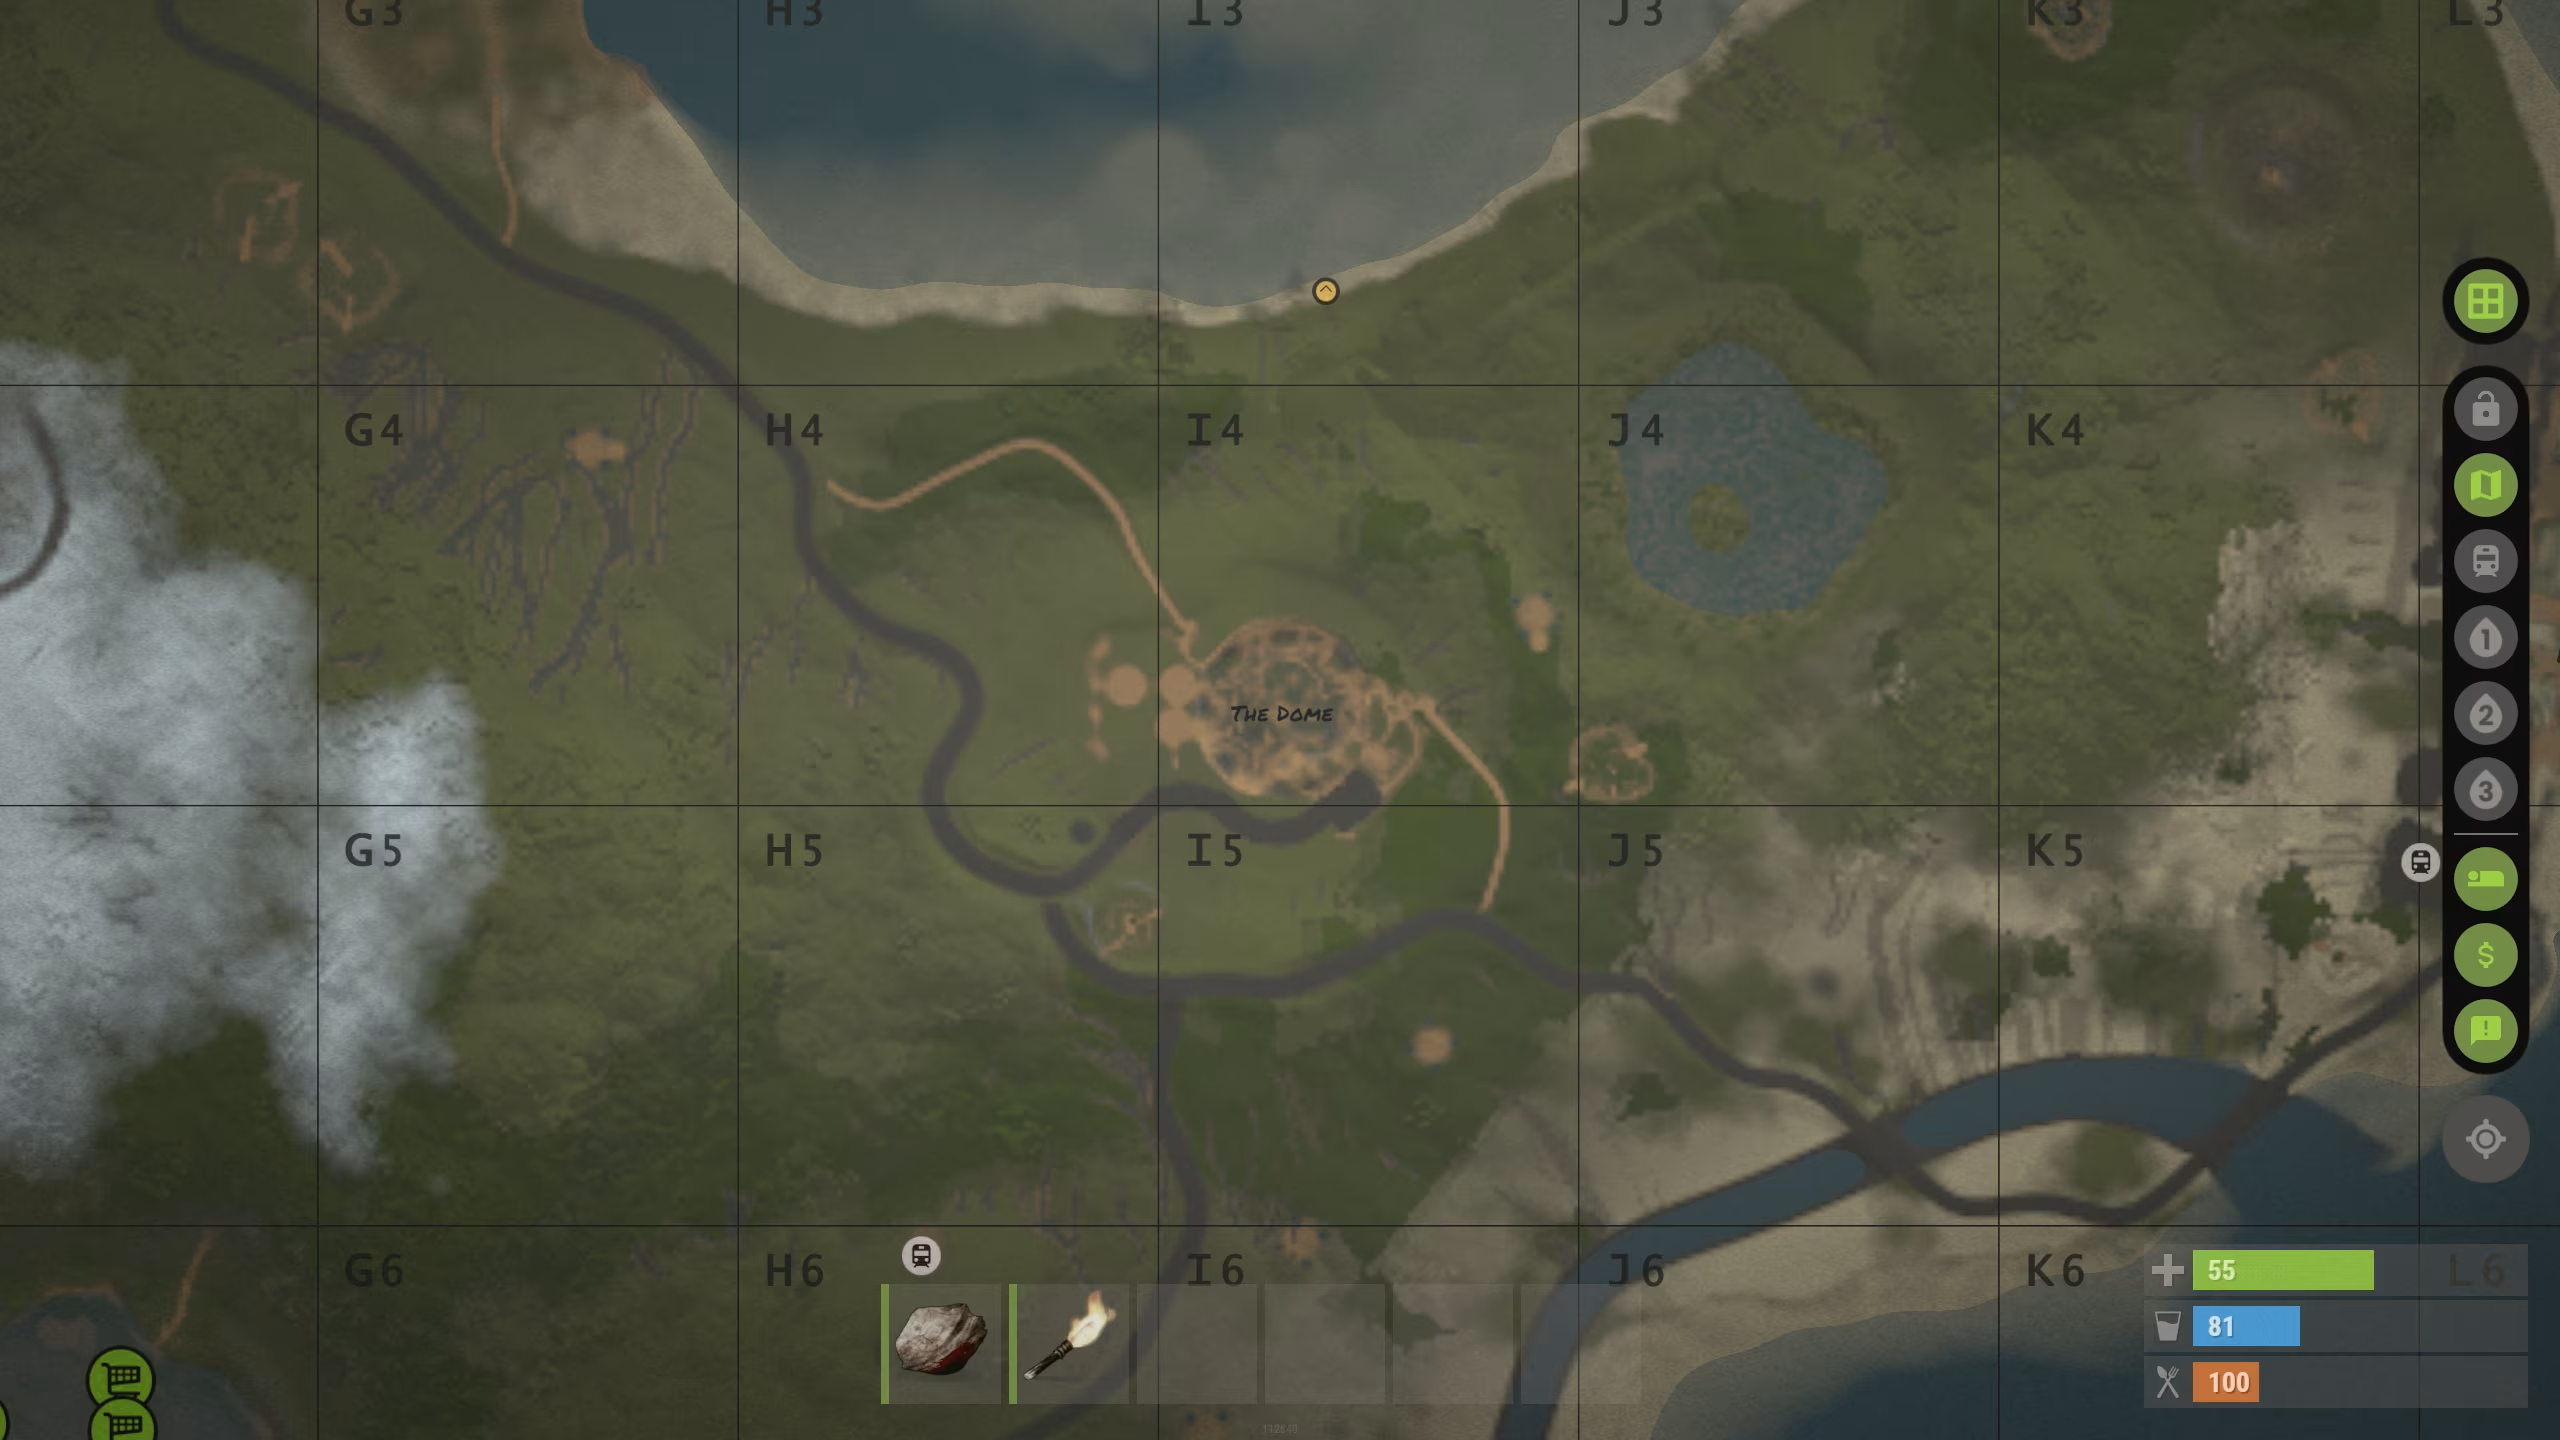
Where to Find It?
Open your map and look for it. The Dome can spawn in any biome.
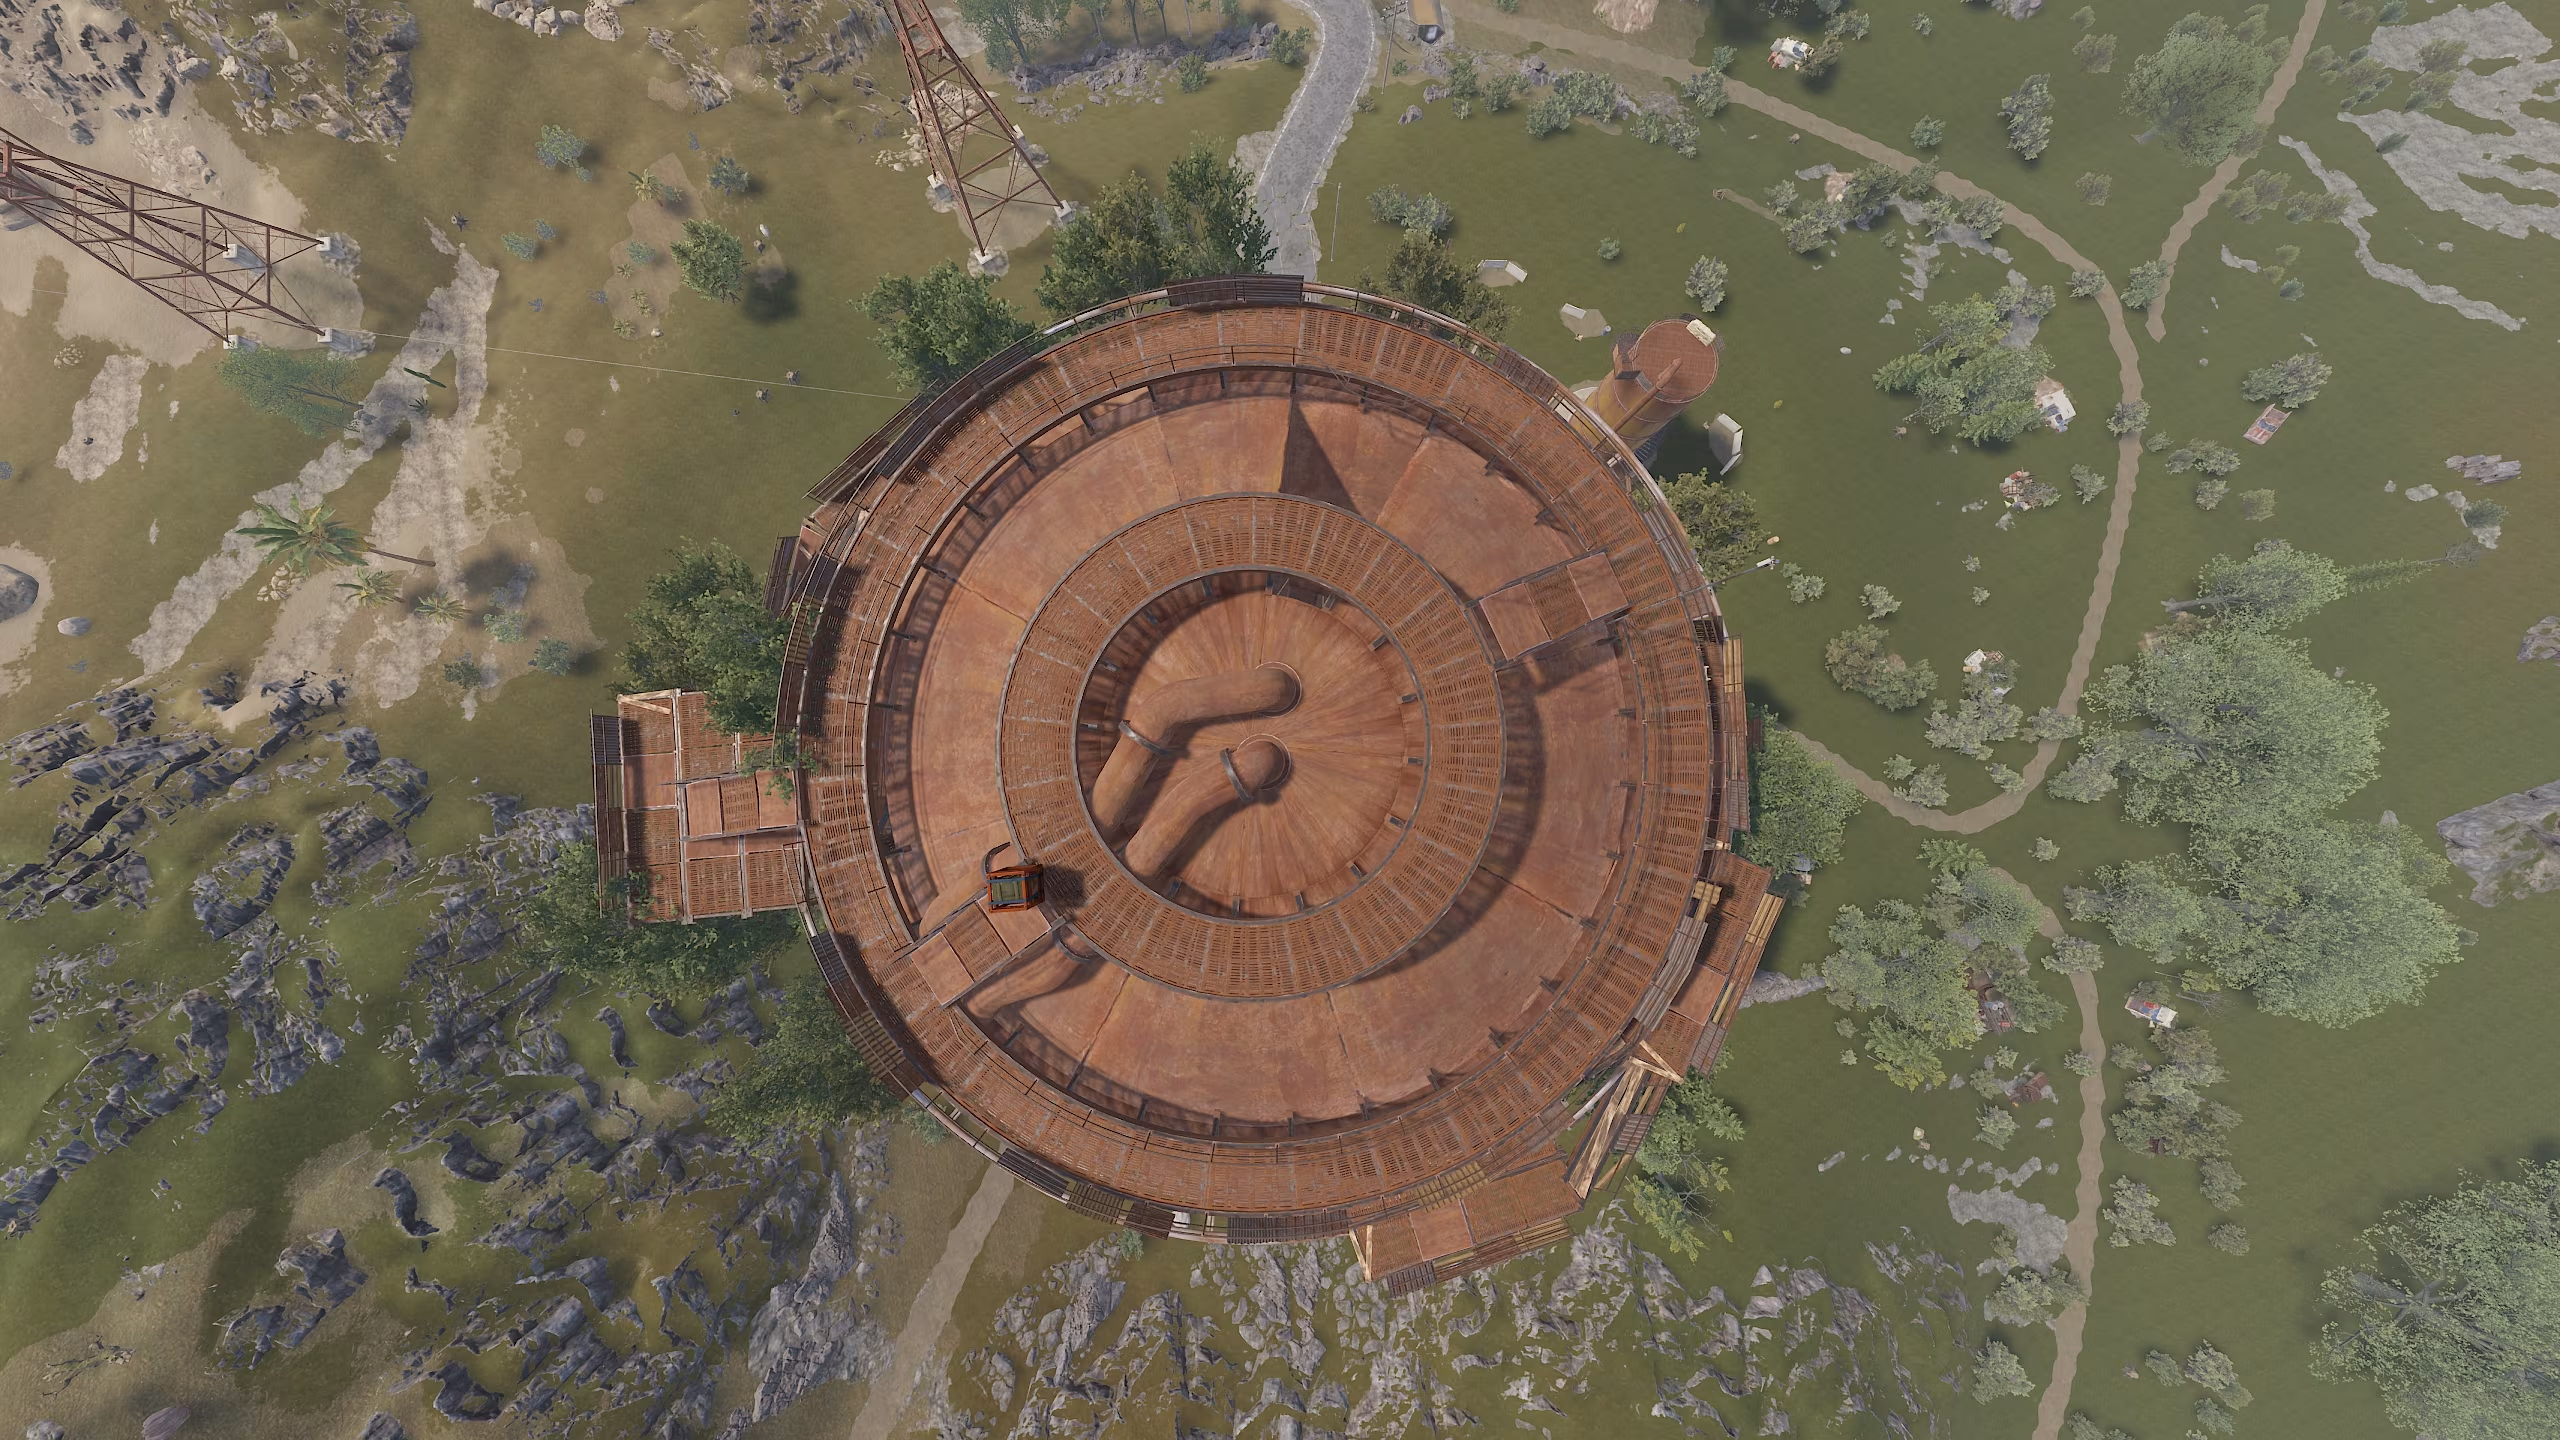
Monument Overview and Structure
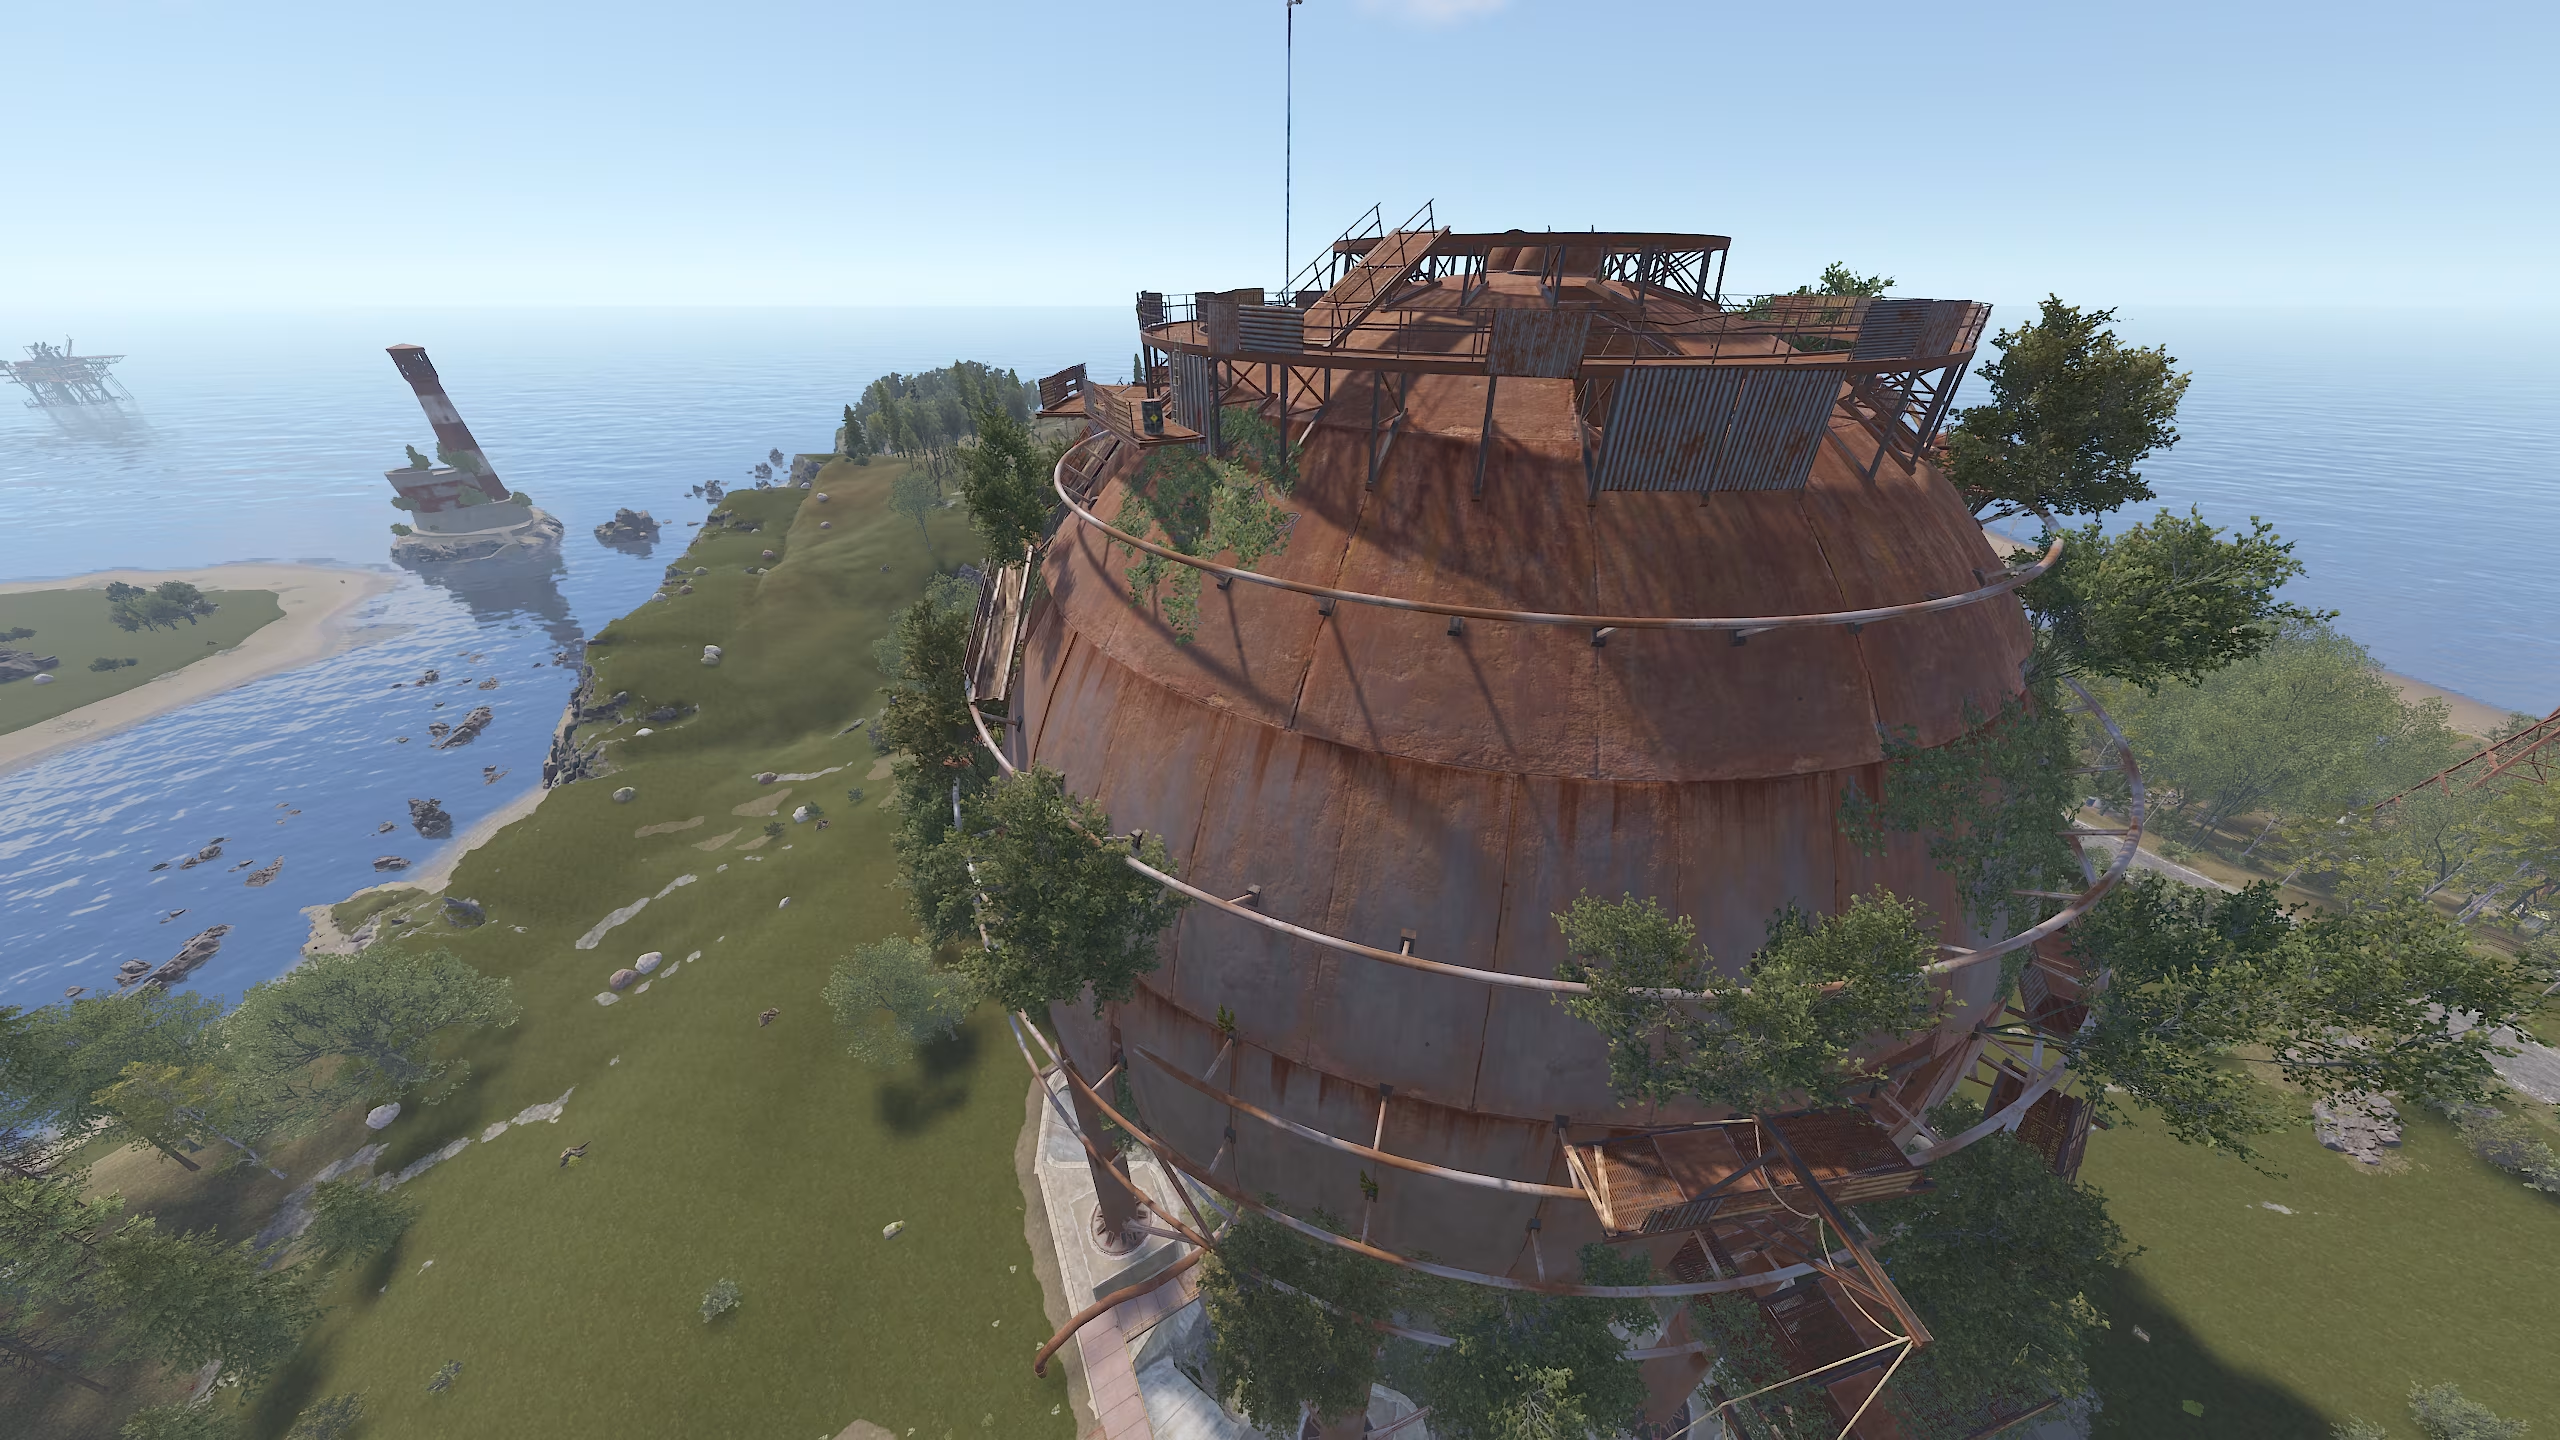
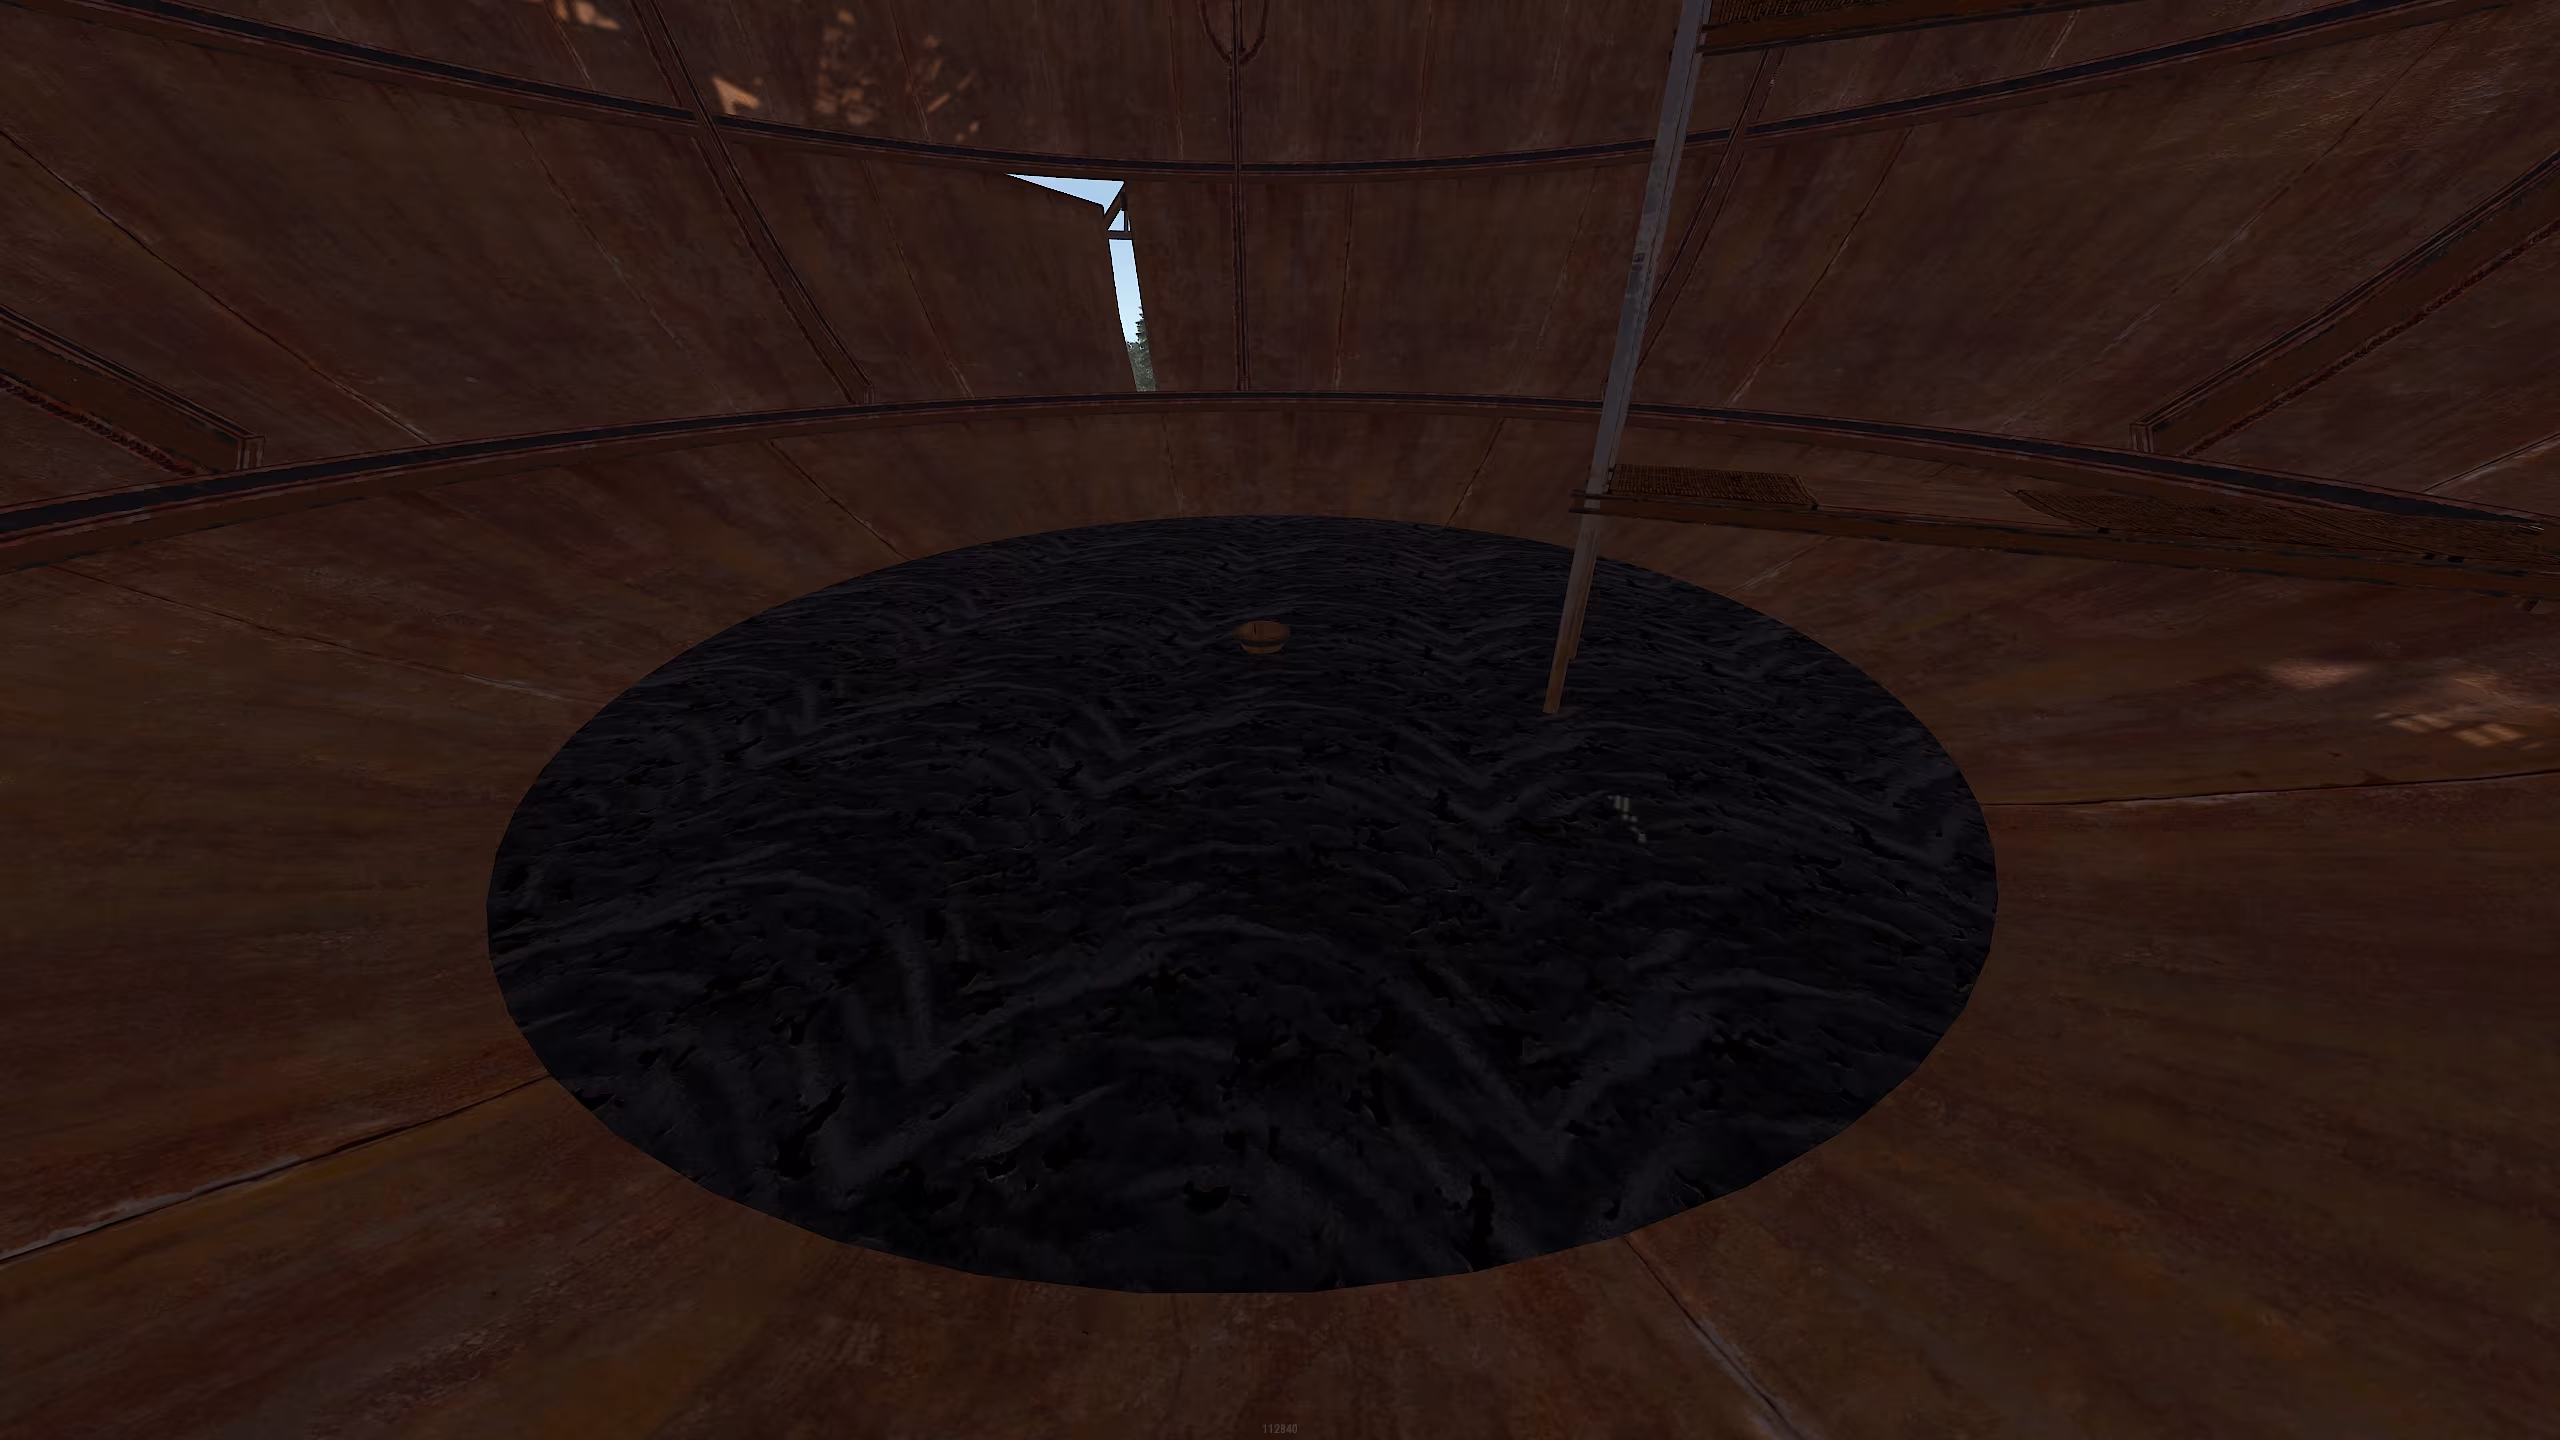
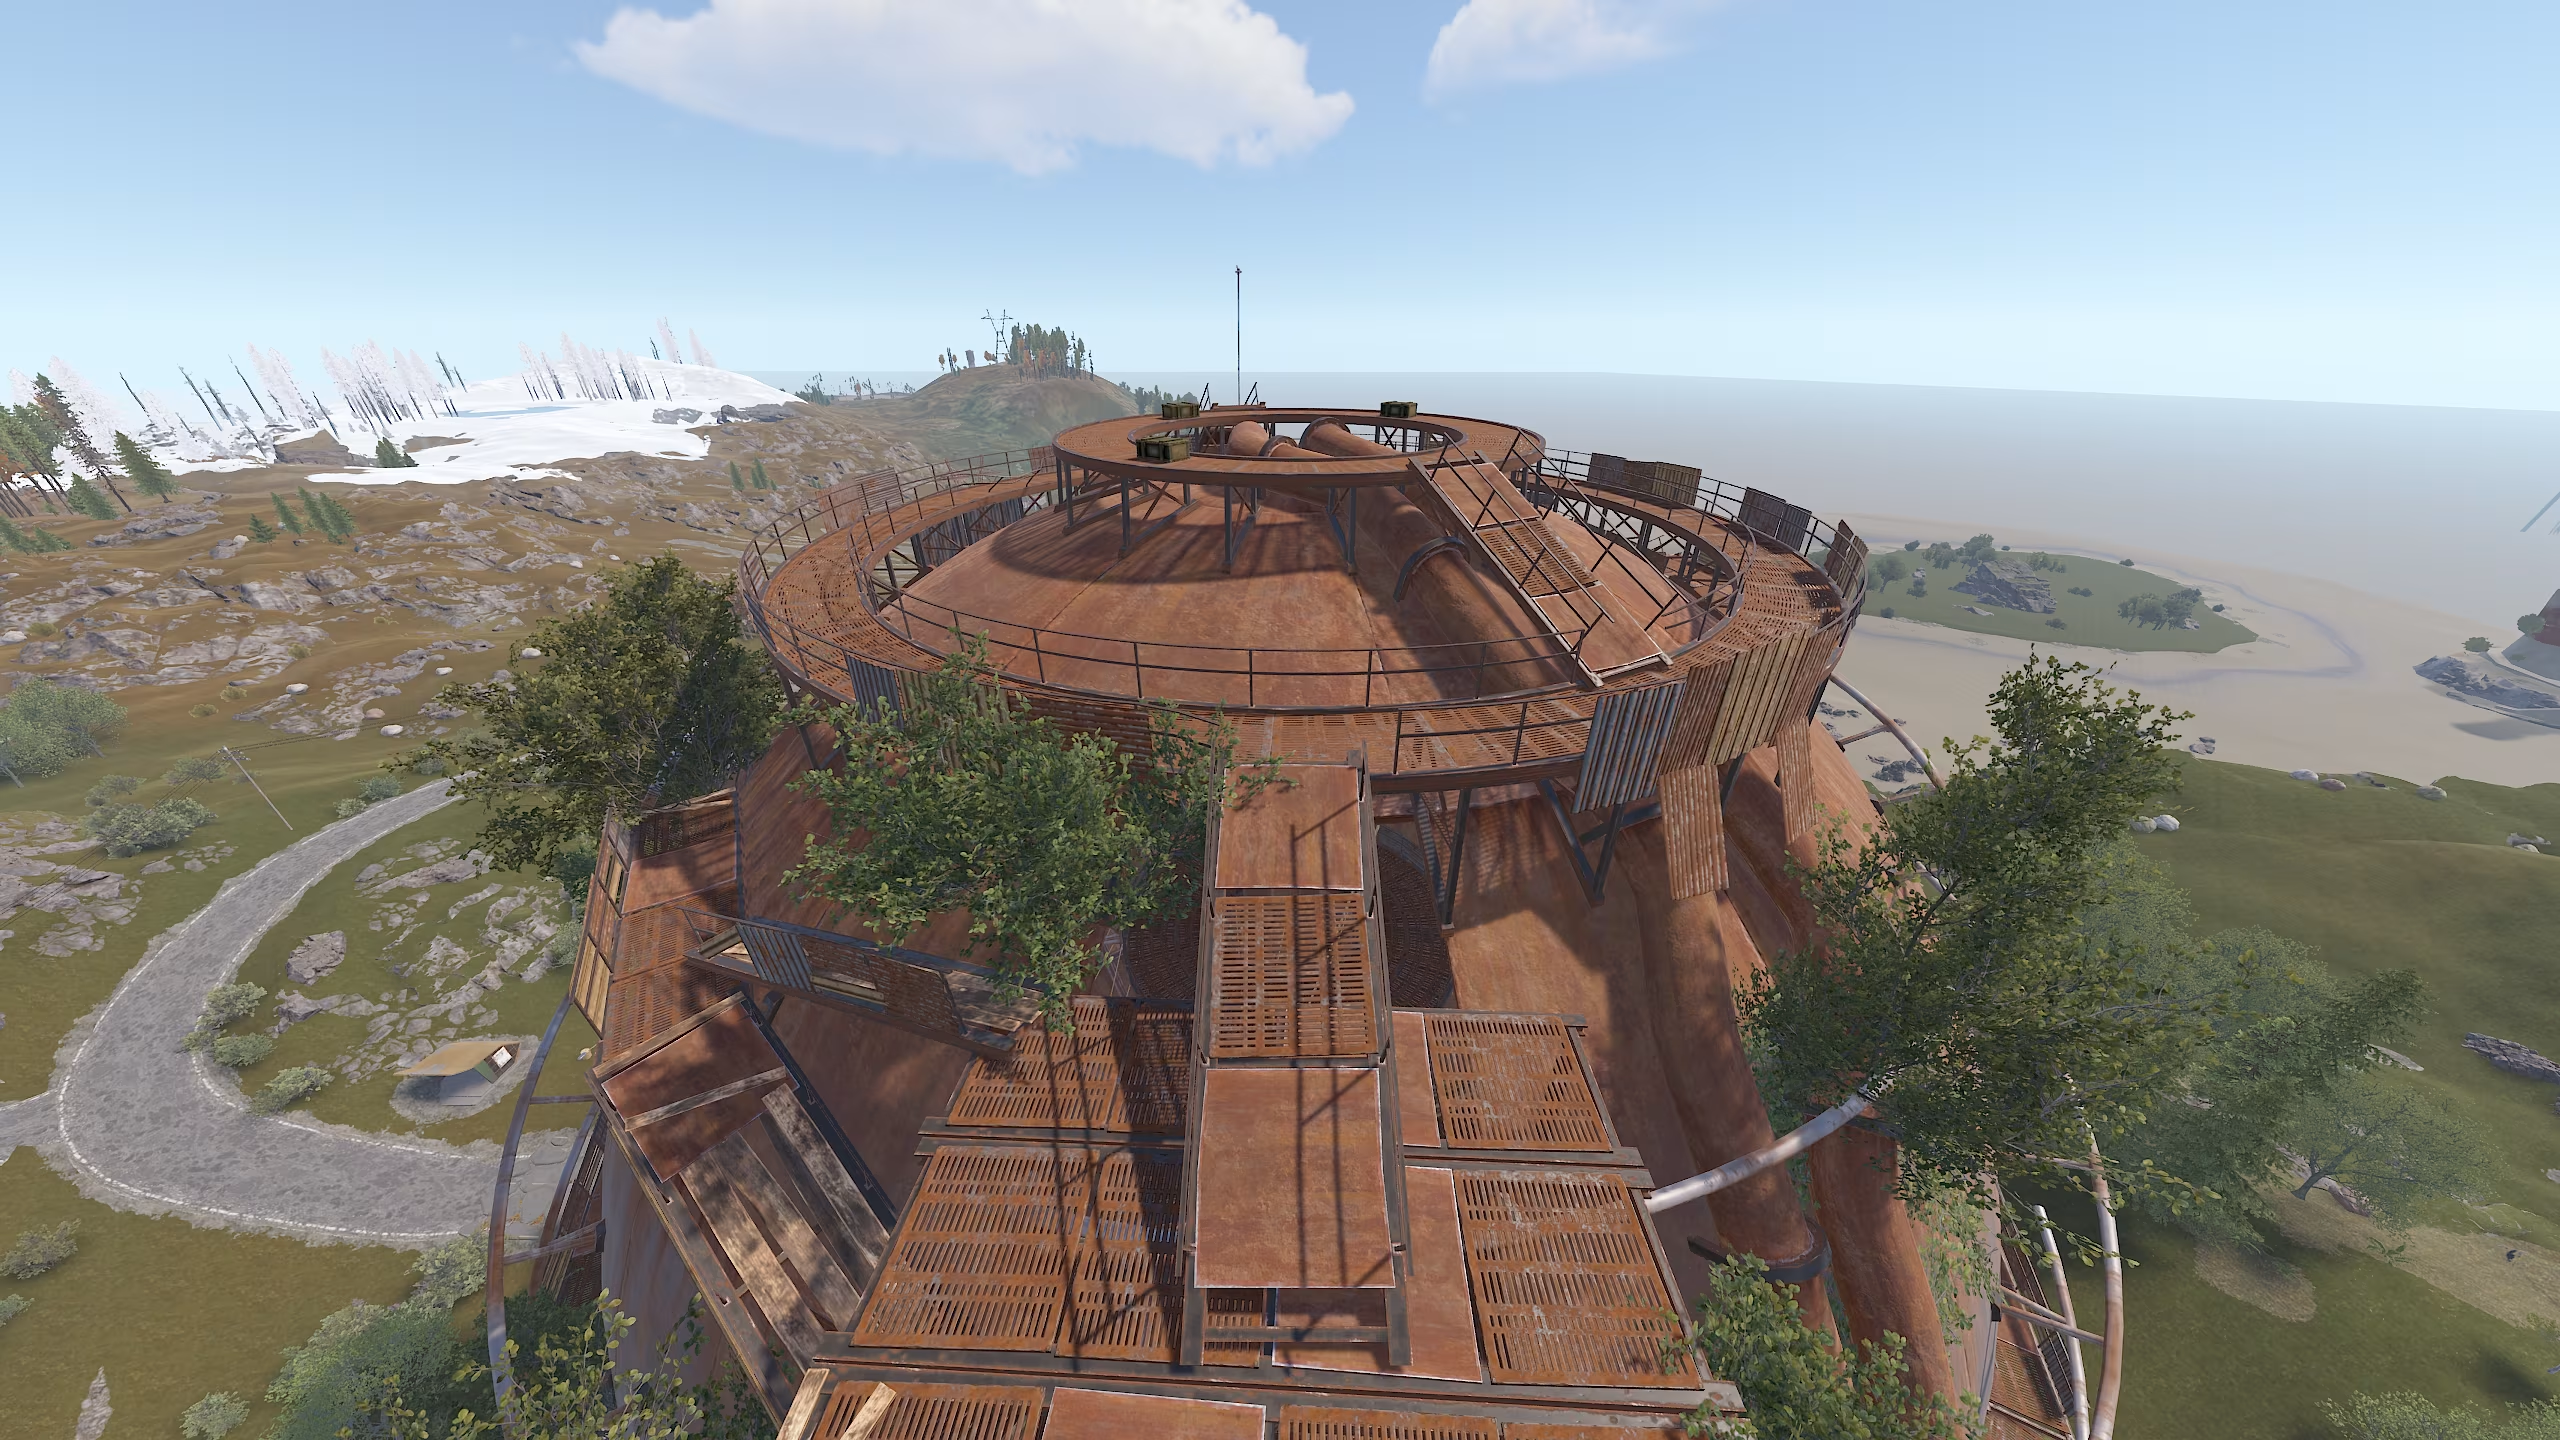
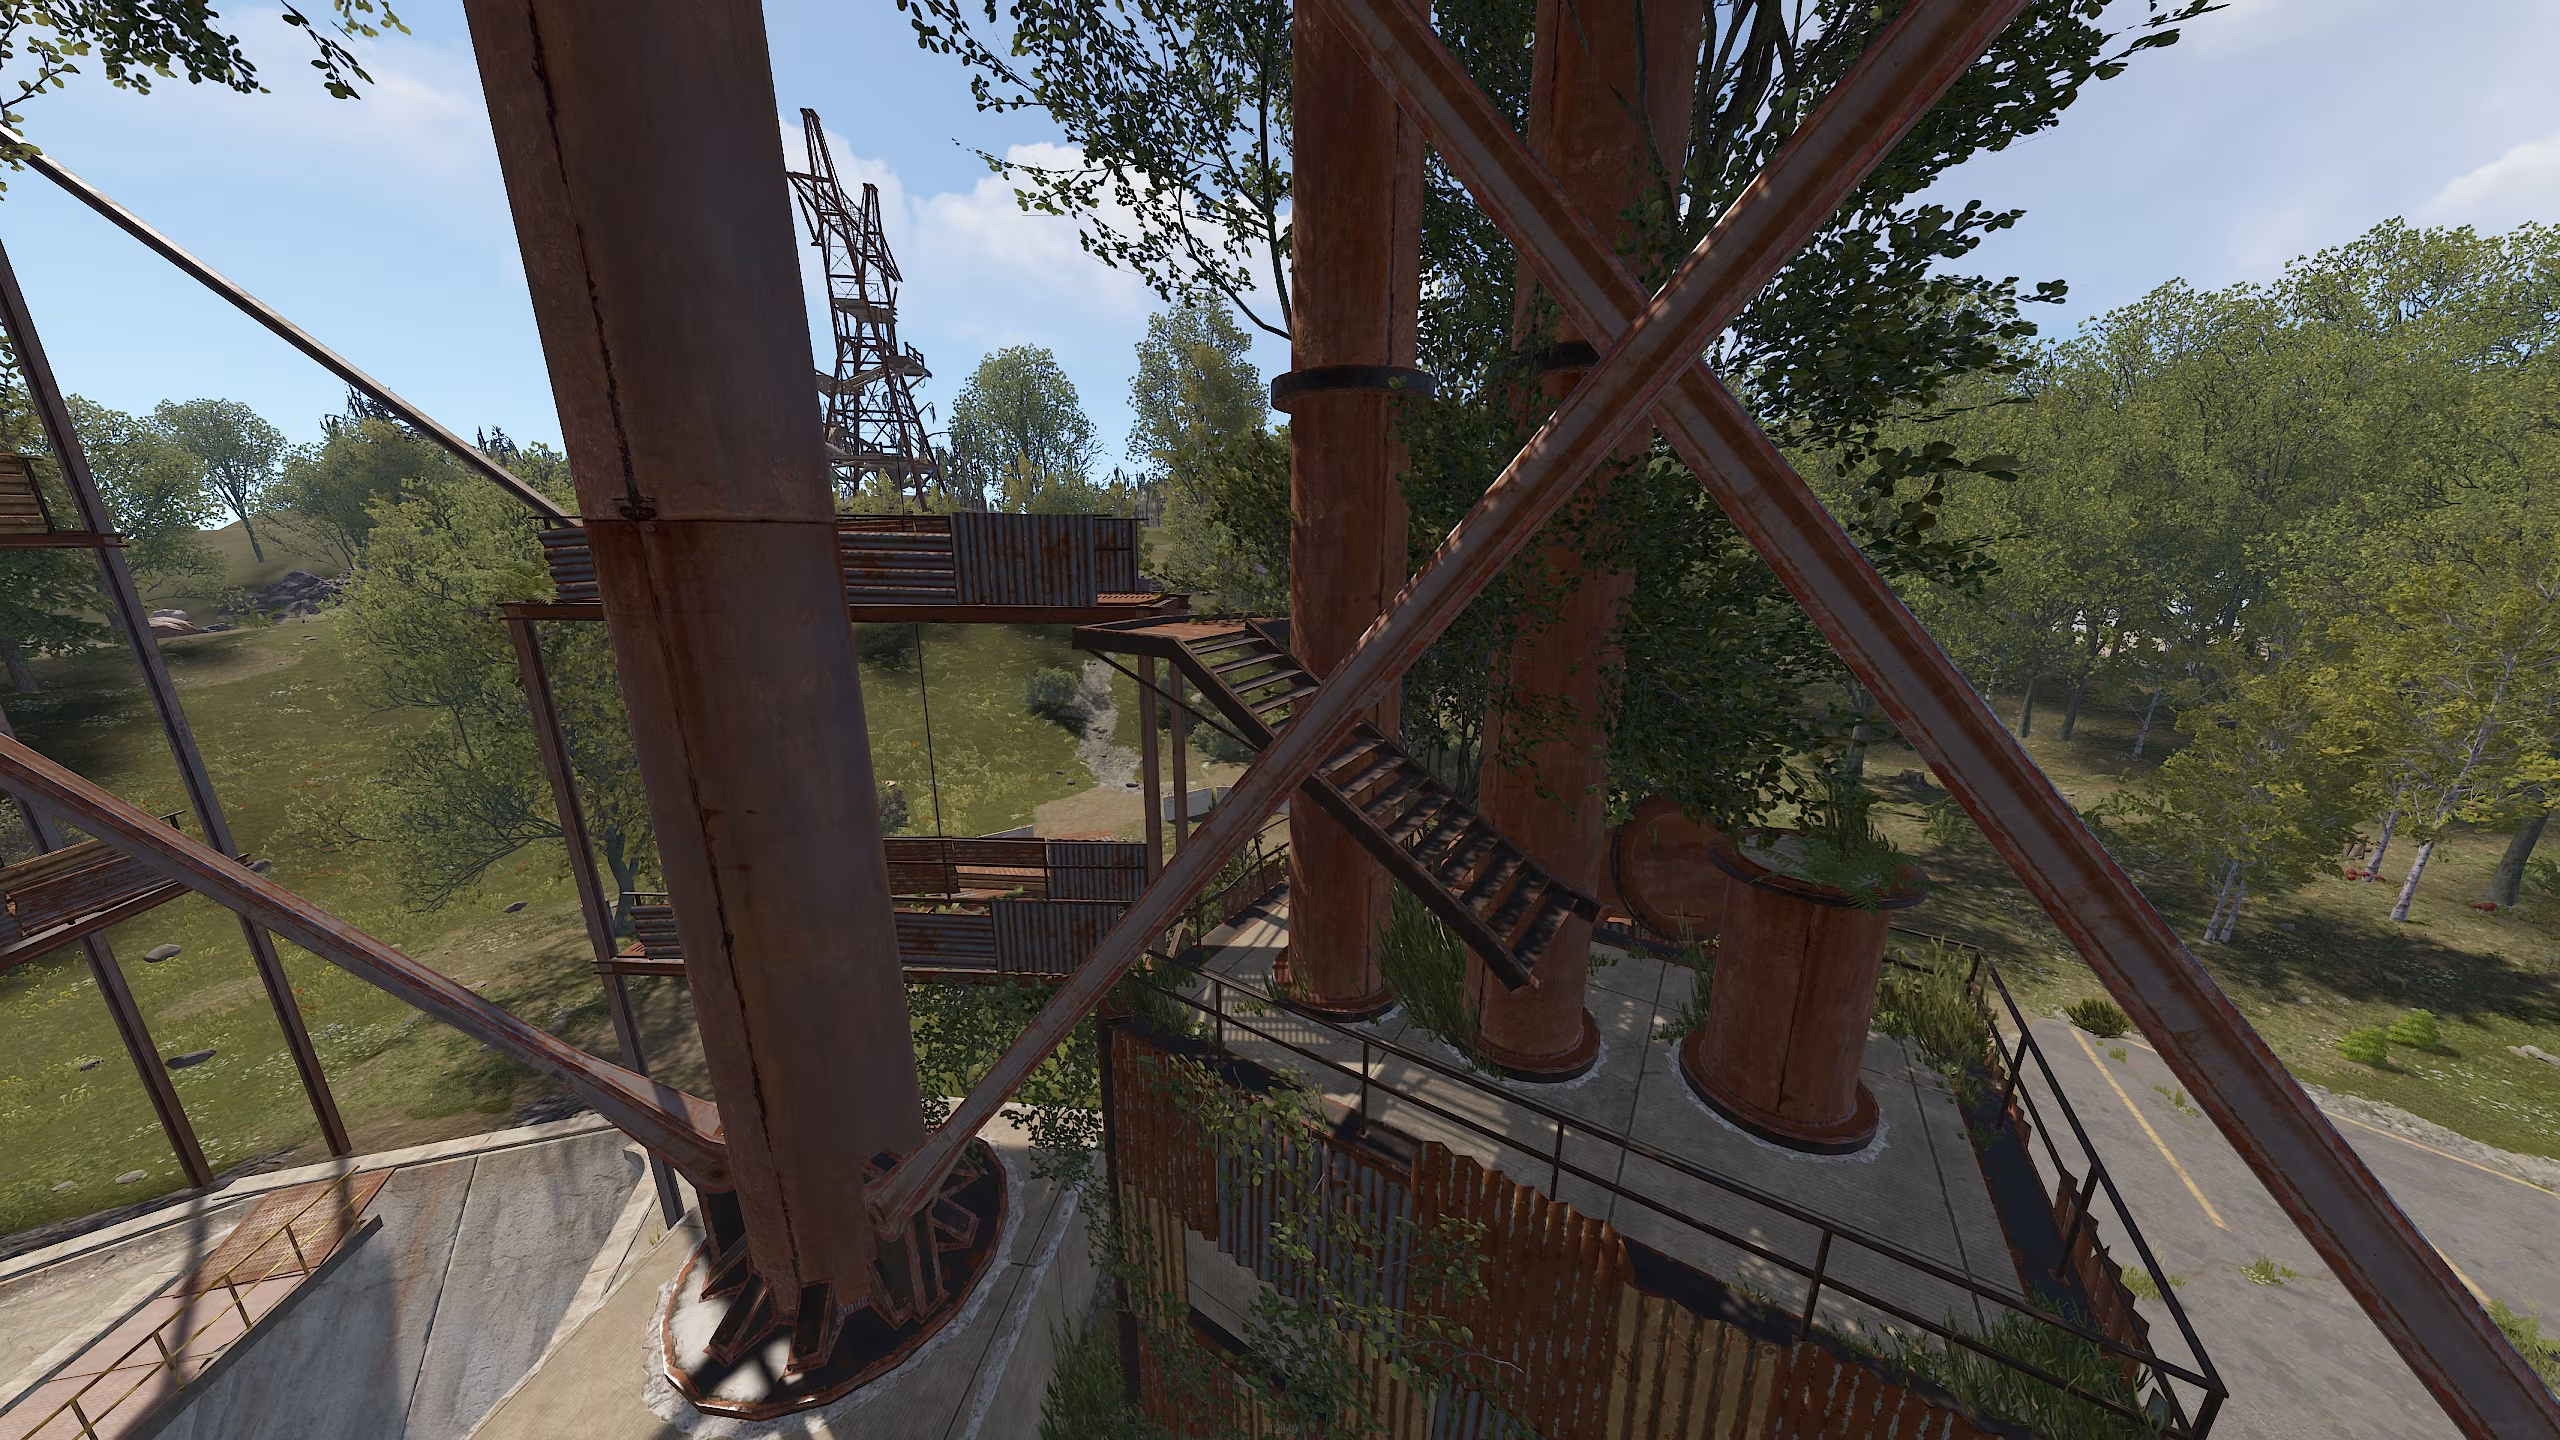
The Dome is a massive metal sphere mounted on large supports, embedded into a concrete foundation. It was once used as an oil reservoir, as evidenced by the residual waste left at the bottom.
Now, this rusty, overgrown structure stands abandoned. However, players appreciate it for its ease of looting and the decent resources it provides.
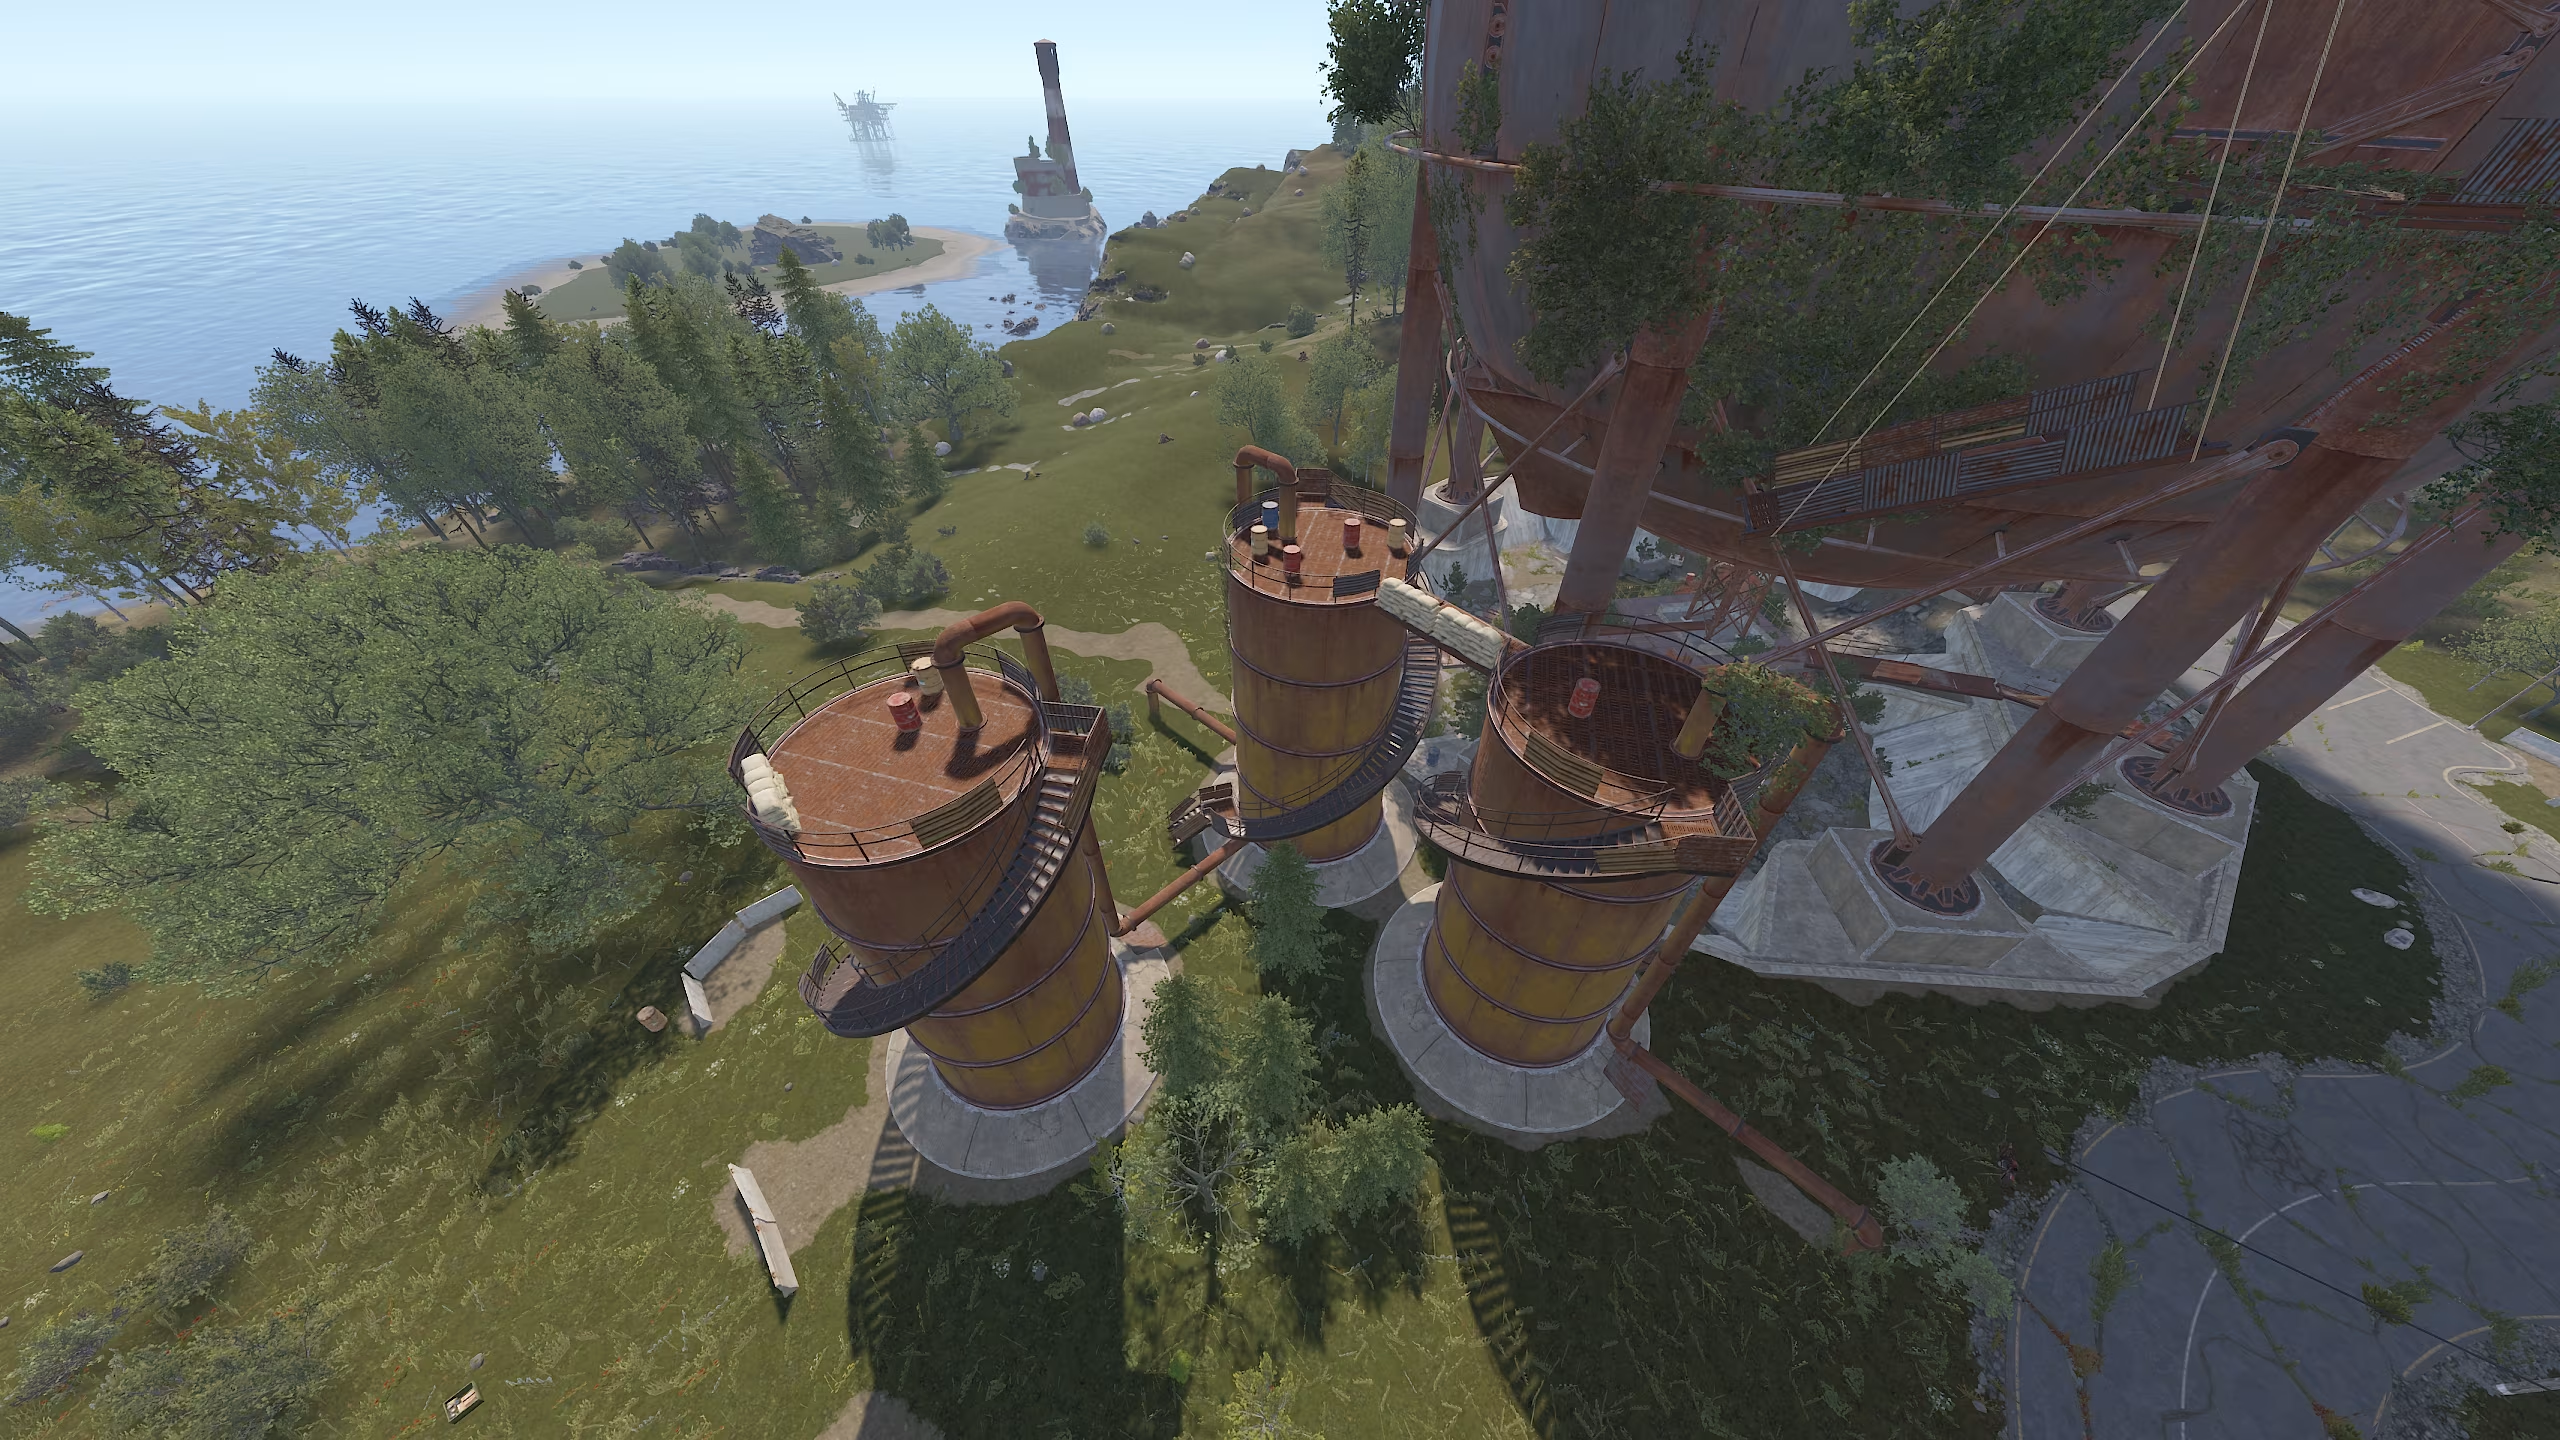
Nearby, there are three large storage tanks where barrels regularly spawn.
How to Loot: Detailed Route
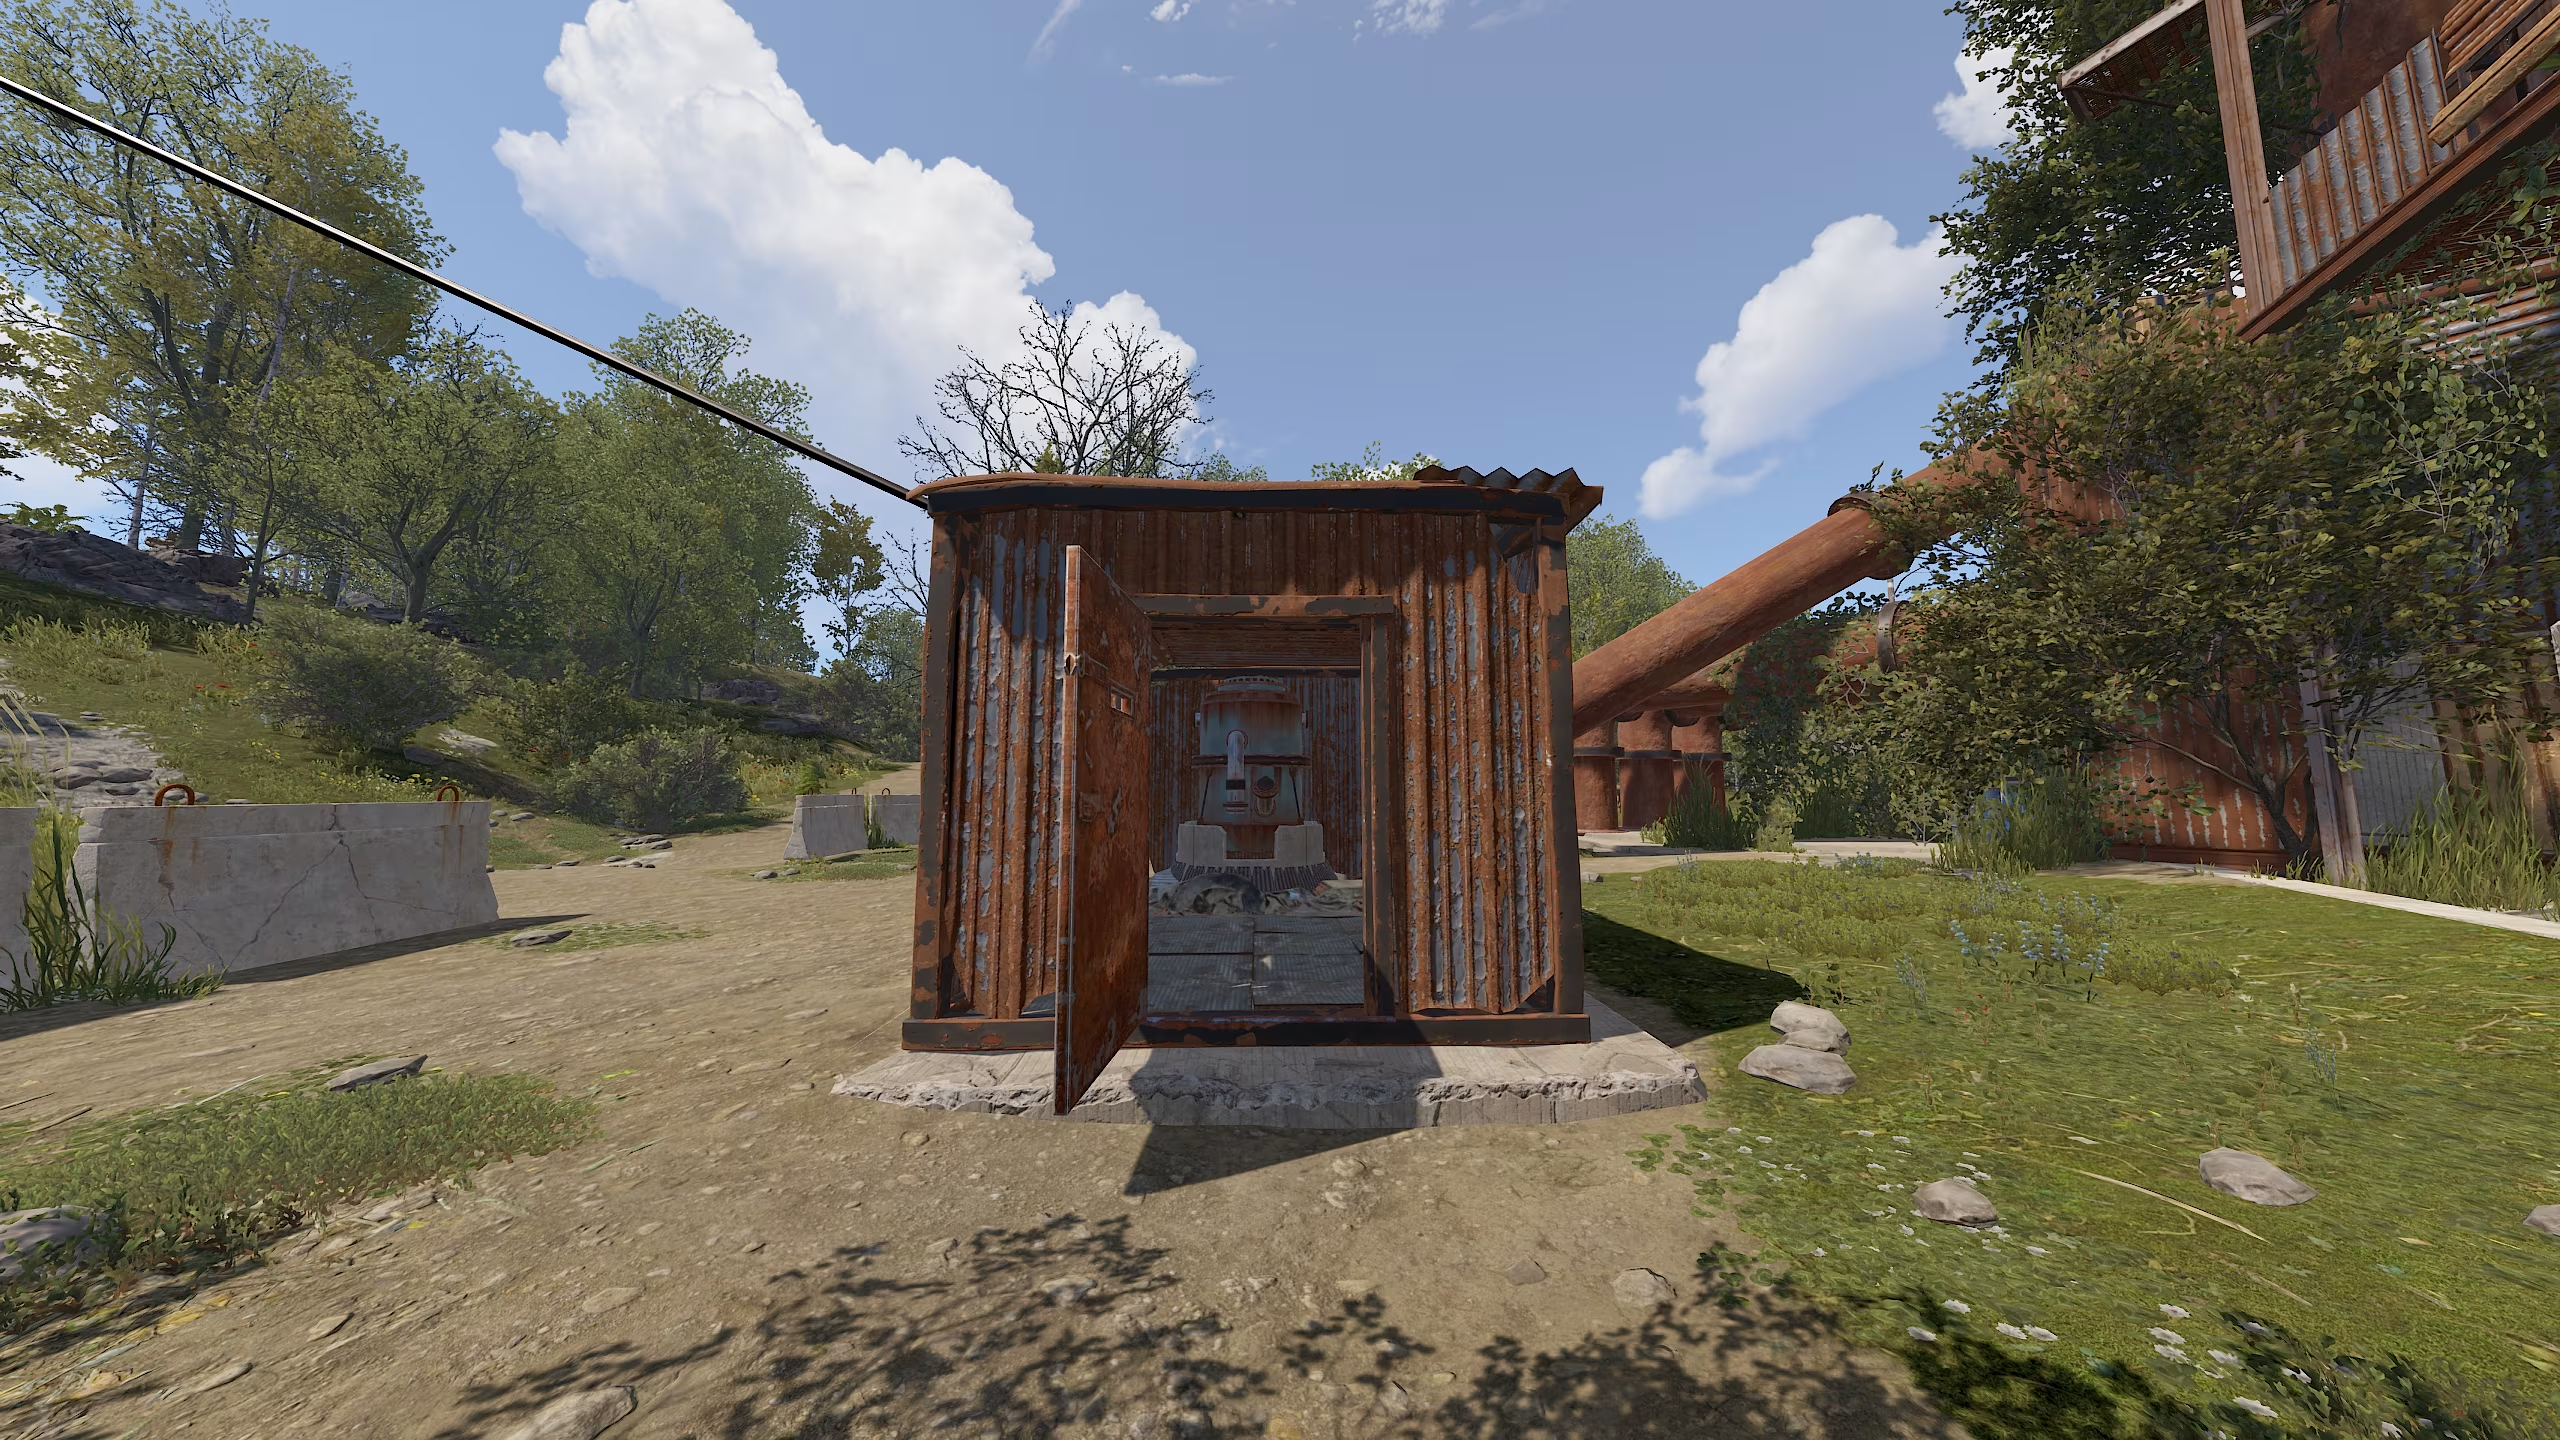
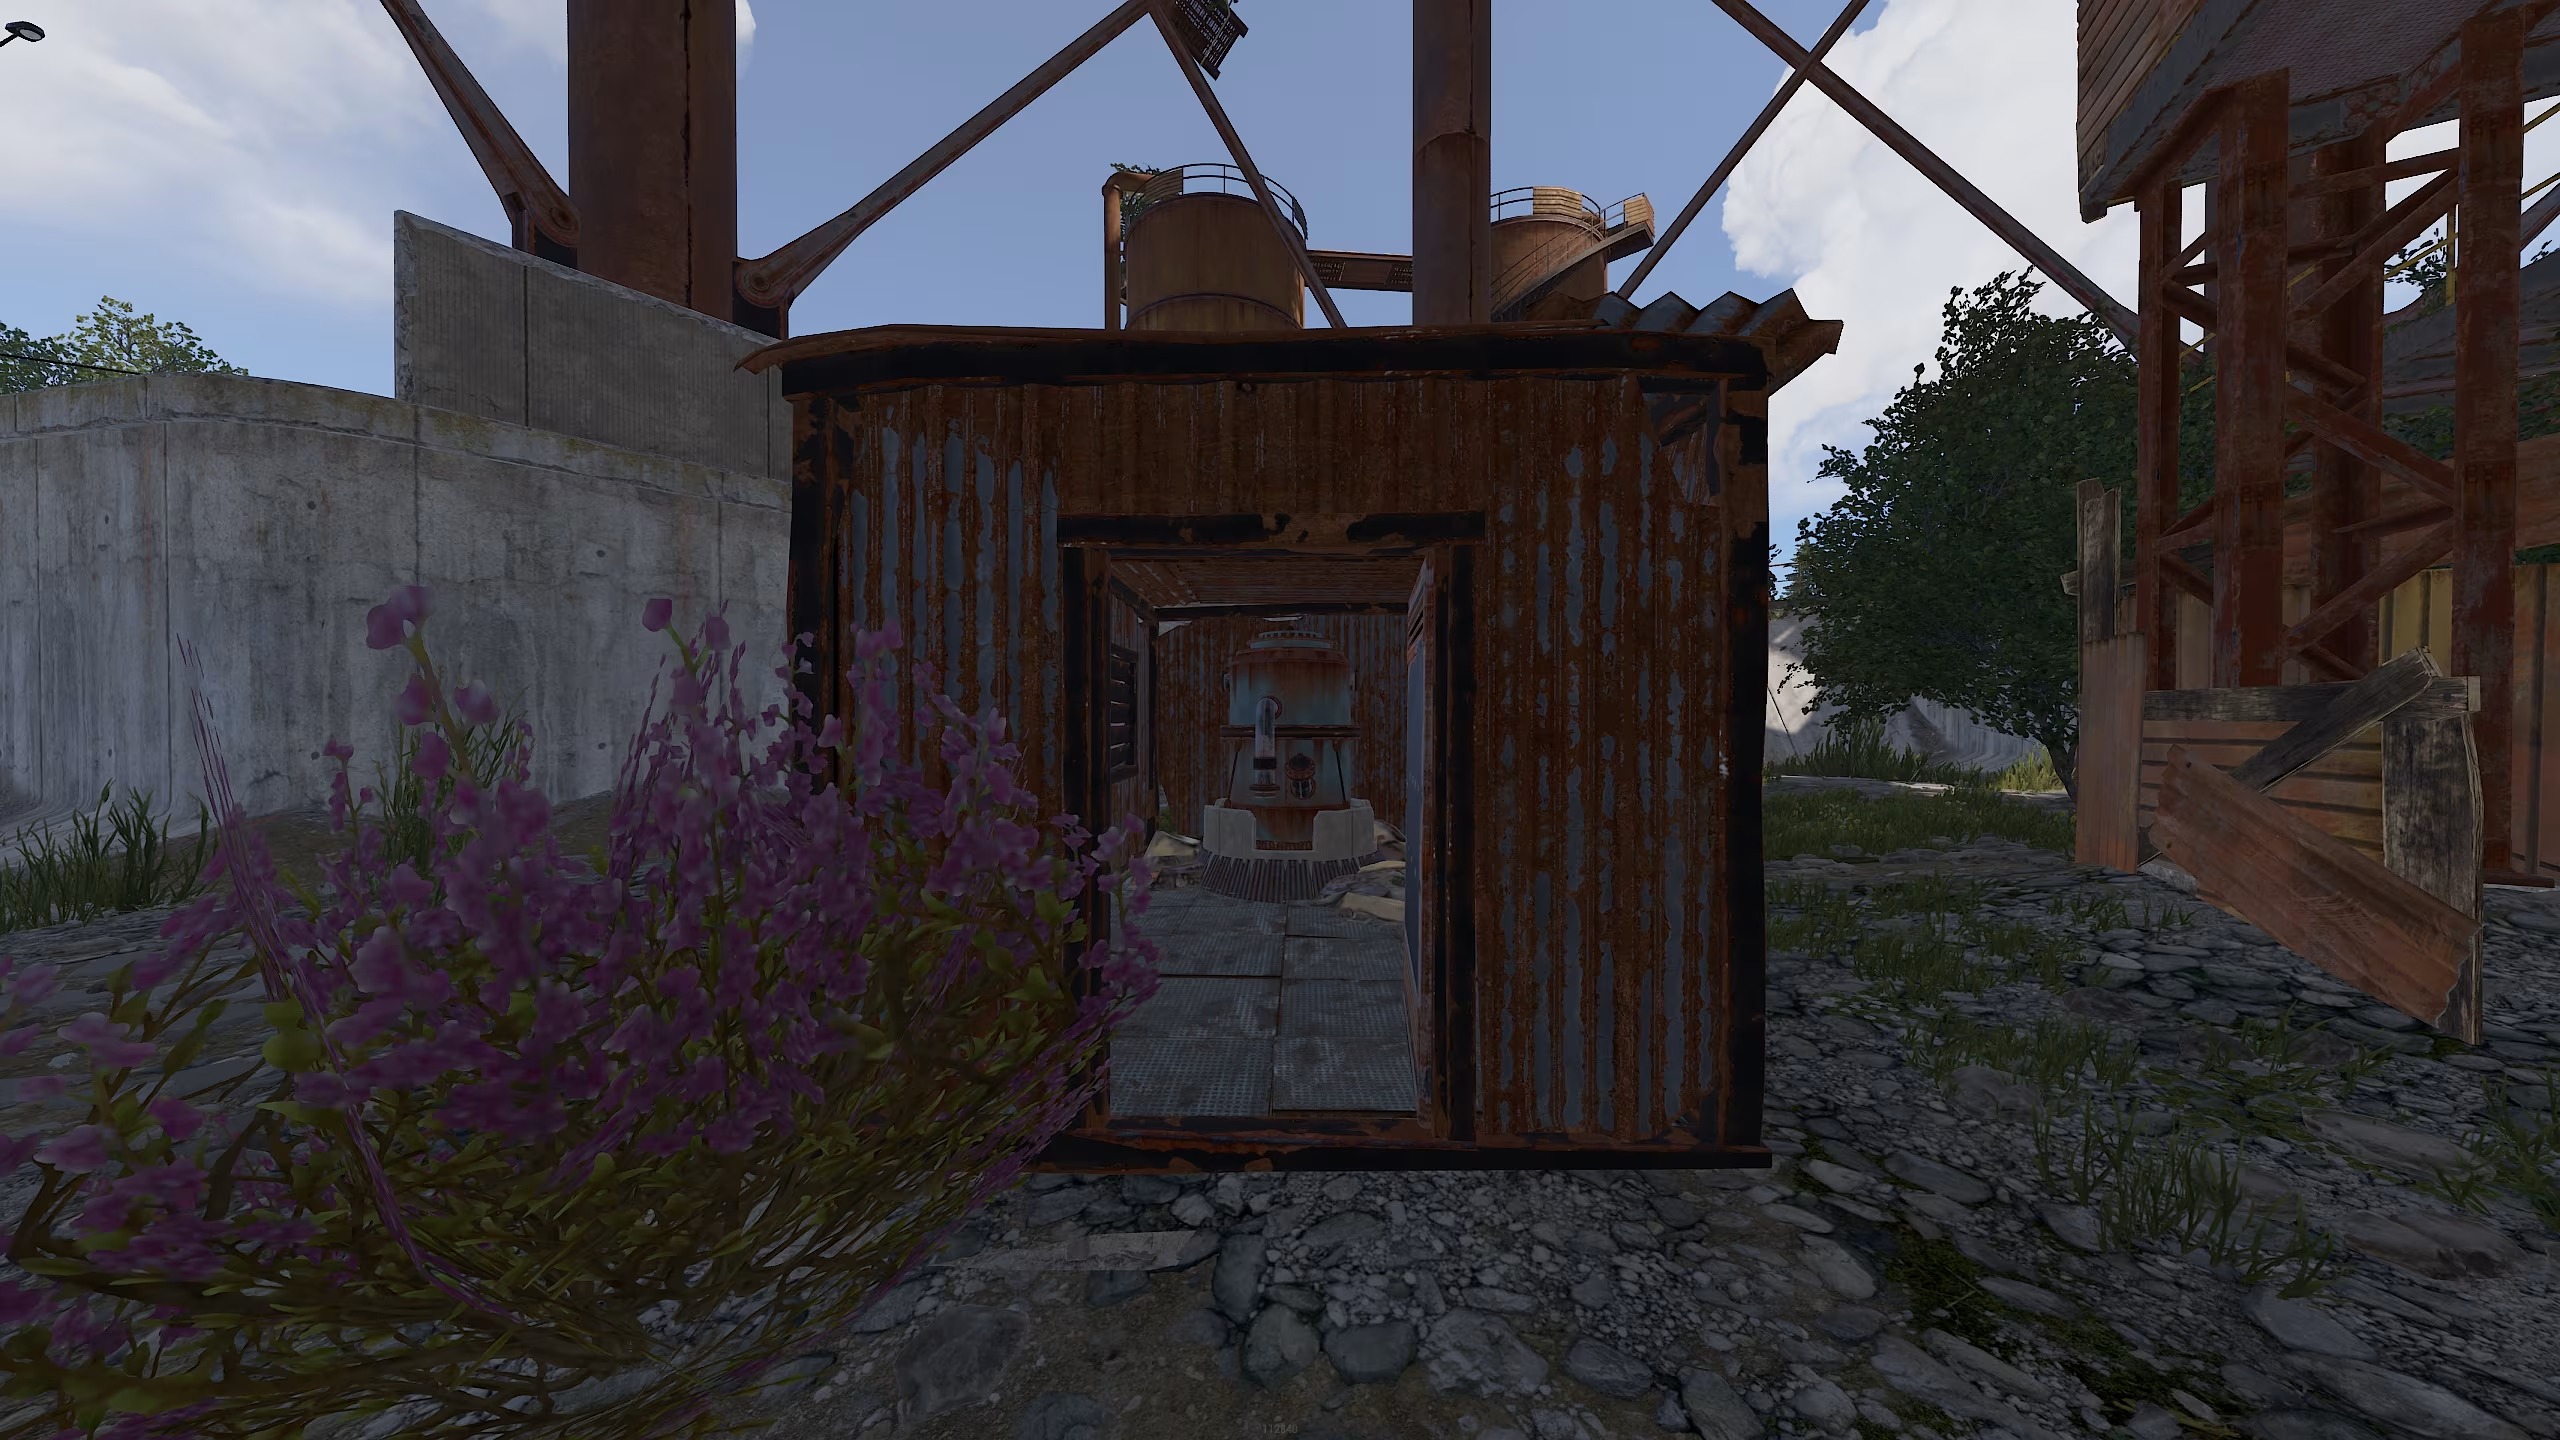
Climbing the Dome
- Start by climbing the large pipe leading to a small platform attached to the Dome. There, you will find a loot crate.
- Jump onto the ladder from this platform and continue walking across the next metal walkway.
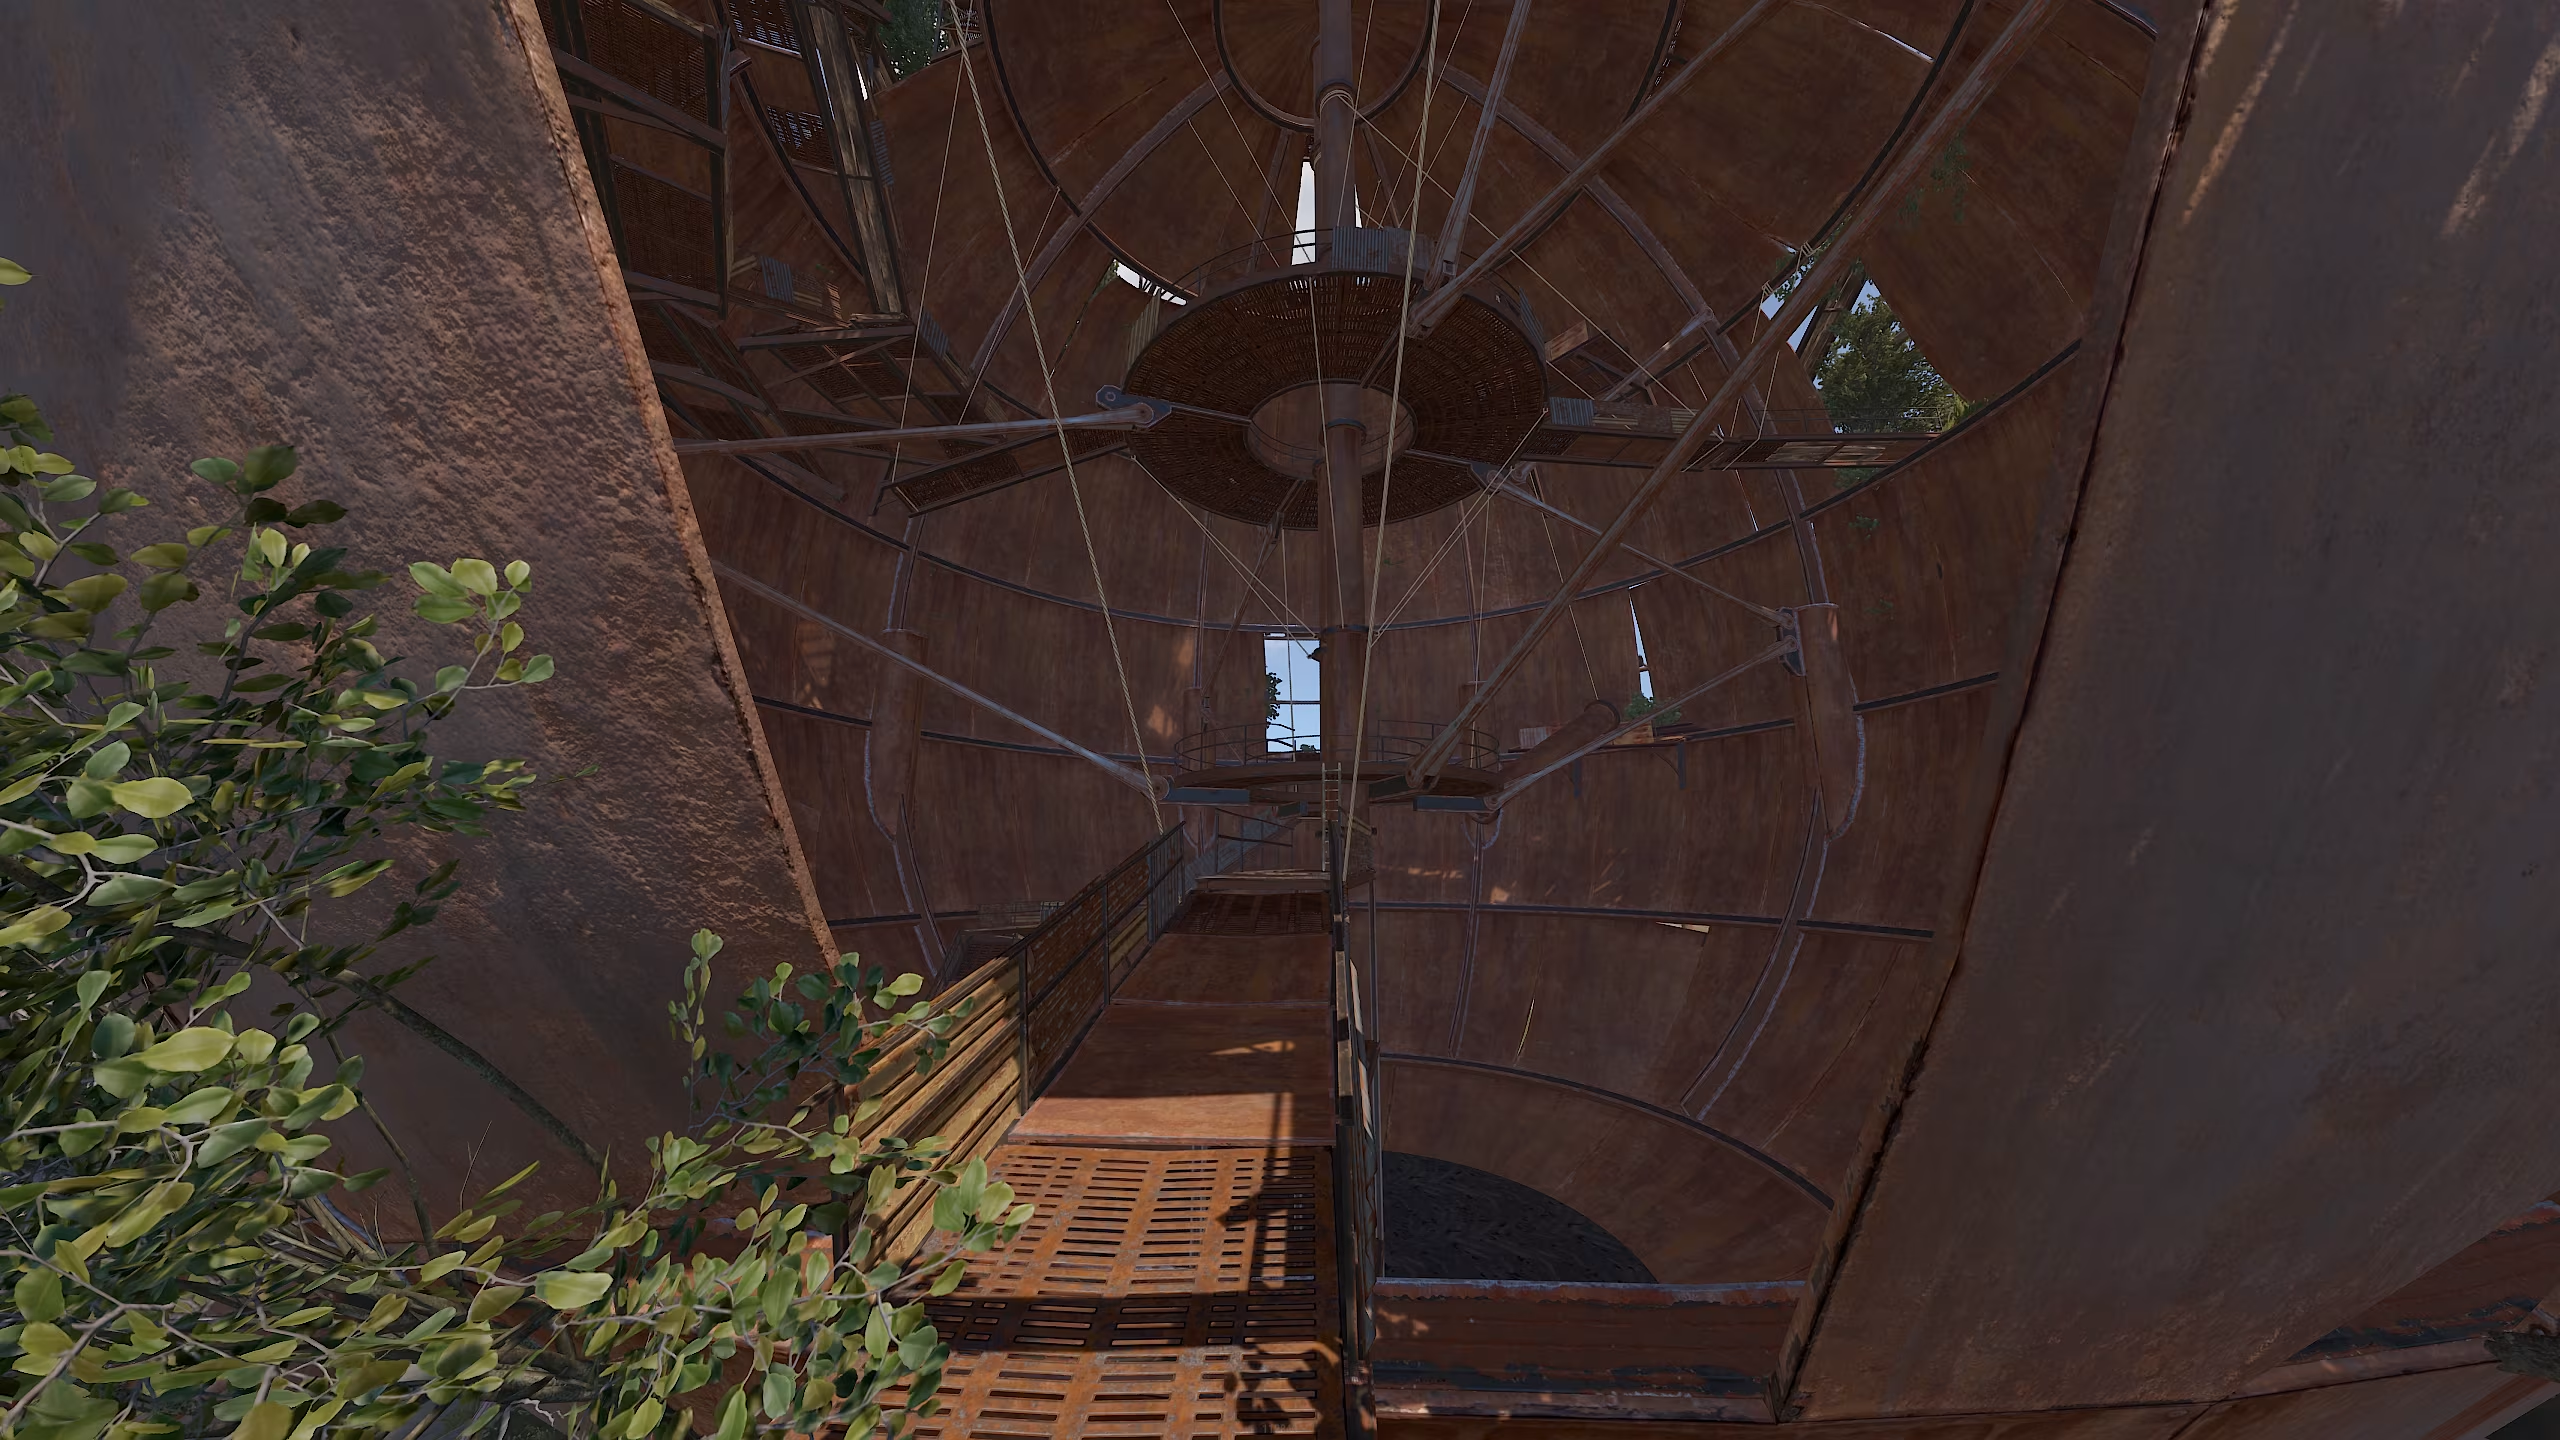
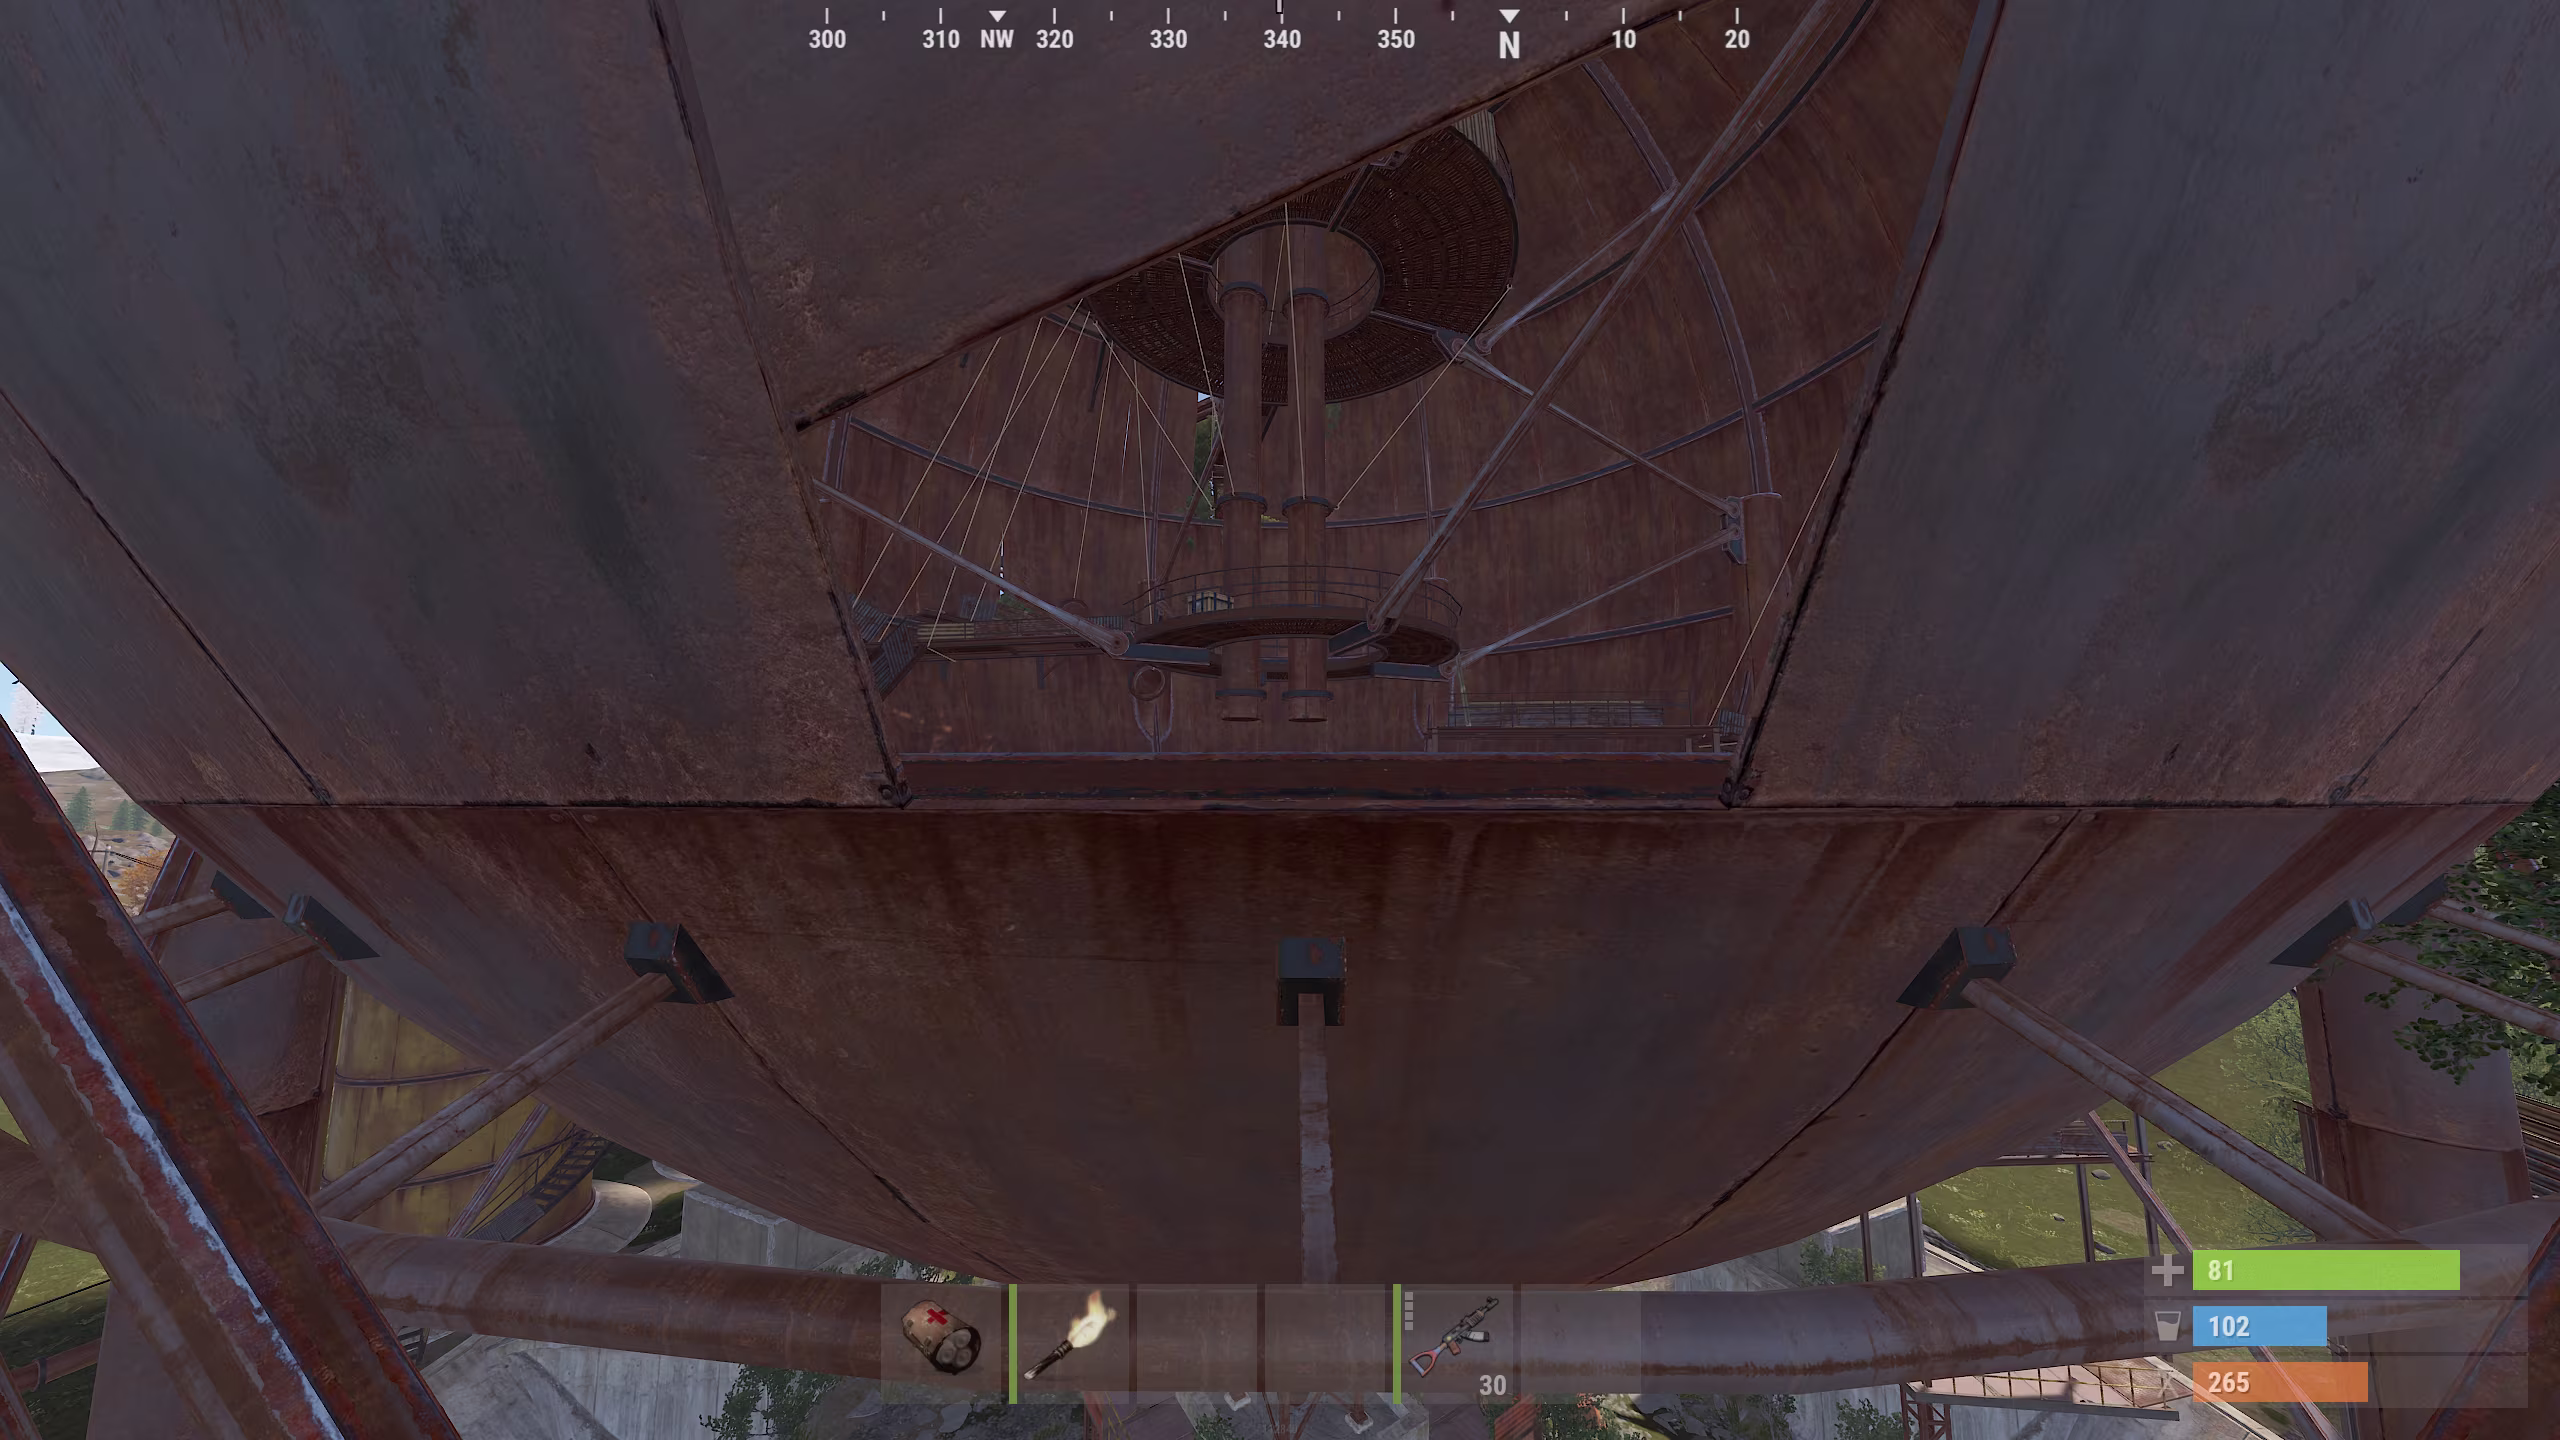
- Follow the thin beam, which leads to the entrance inside the Dome.
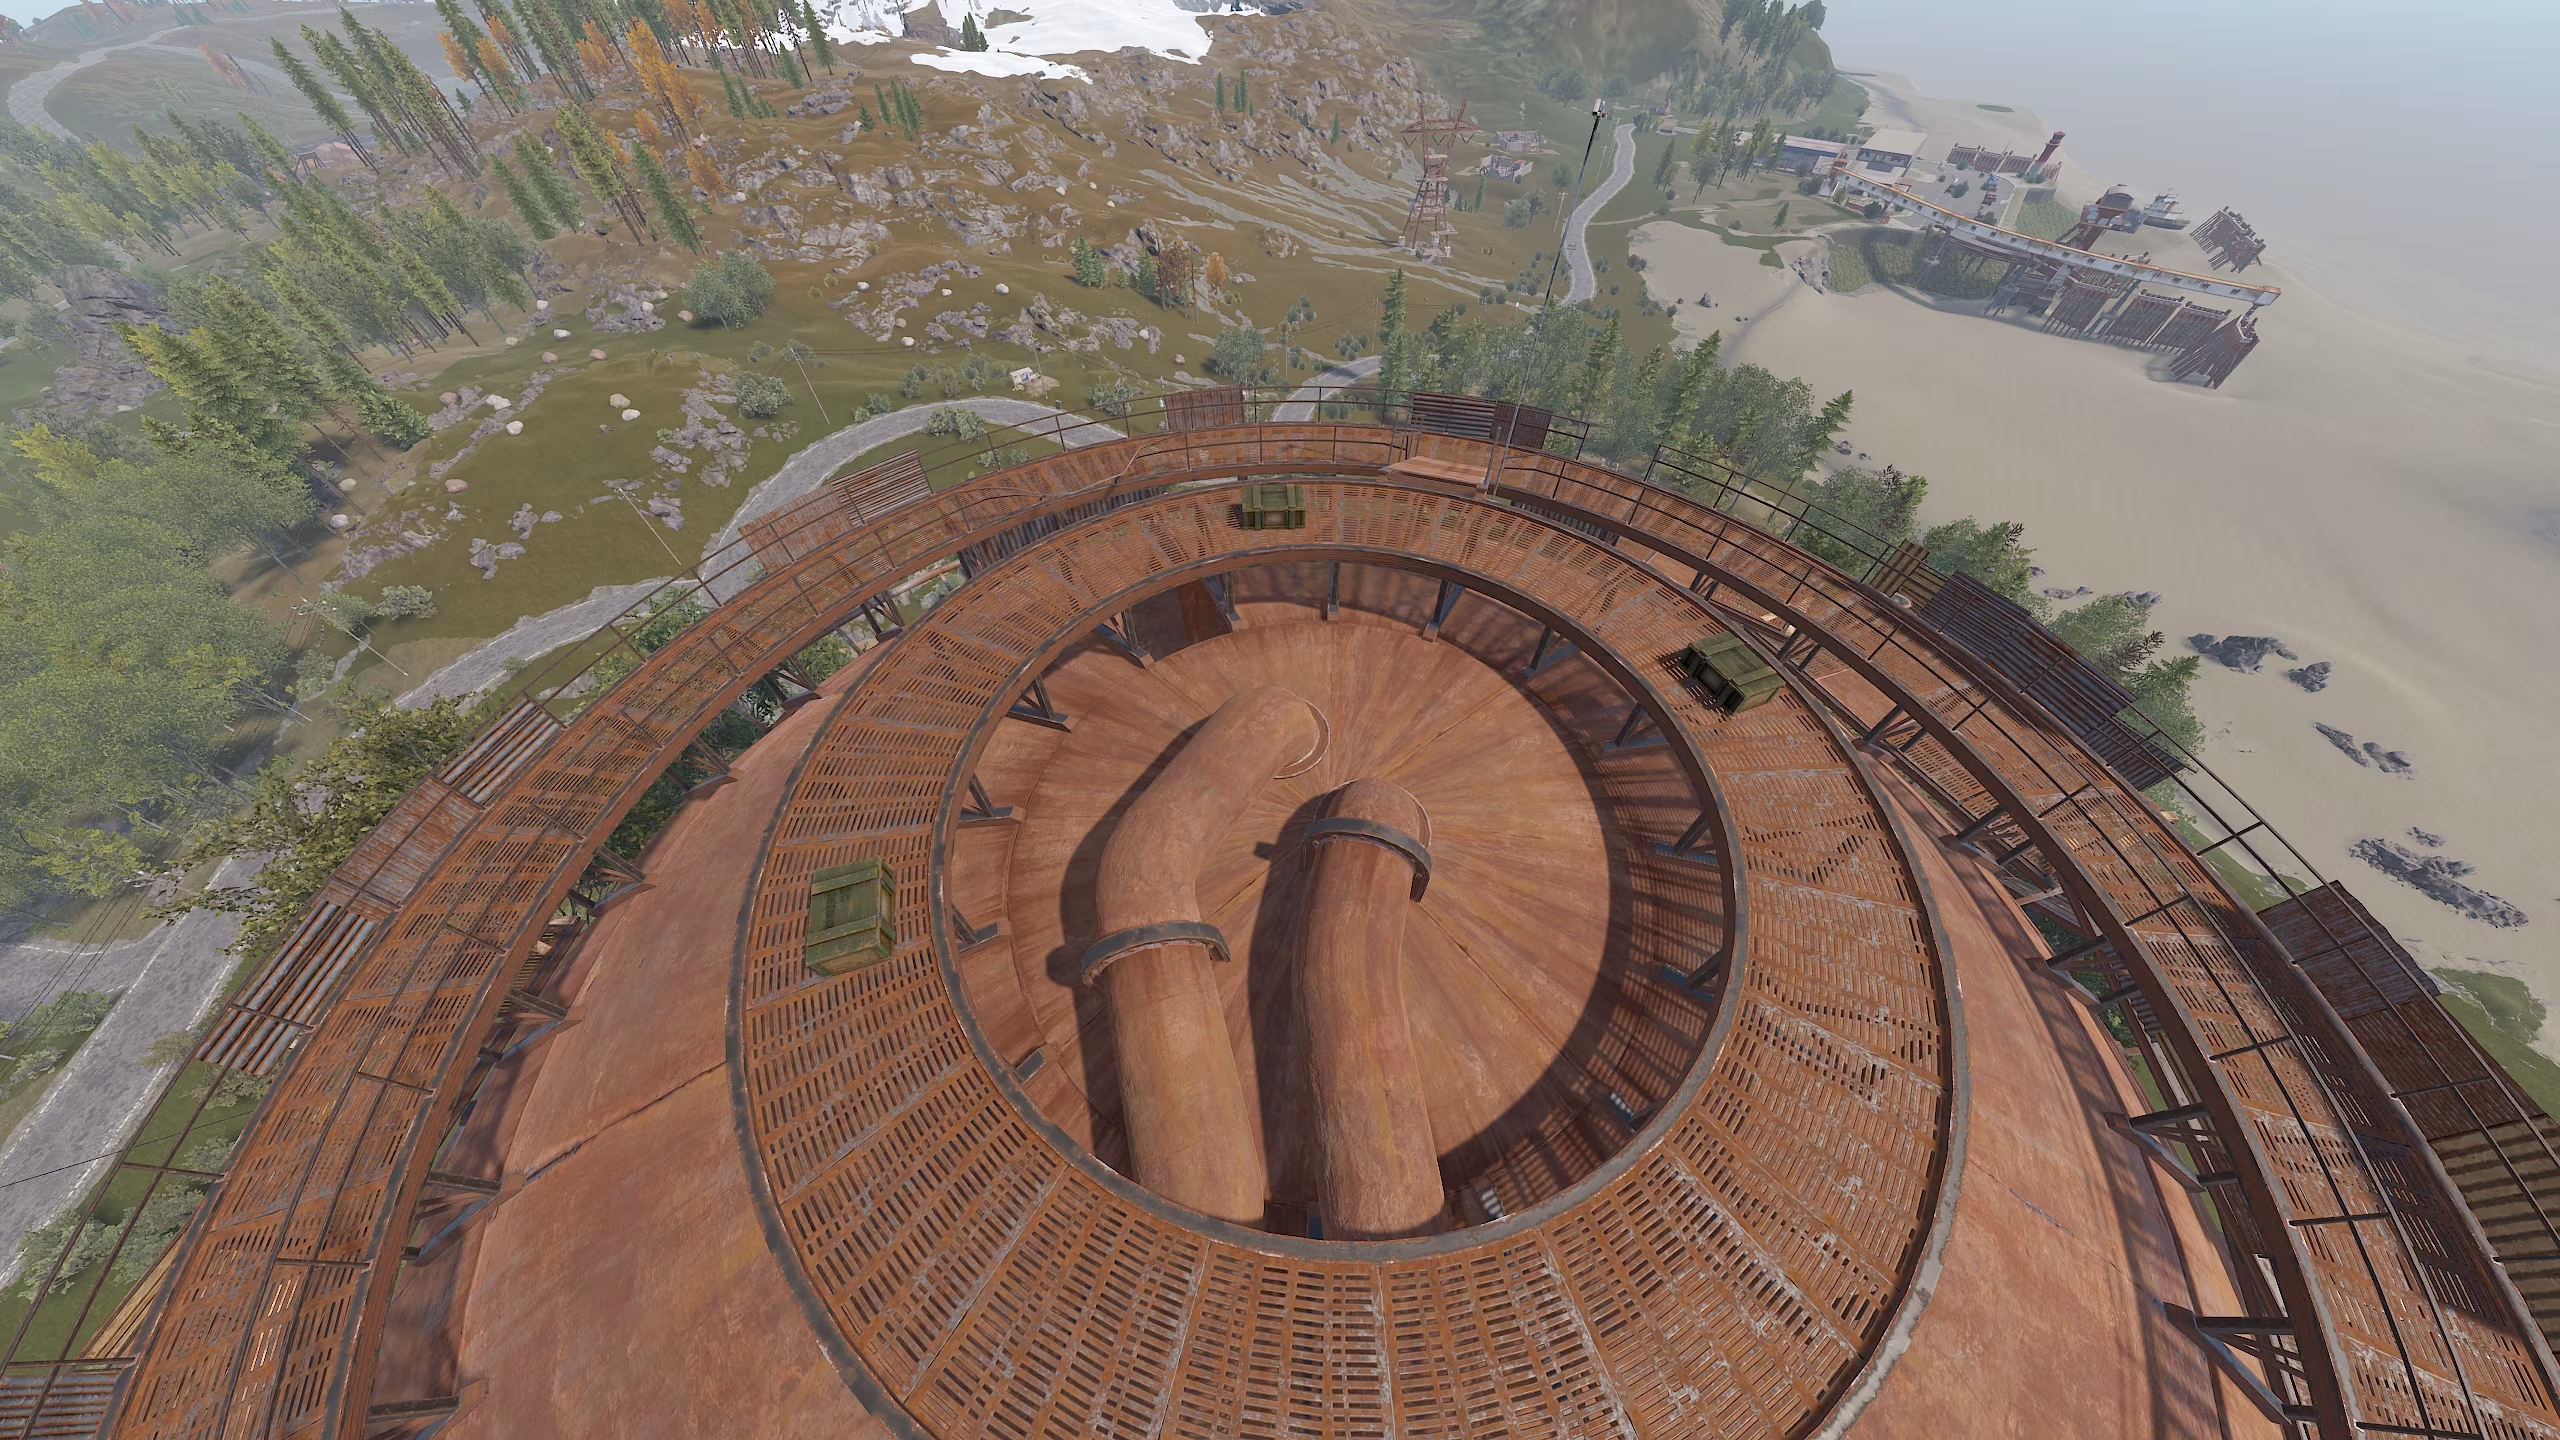
- Enter the Dome via the bridge and climb the stairs to the circular platform. Loot usually spawns here—grab it.
- Drop down to the lower platform, where another loot crate can be found.
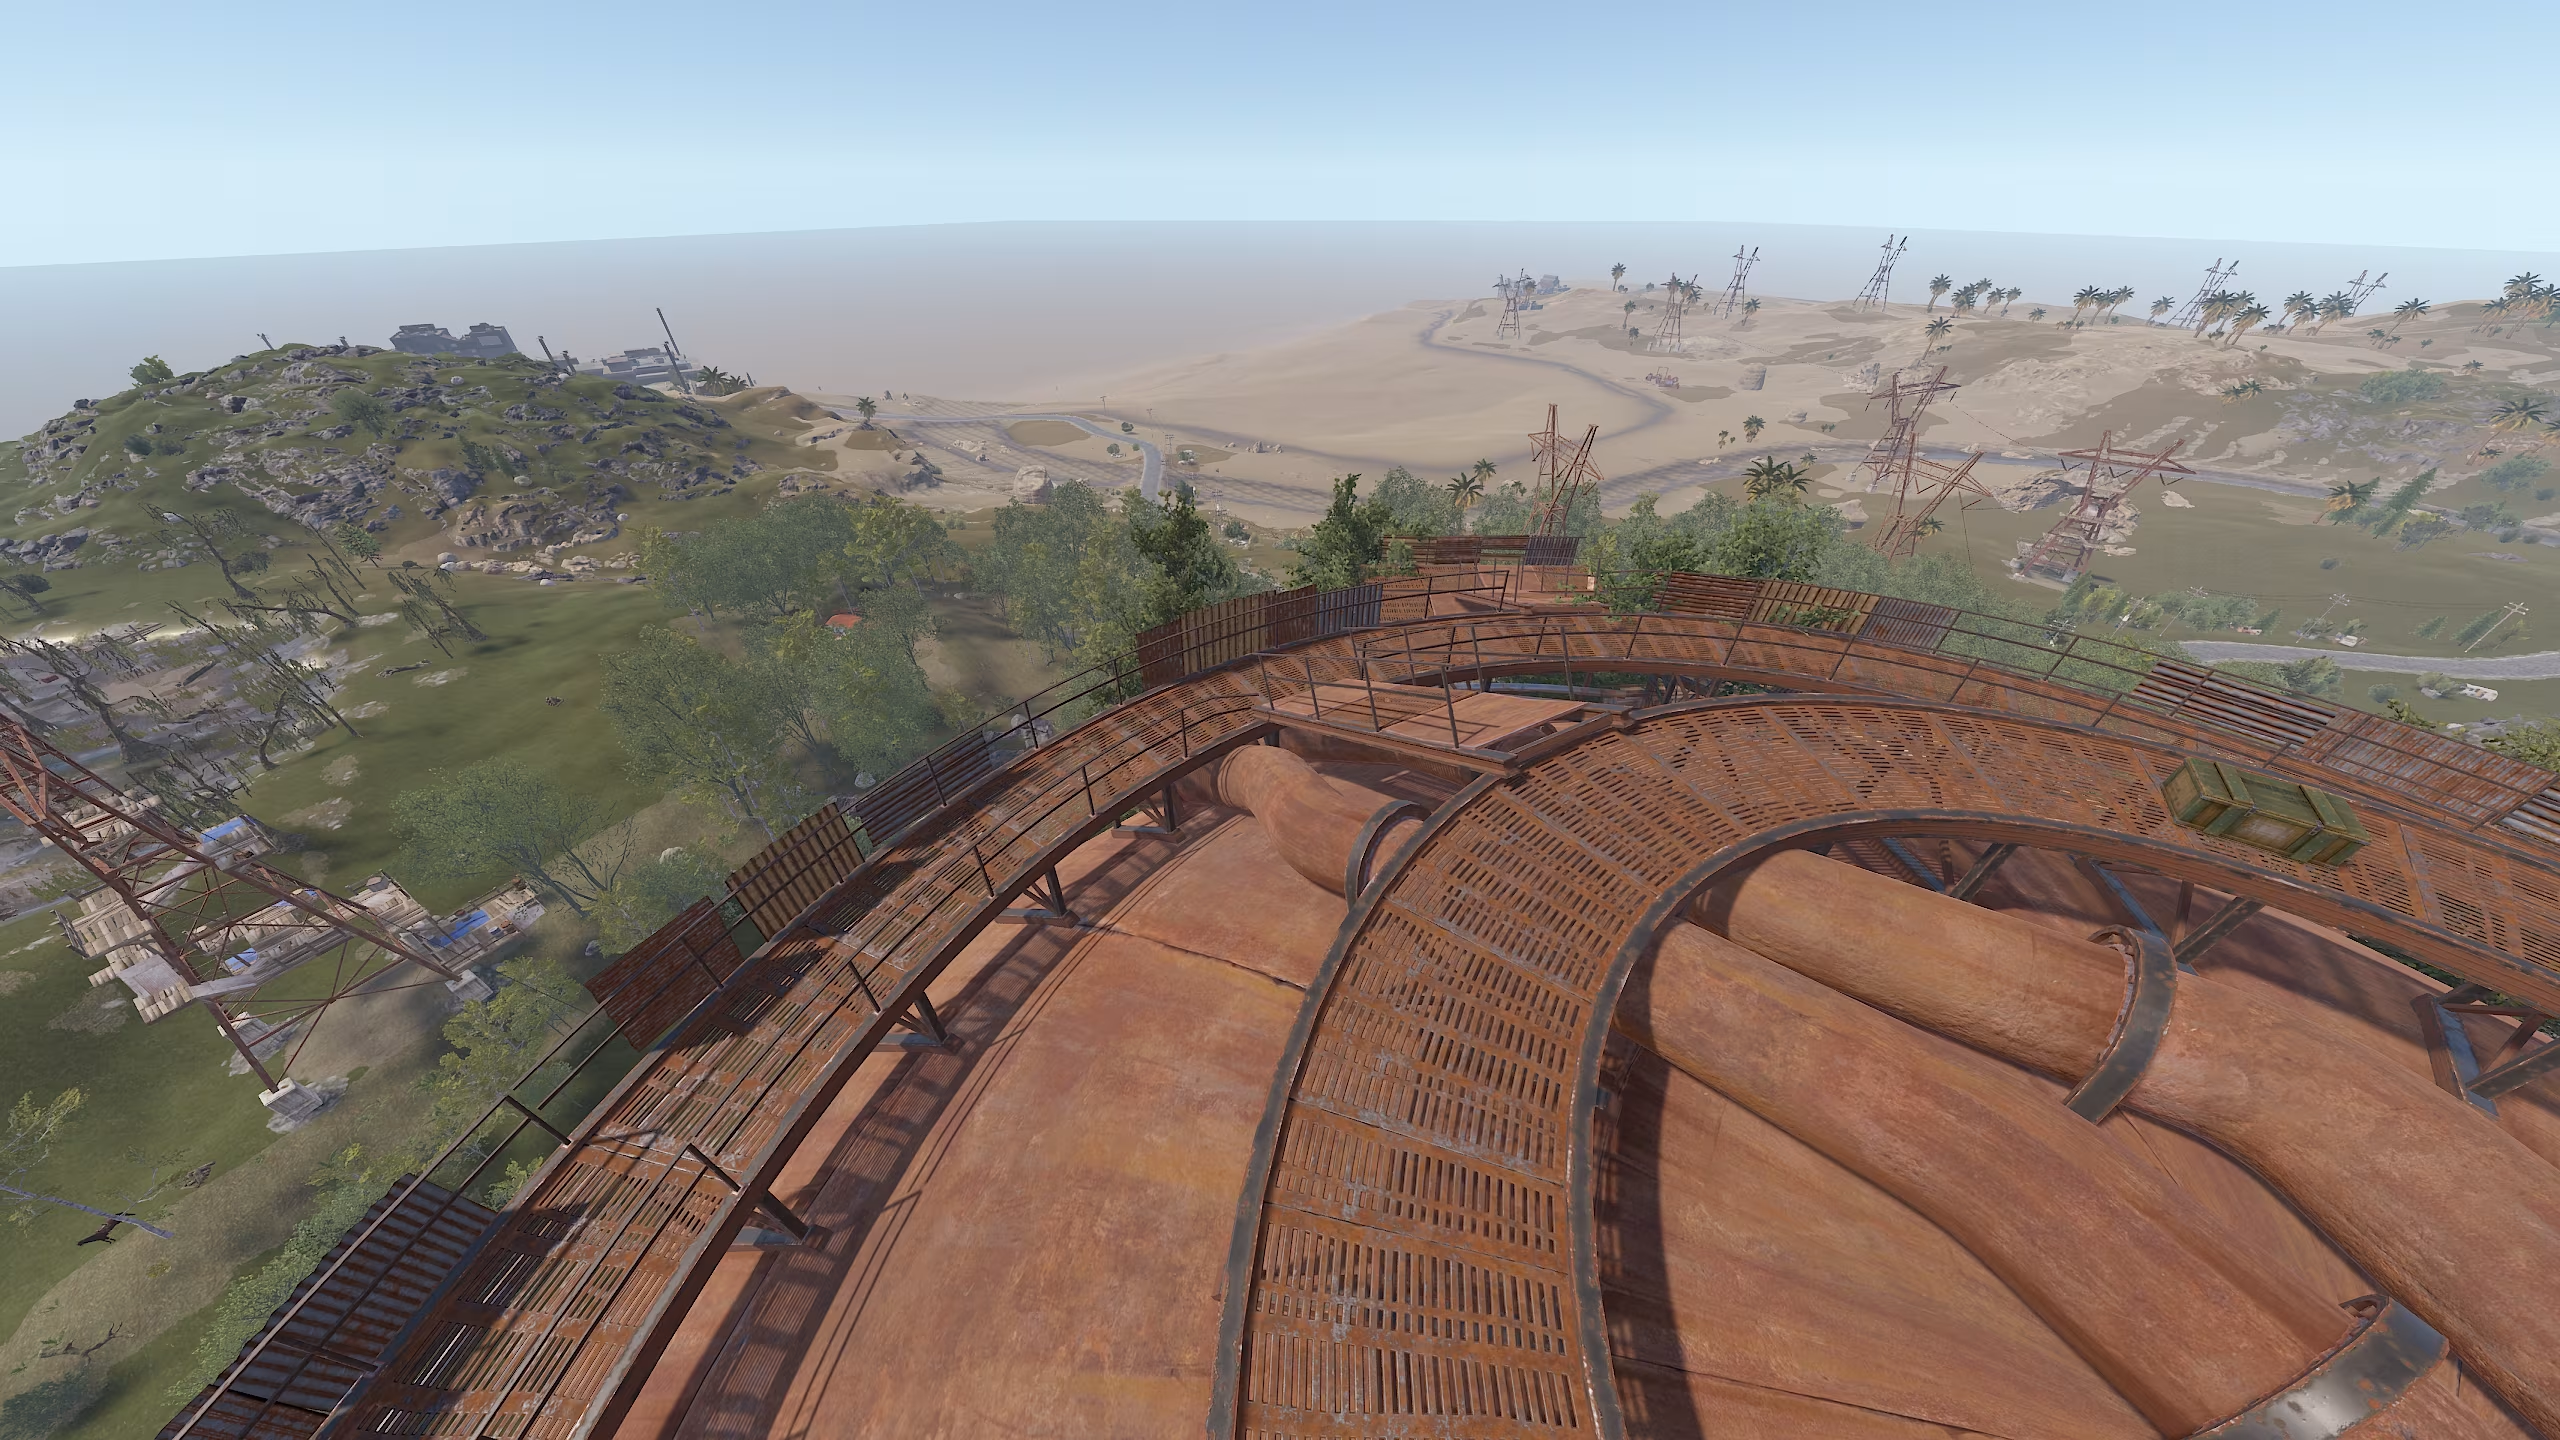
- Follow the bridge to exit onto the outer platform of the Dome.
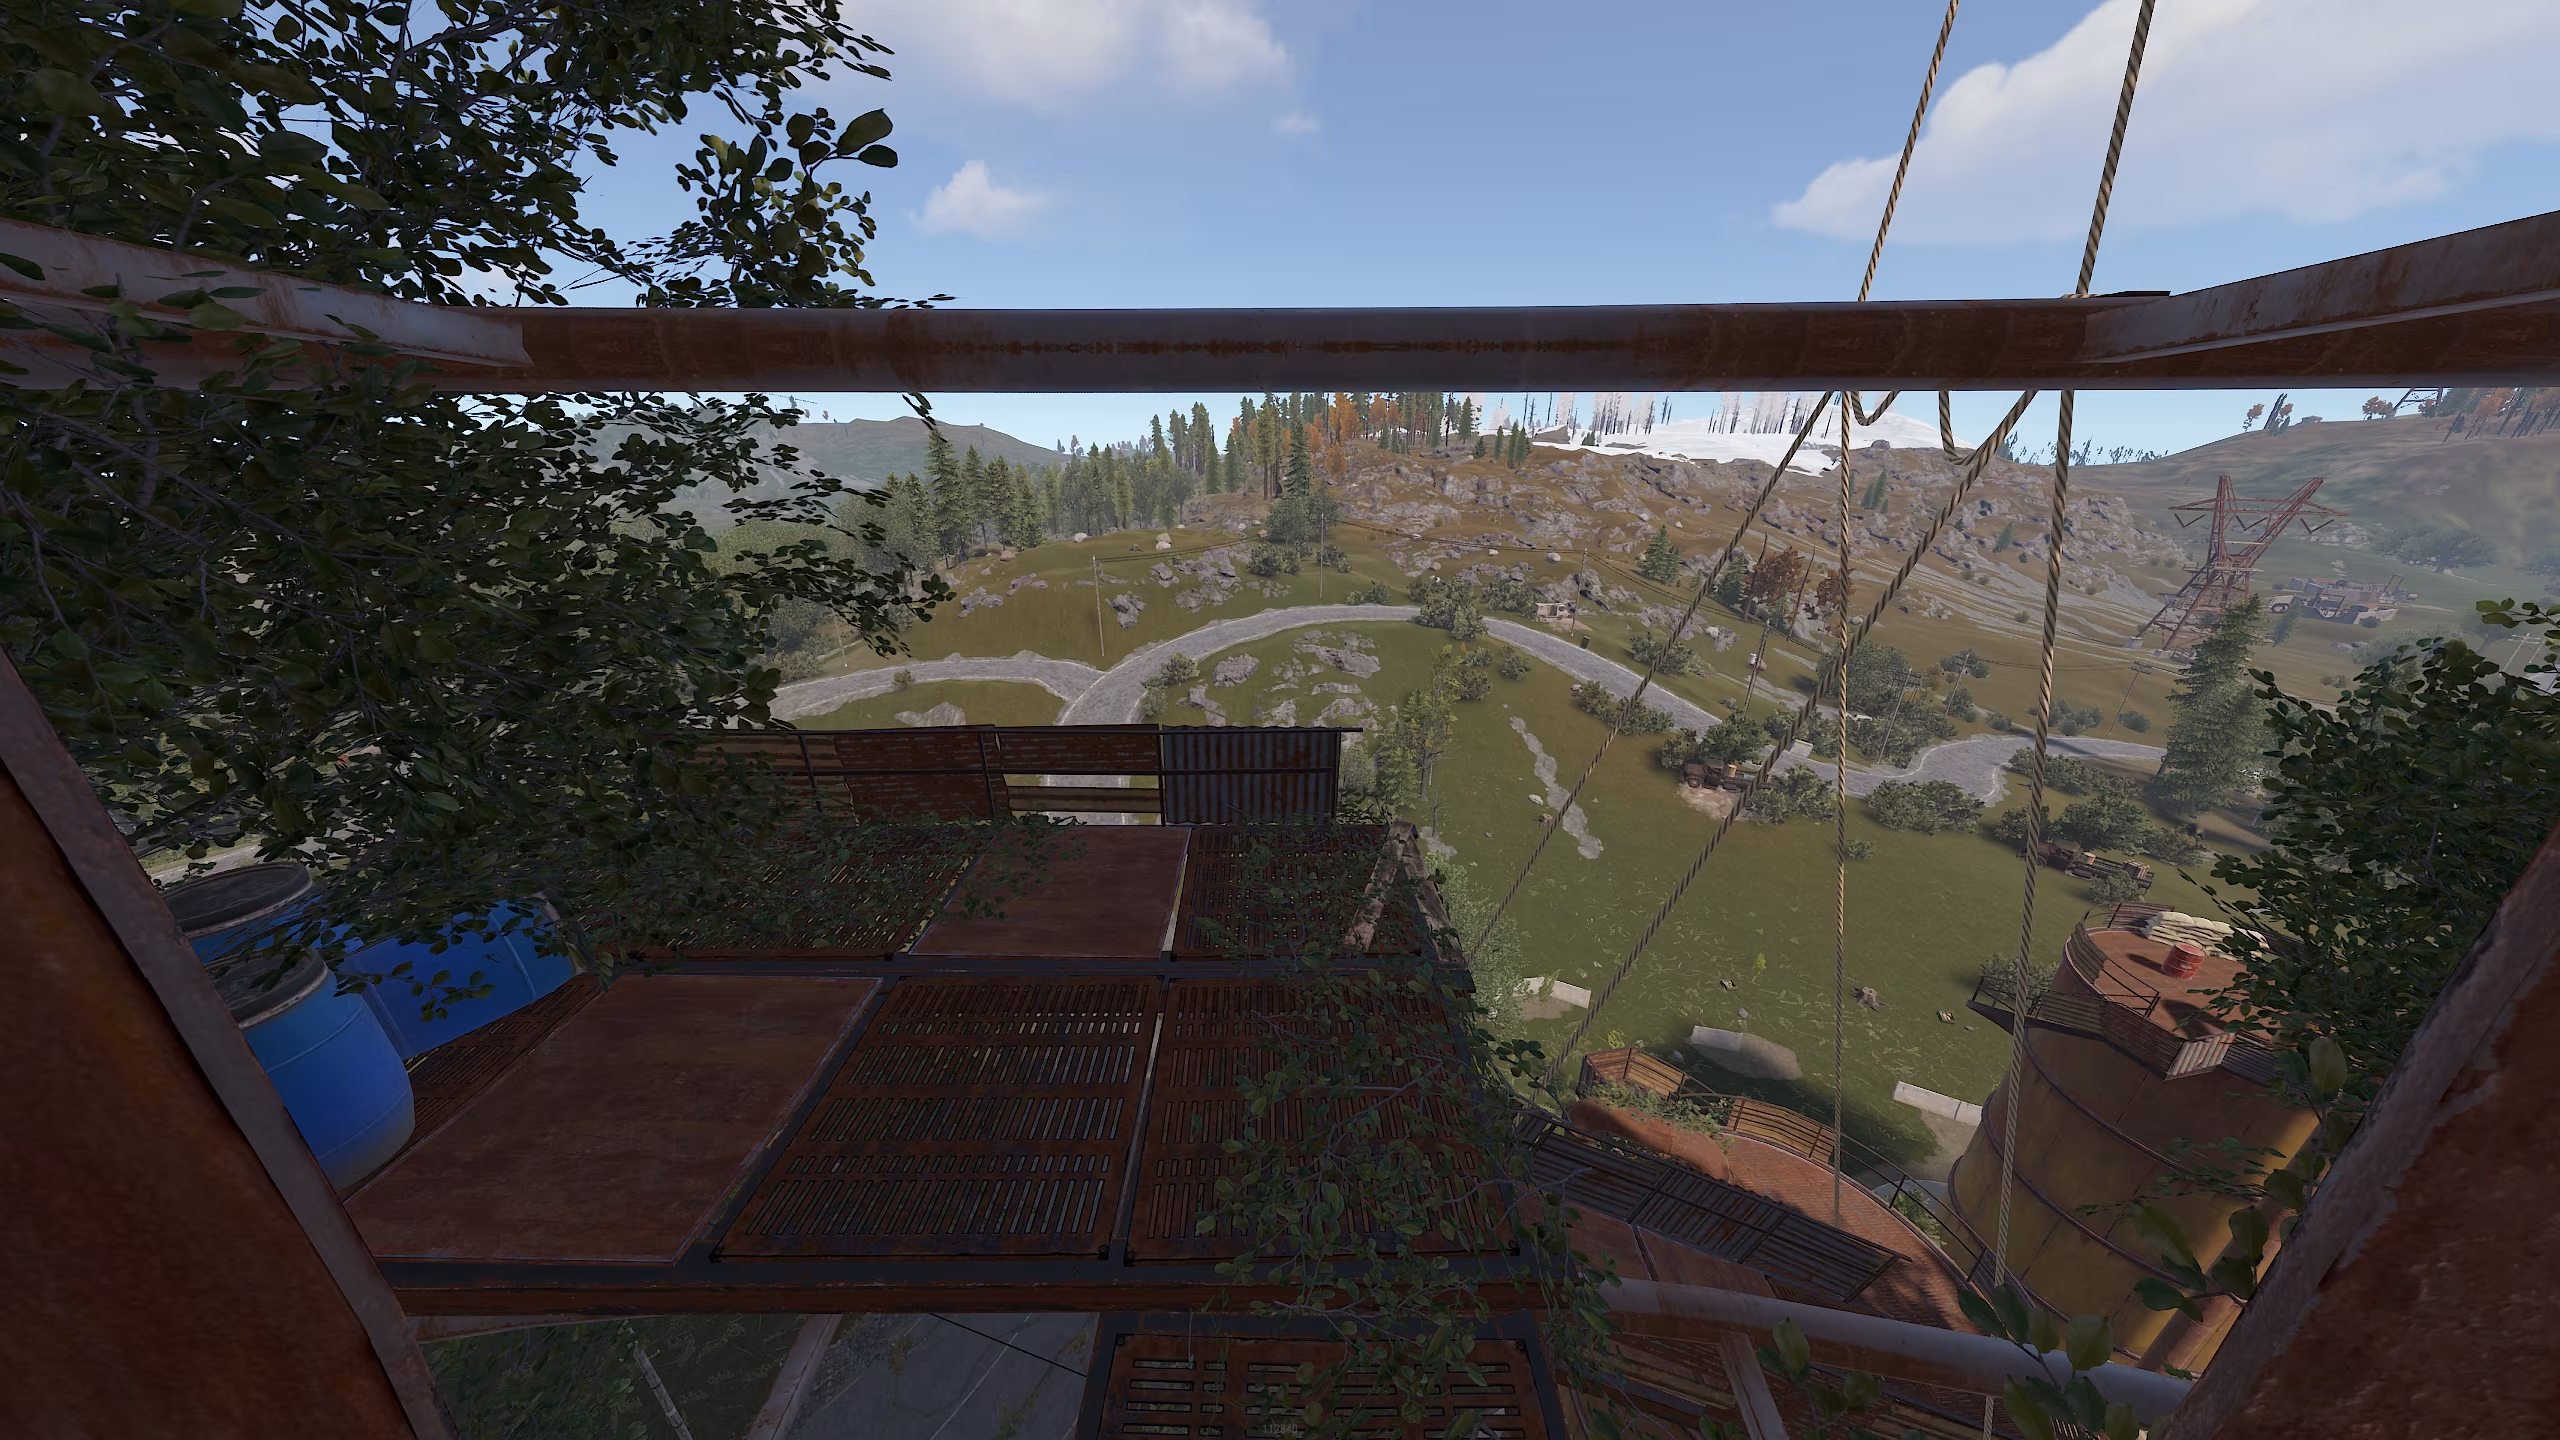
- Once outside, you will see three blue barrels on your left and a jump spot on your right leading to a bridge. This bridge connects to three large cylindrical tanks, which serve as one of the possible exits from the location.
- For now, focus on the blue barrels. Jump onto them, then onto the next platform.
- Imagine yourself as a parkour master and start running across platforms and pipes, maneuvering around the Dome while jumping over obstacles in your path.
At this point, be especially careful, as you will need to jump from platforms onto pipes and then onto the next balcony. A single misstep can lead to a dangerous fall.
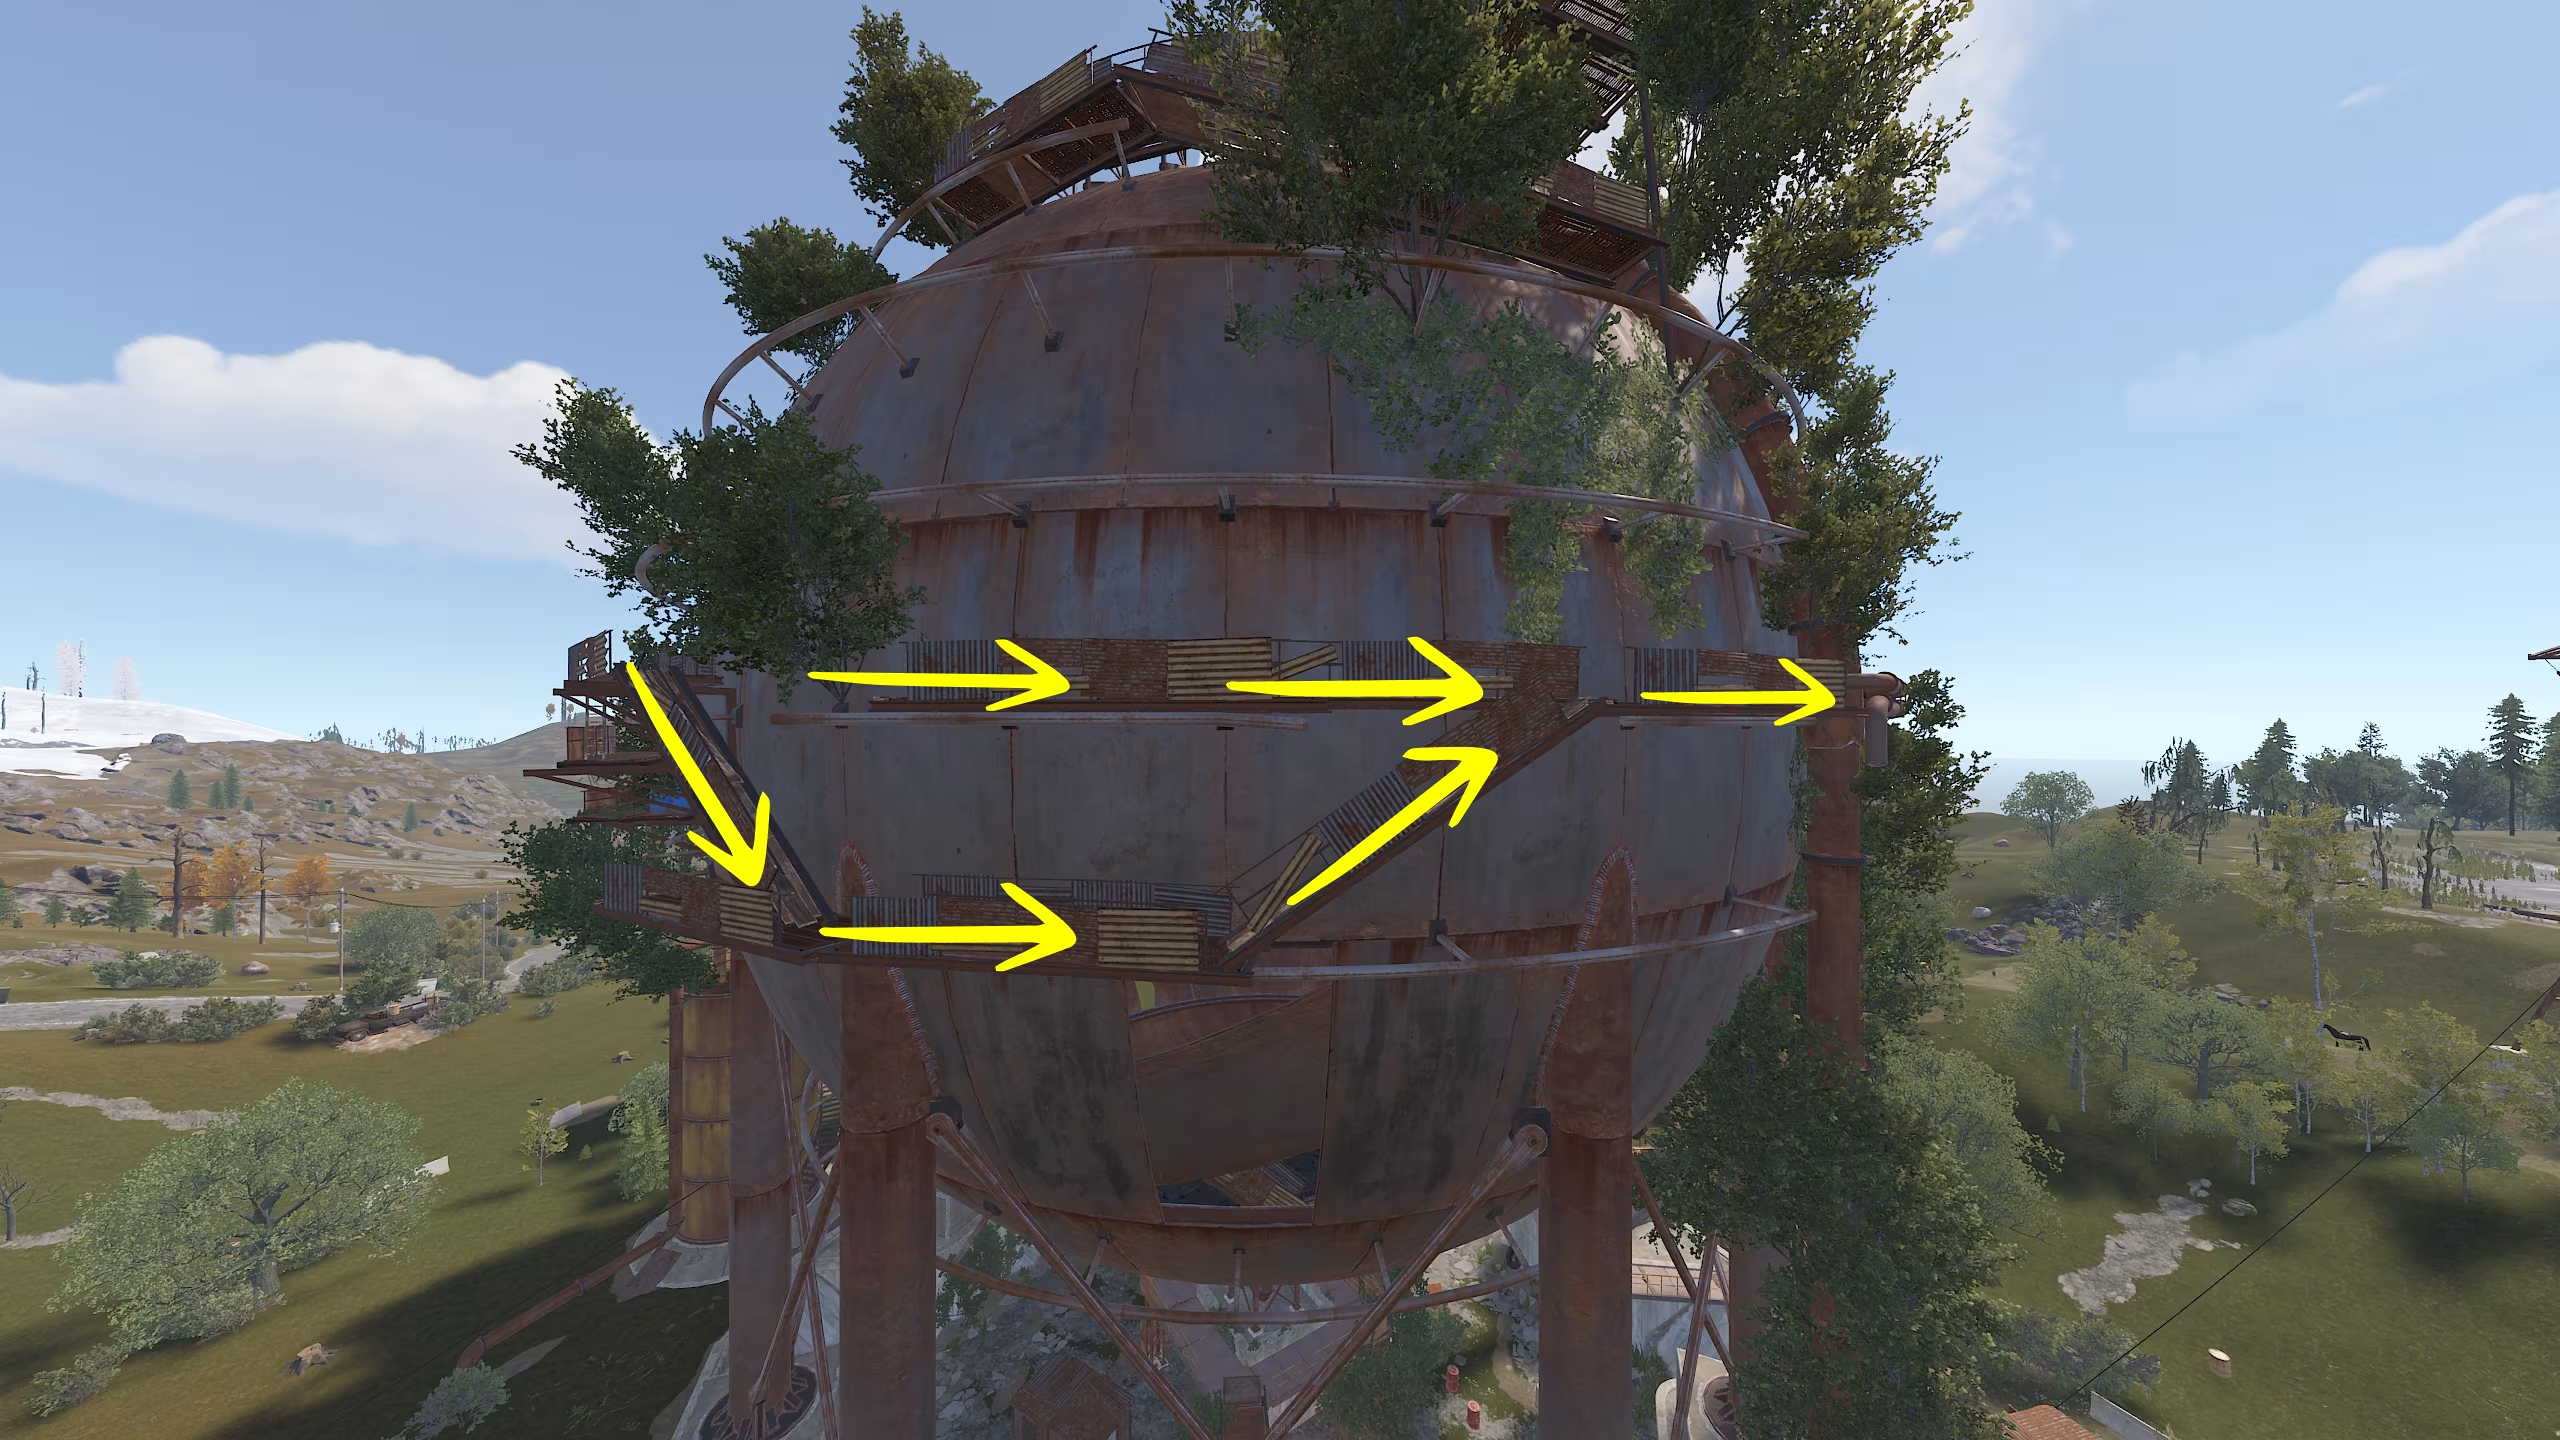
- Continue walking along the narrow pipe until you see an entrance to the inside of the Dome on your left.
- Enter the Dome through this opening.
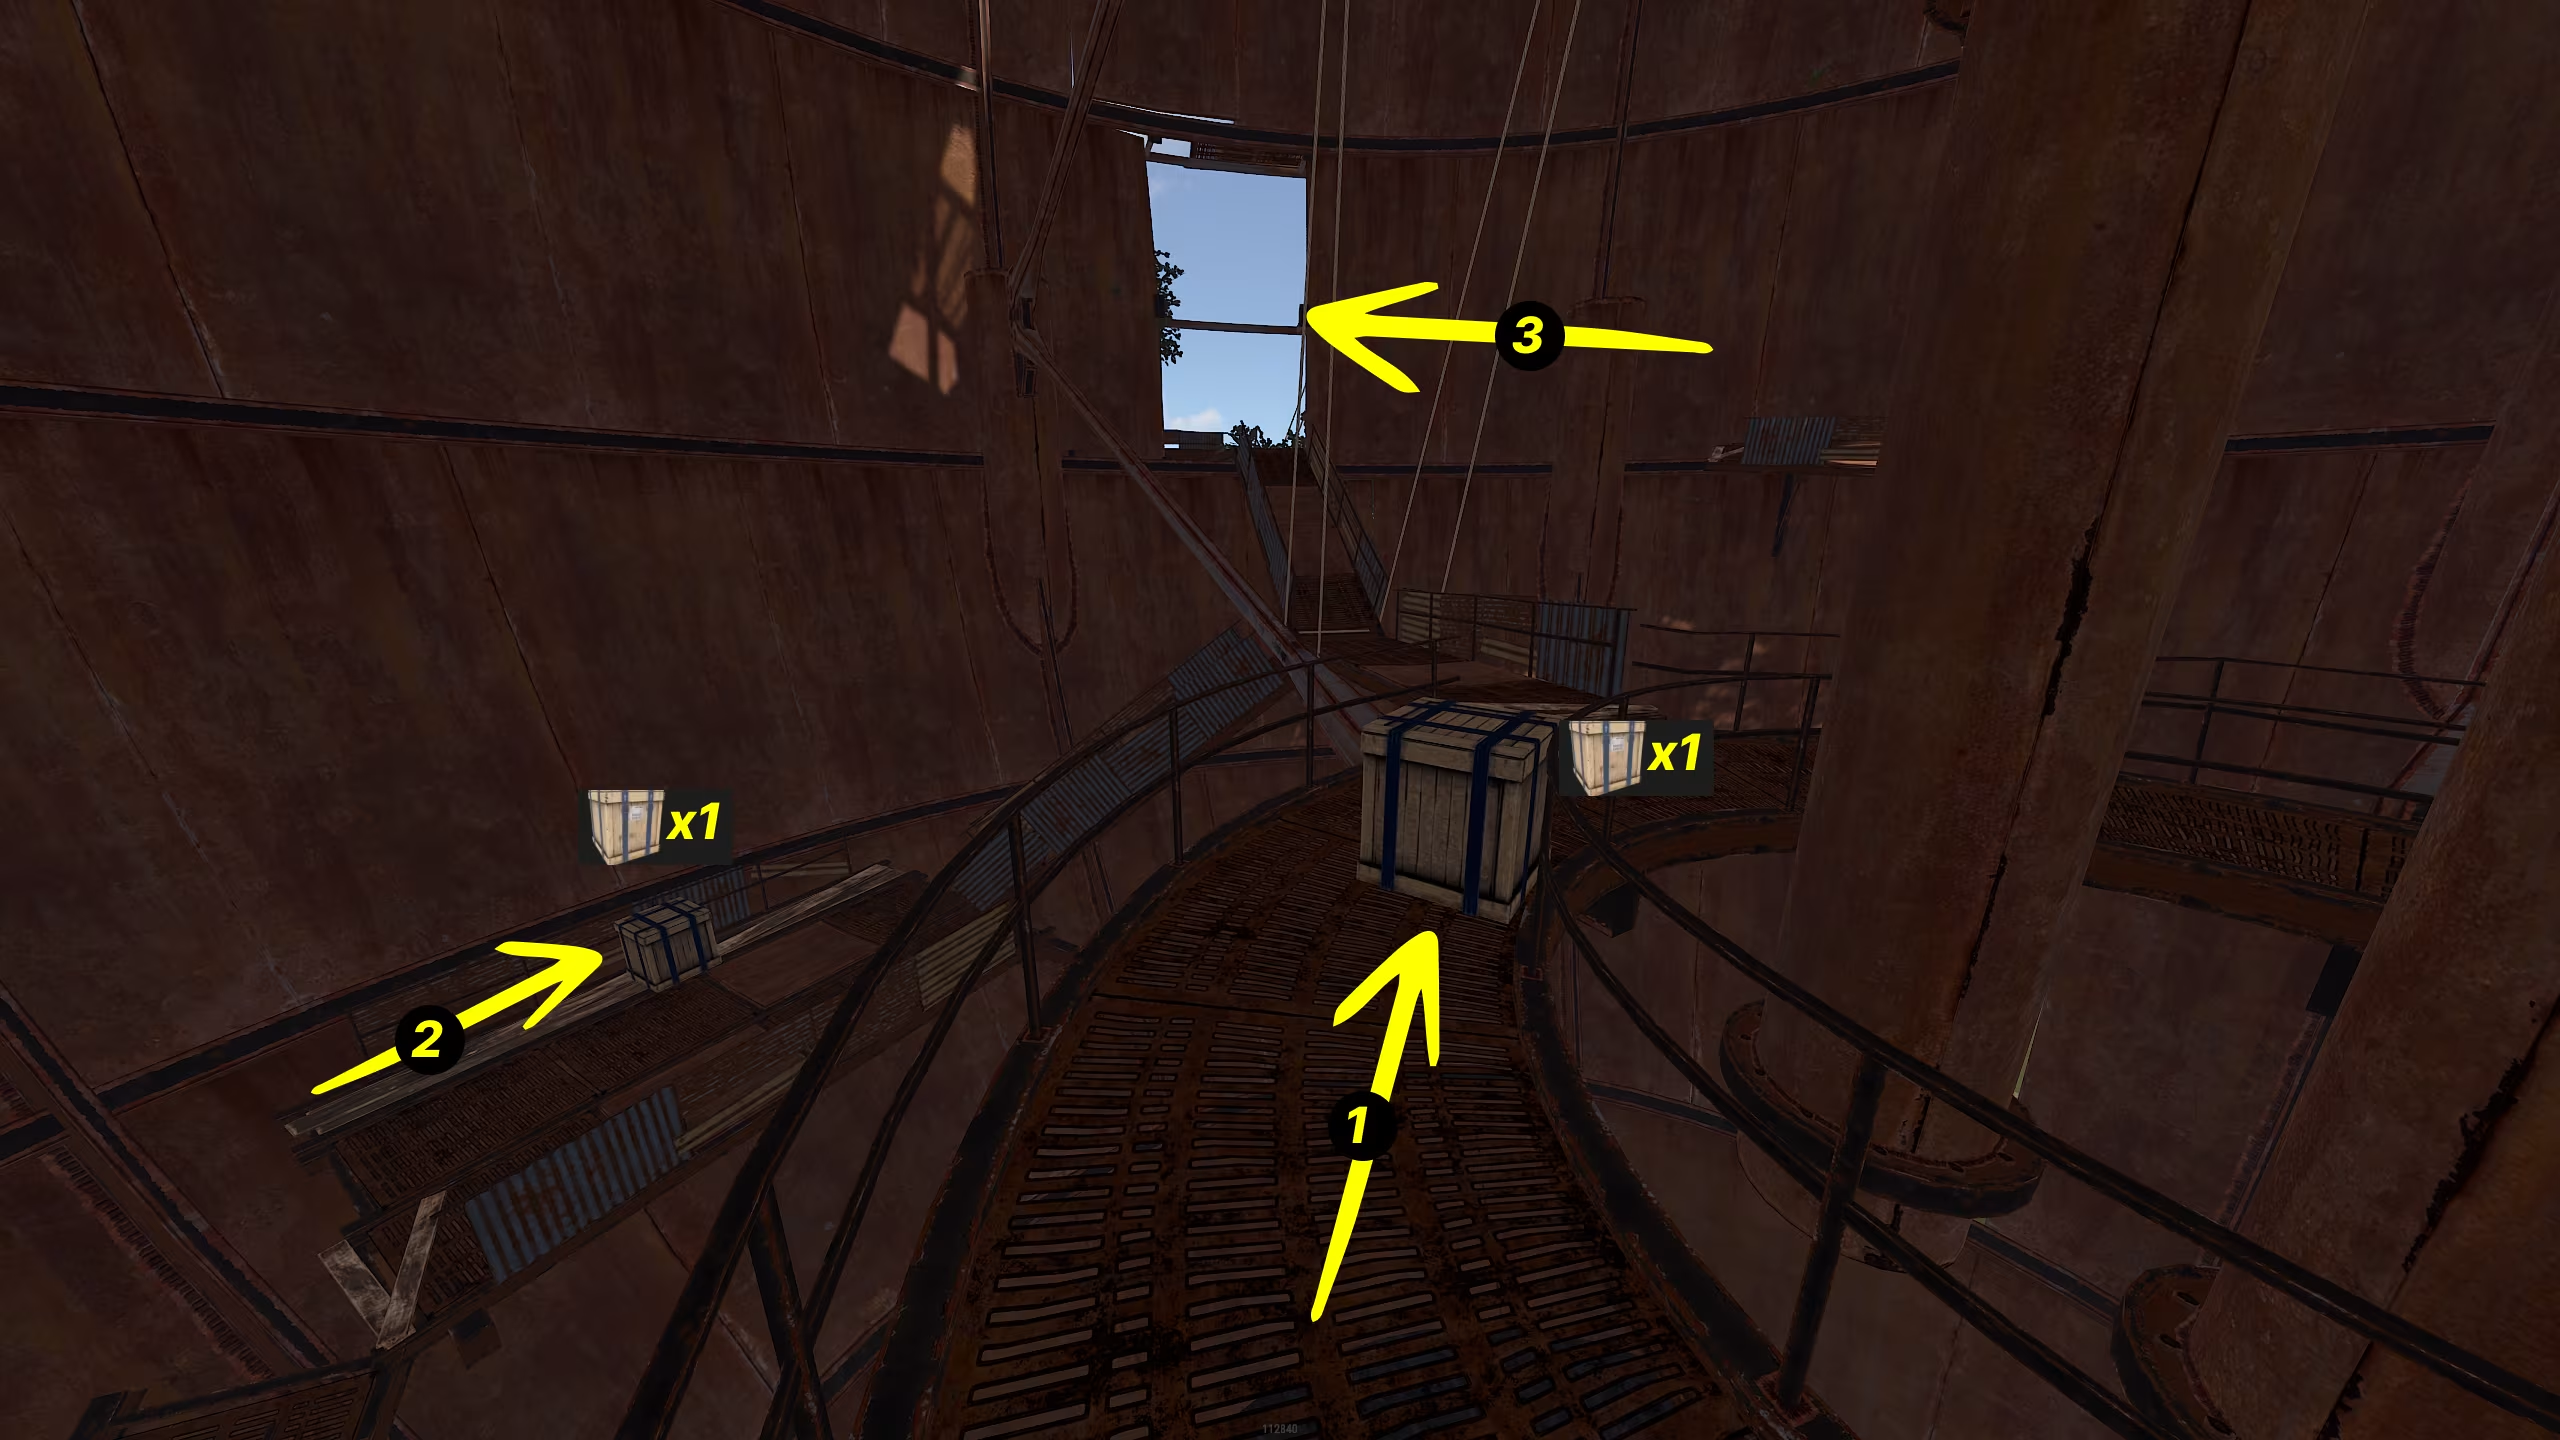
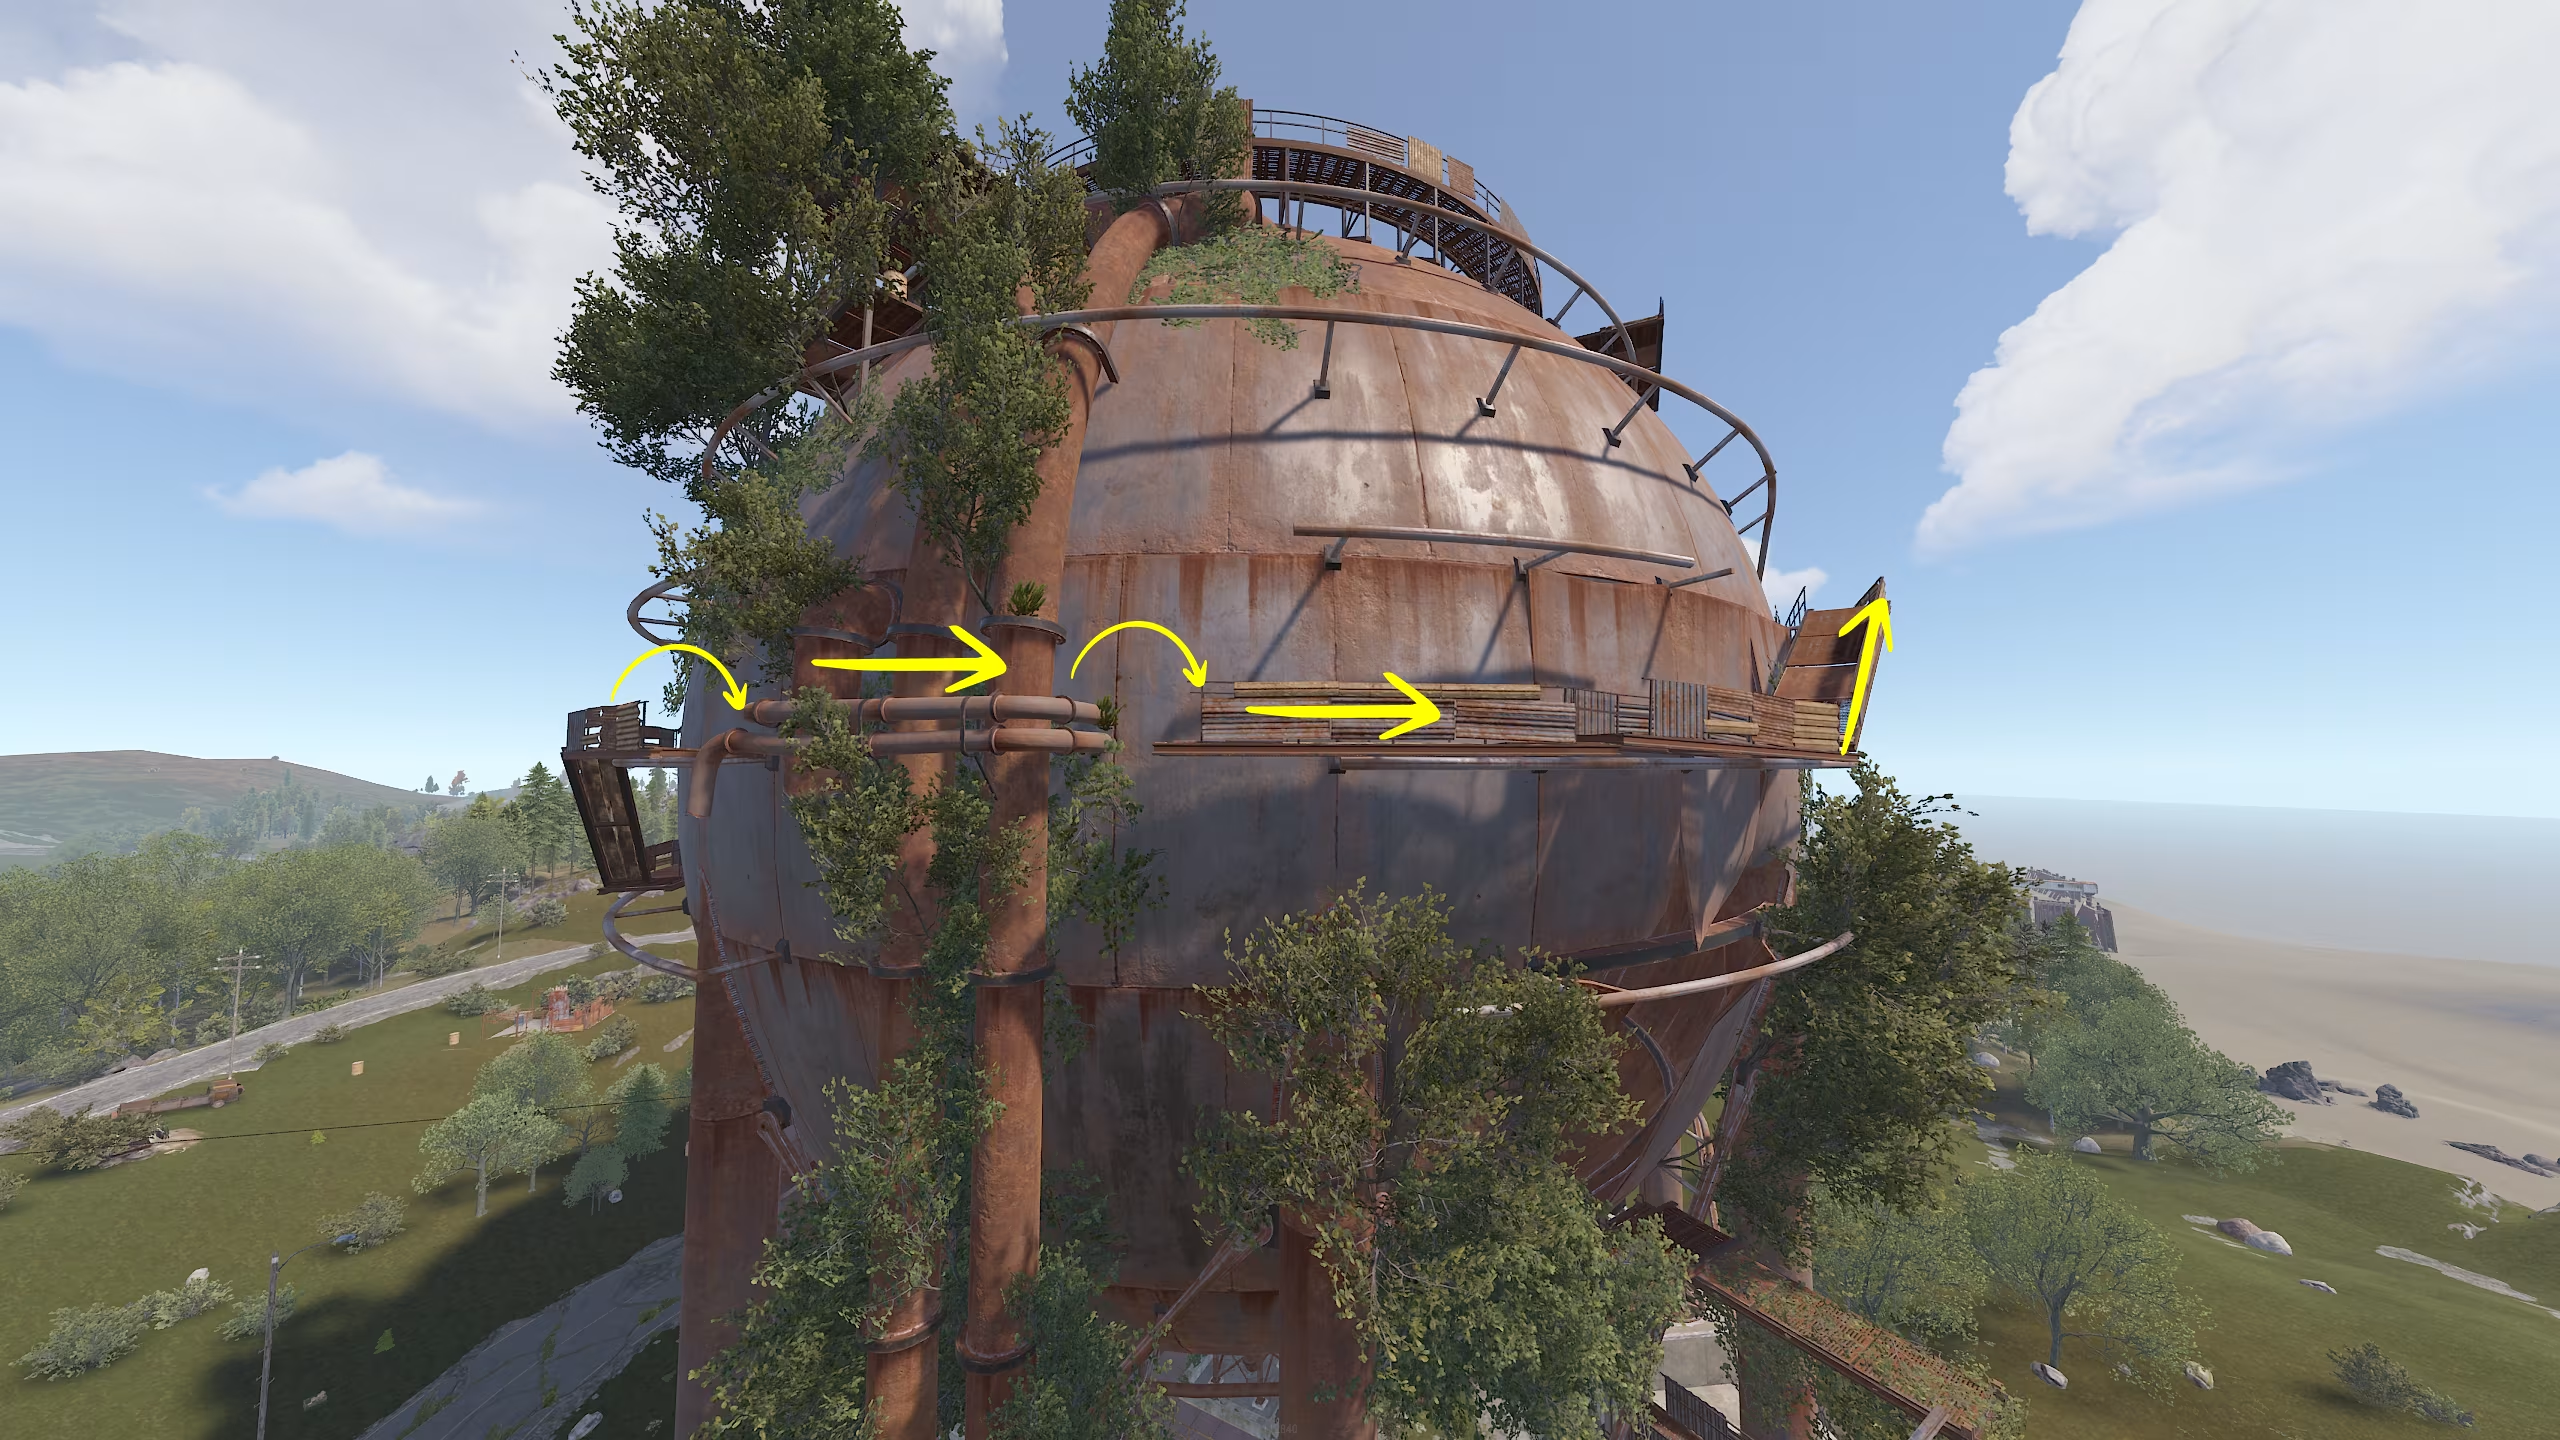
- Now, you've reached the second inner level of the Dome. Here, you'll see another circular platform wrapping around the central pipes.
- Check for loot, collect any crates that spawn, and then approach the railing. Below the platform, you'll spot a military crate.
- To reach it, jump onto the railing, carefully walk across the beam, and grab the crate.
- Return to the circular platform and take the bridge leading to the next crate.
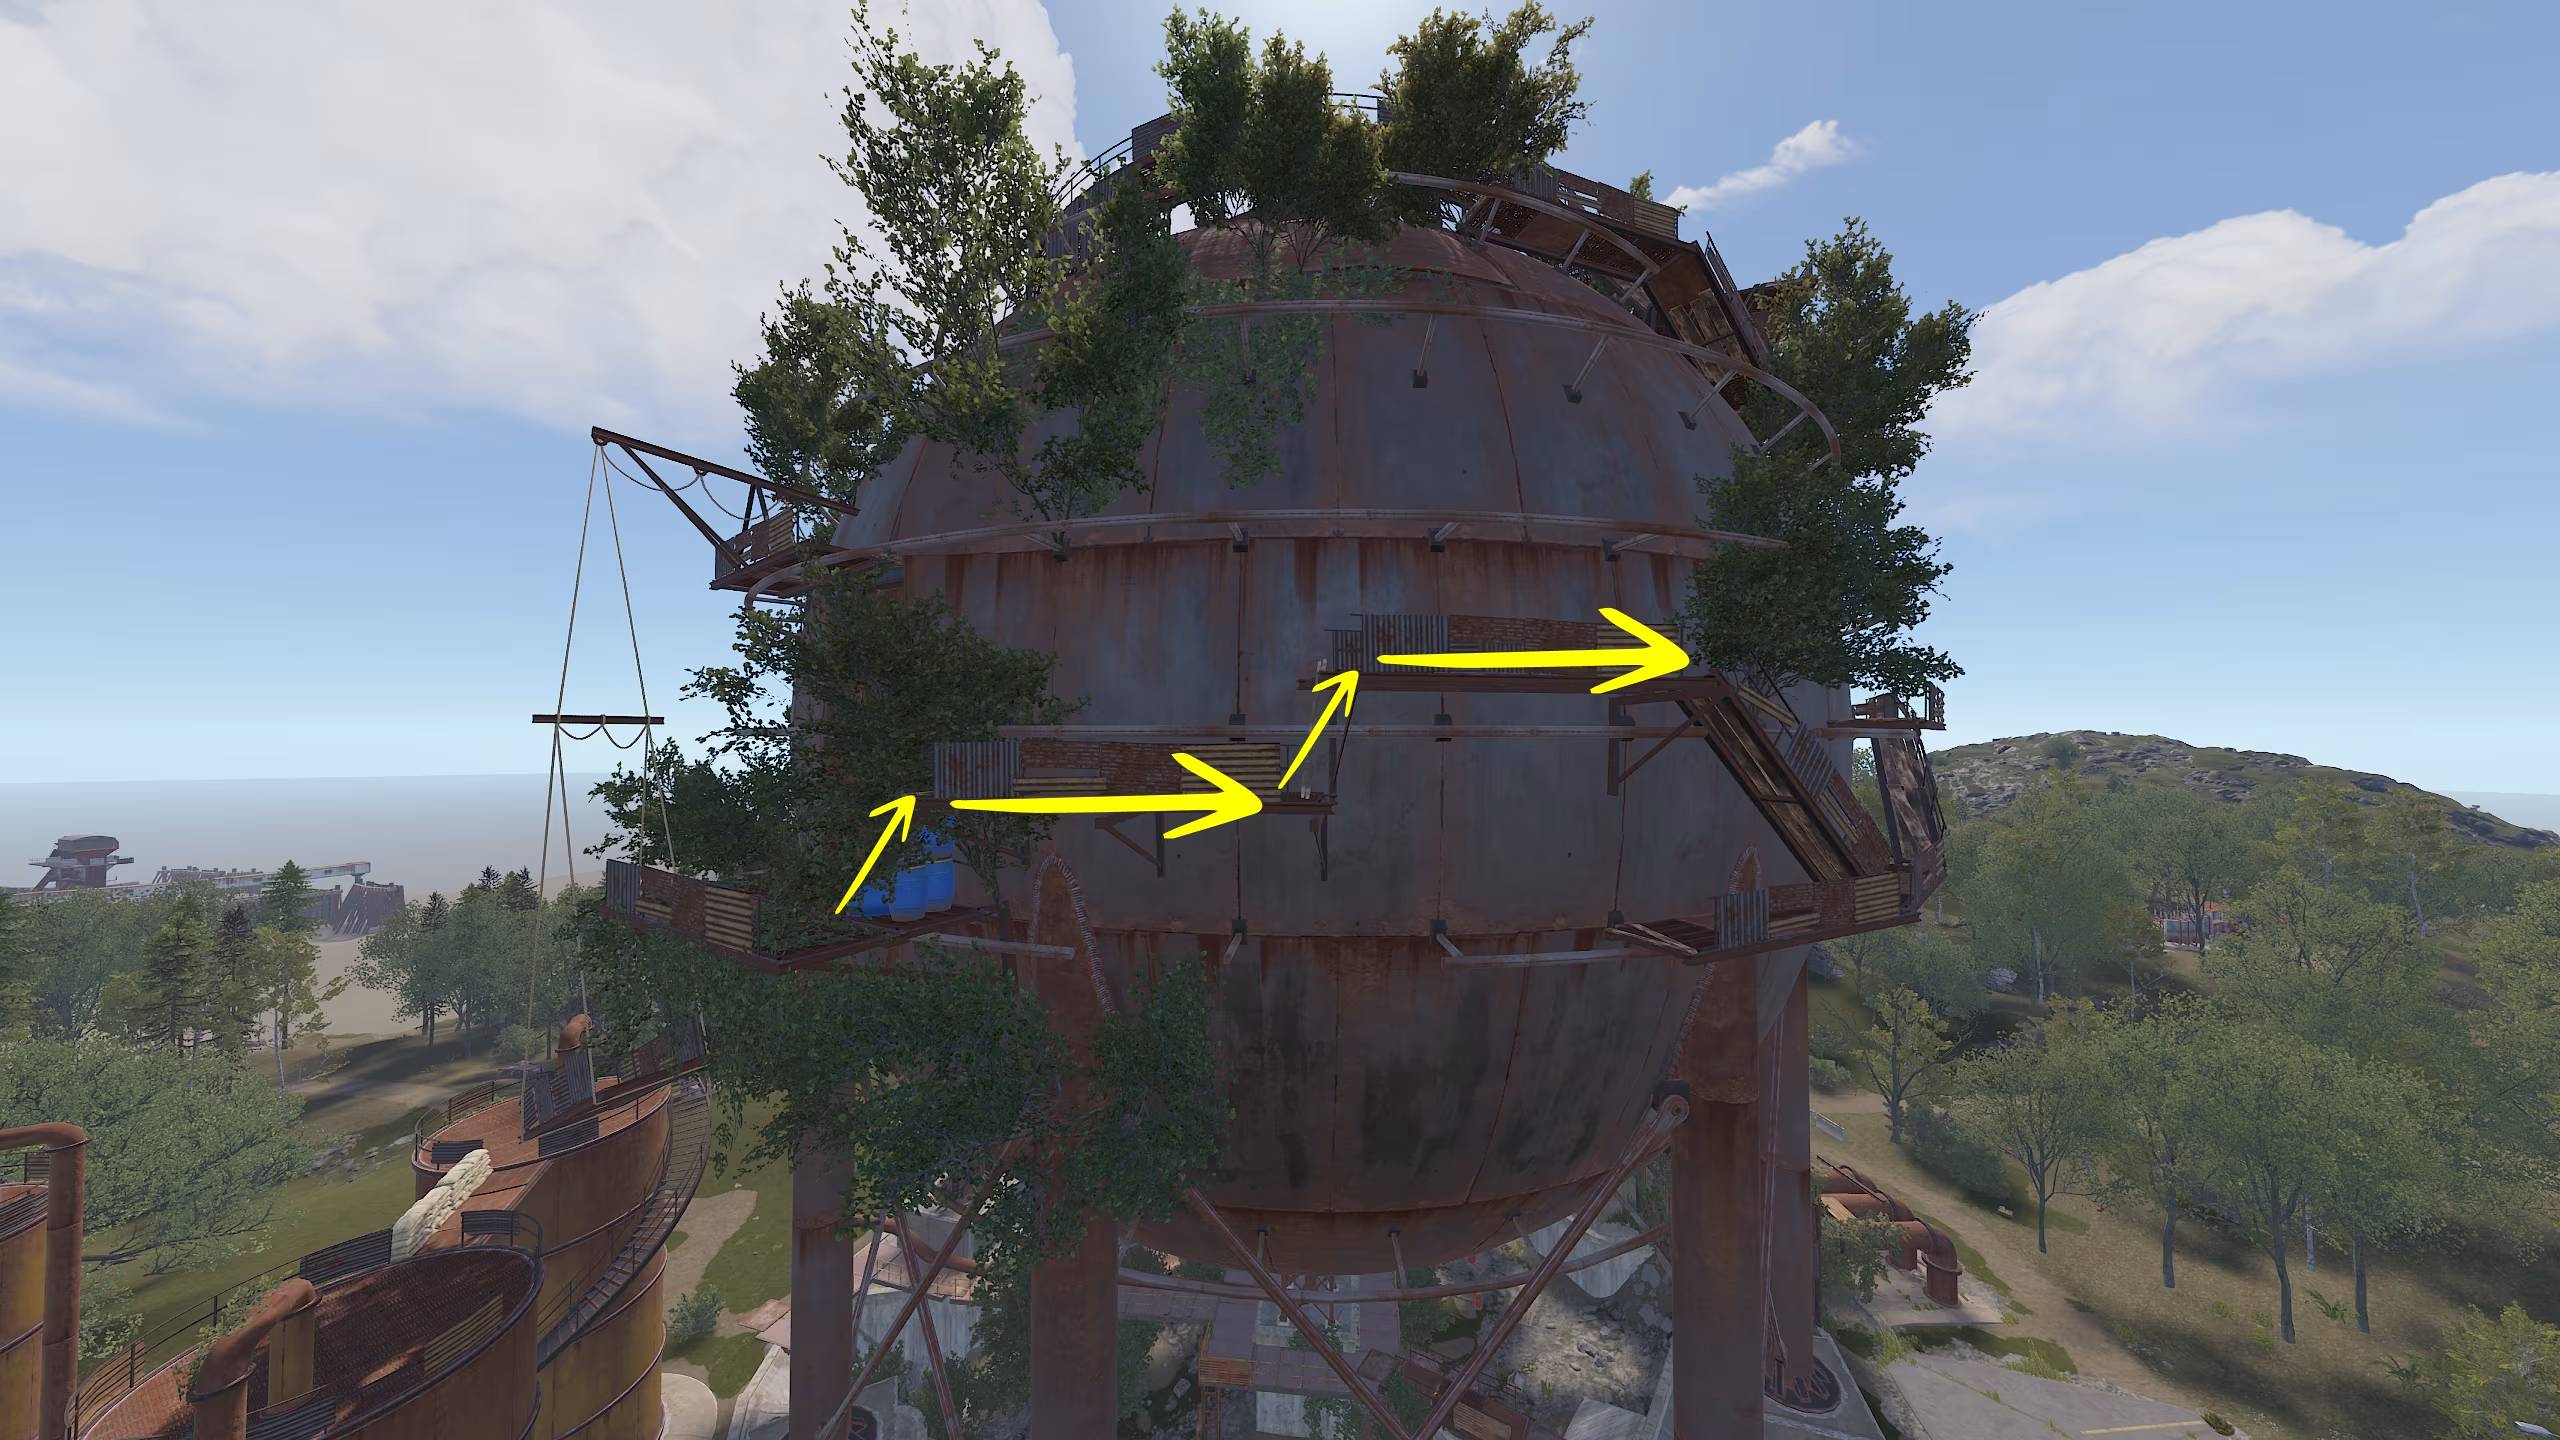
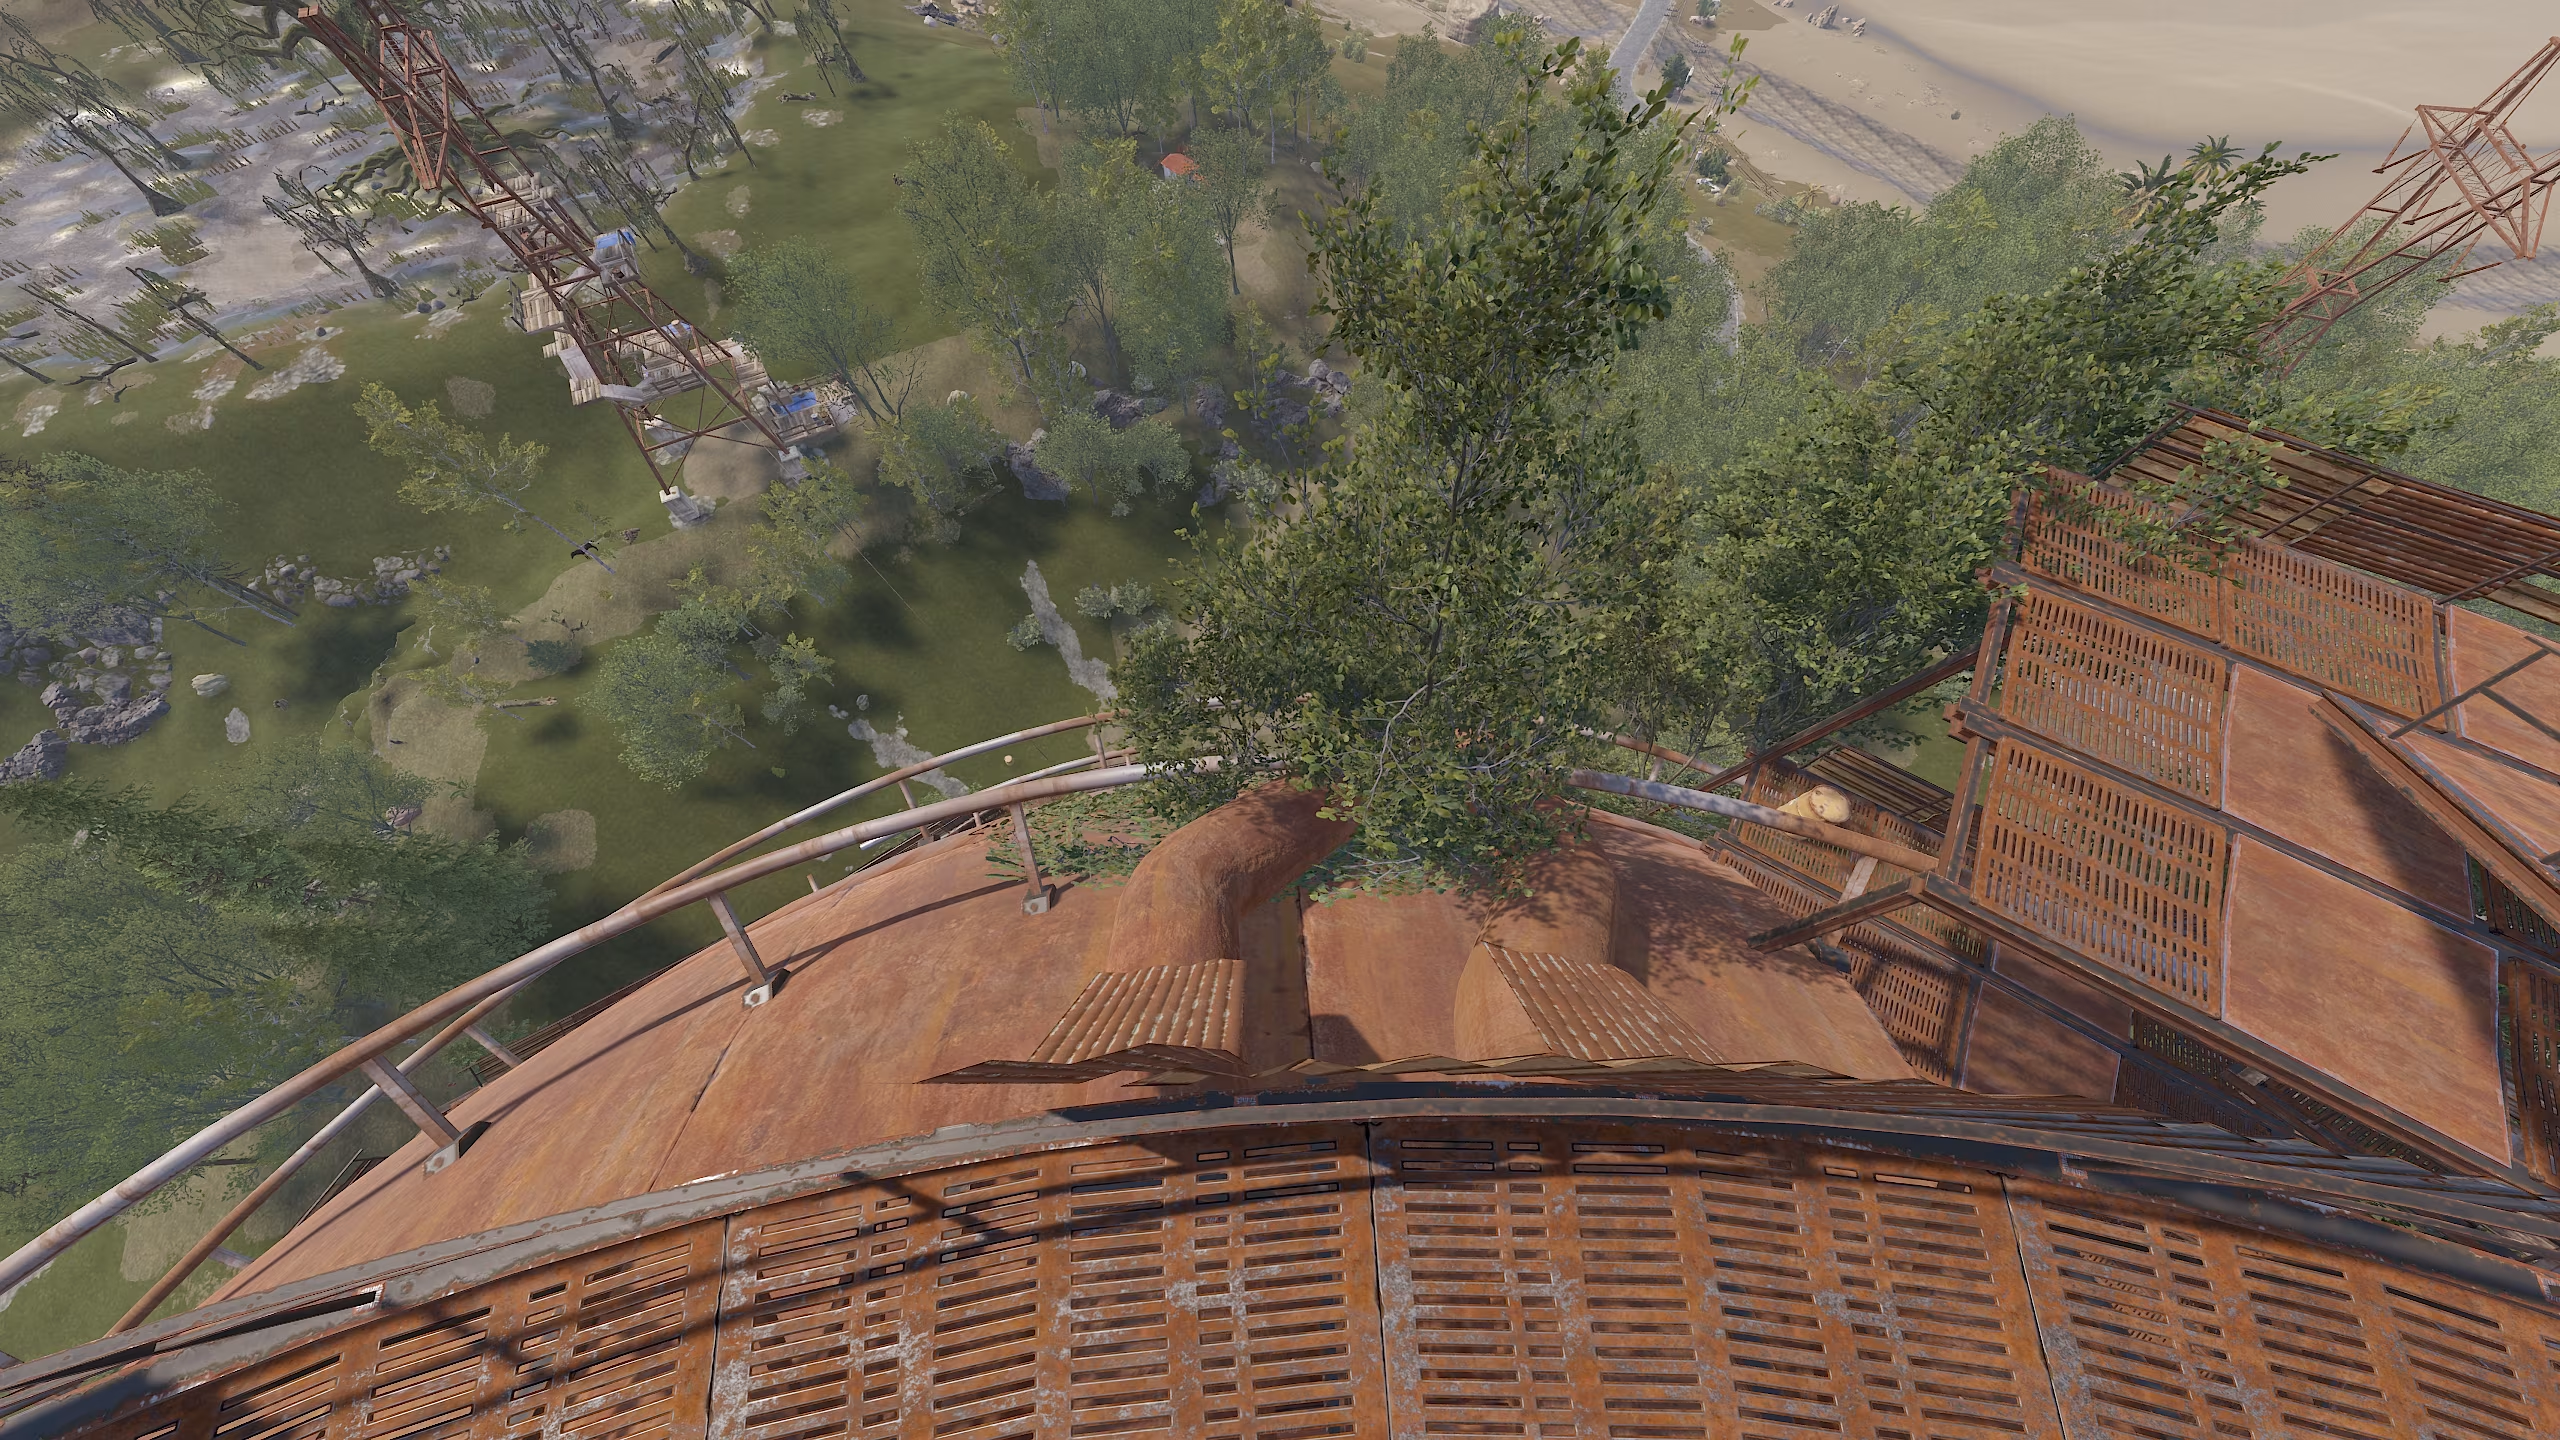
- Climb up the higher levels, looting along the way, until you eventually exit to the outside of the Dome.

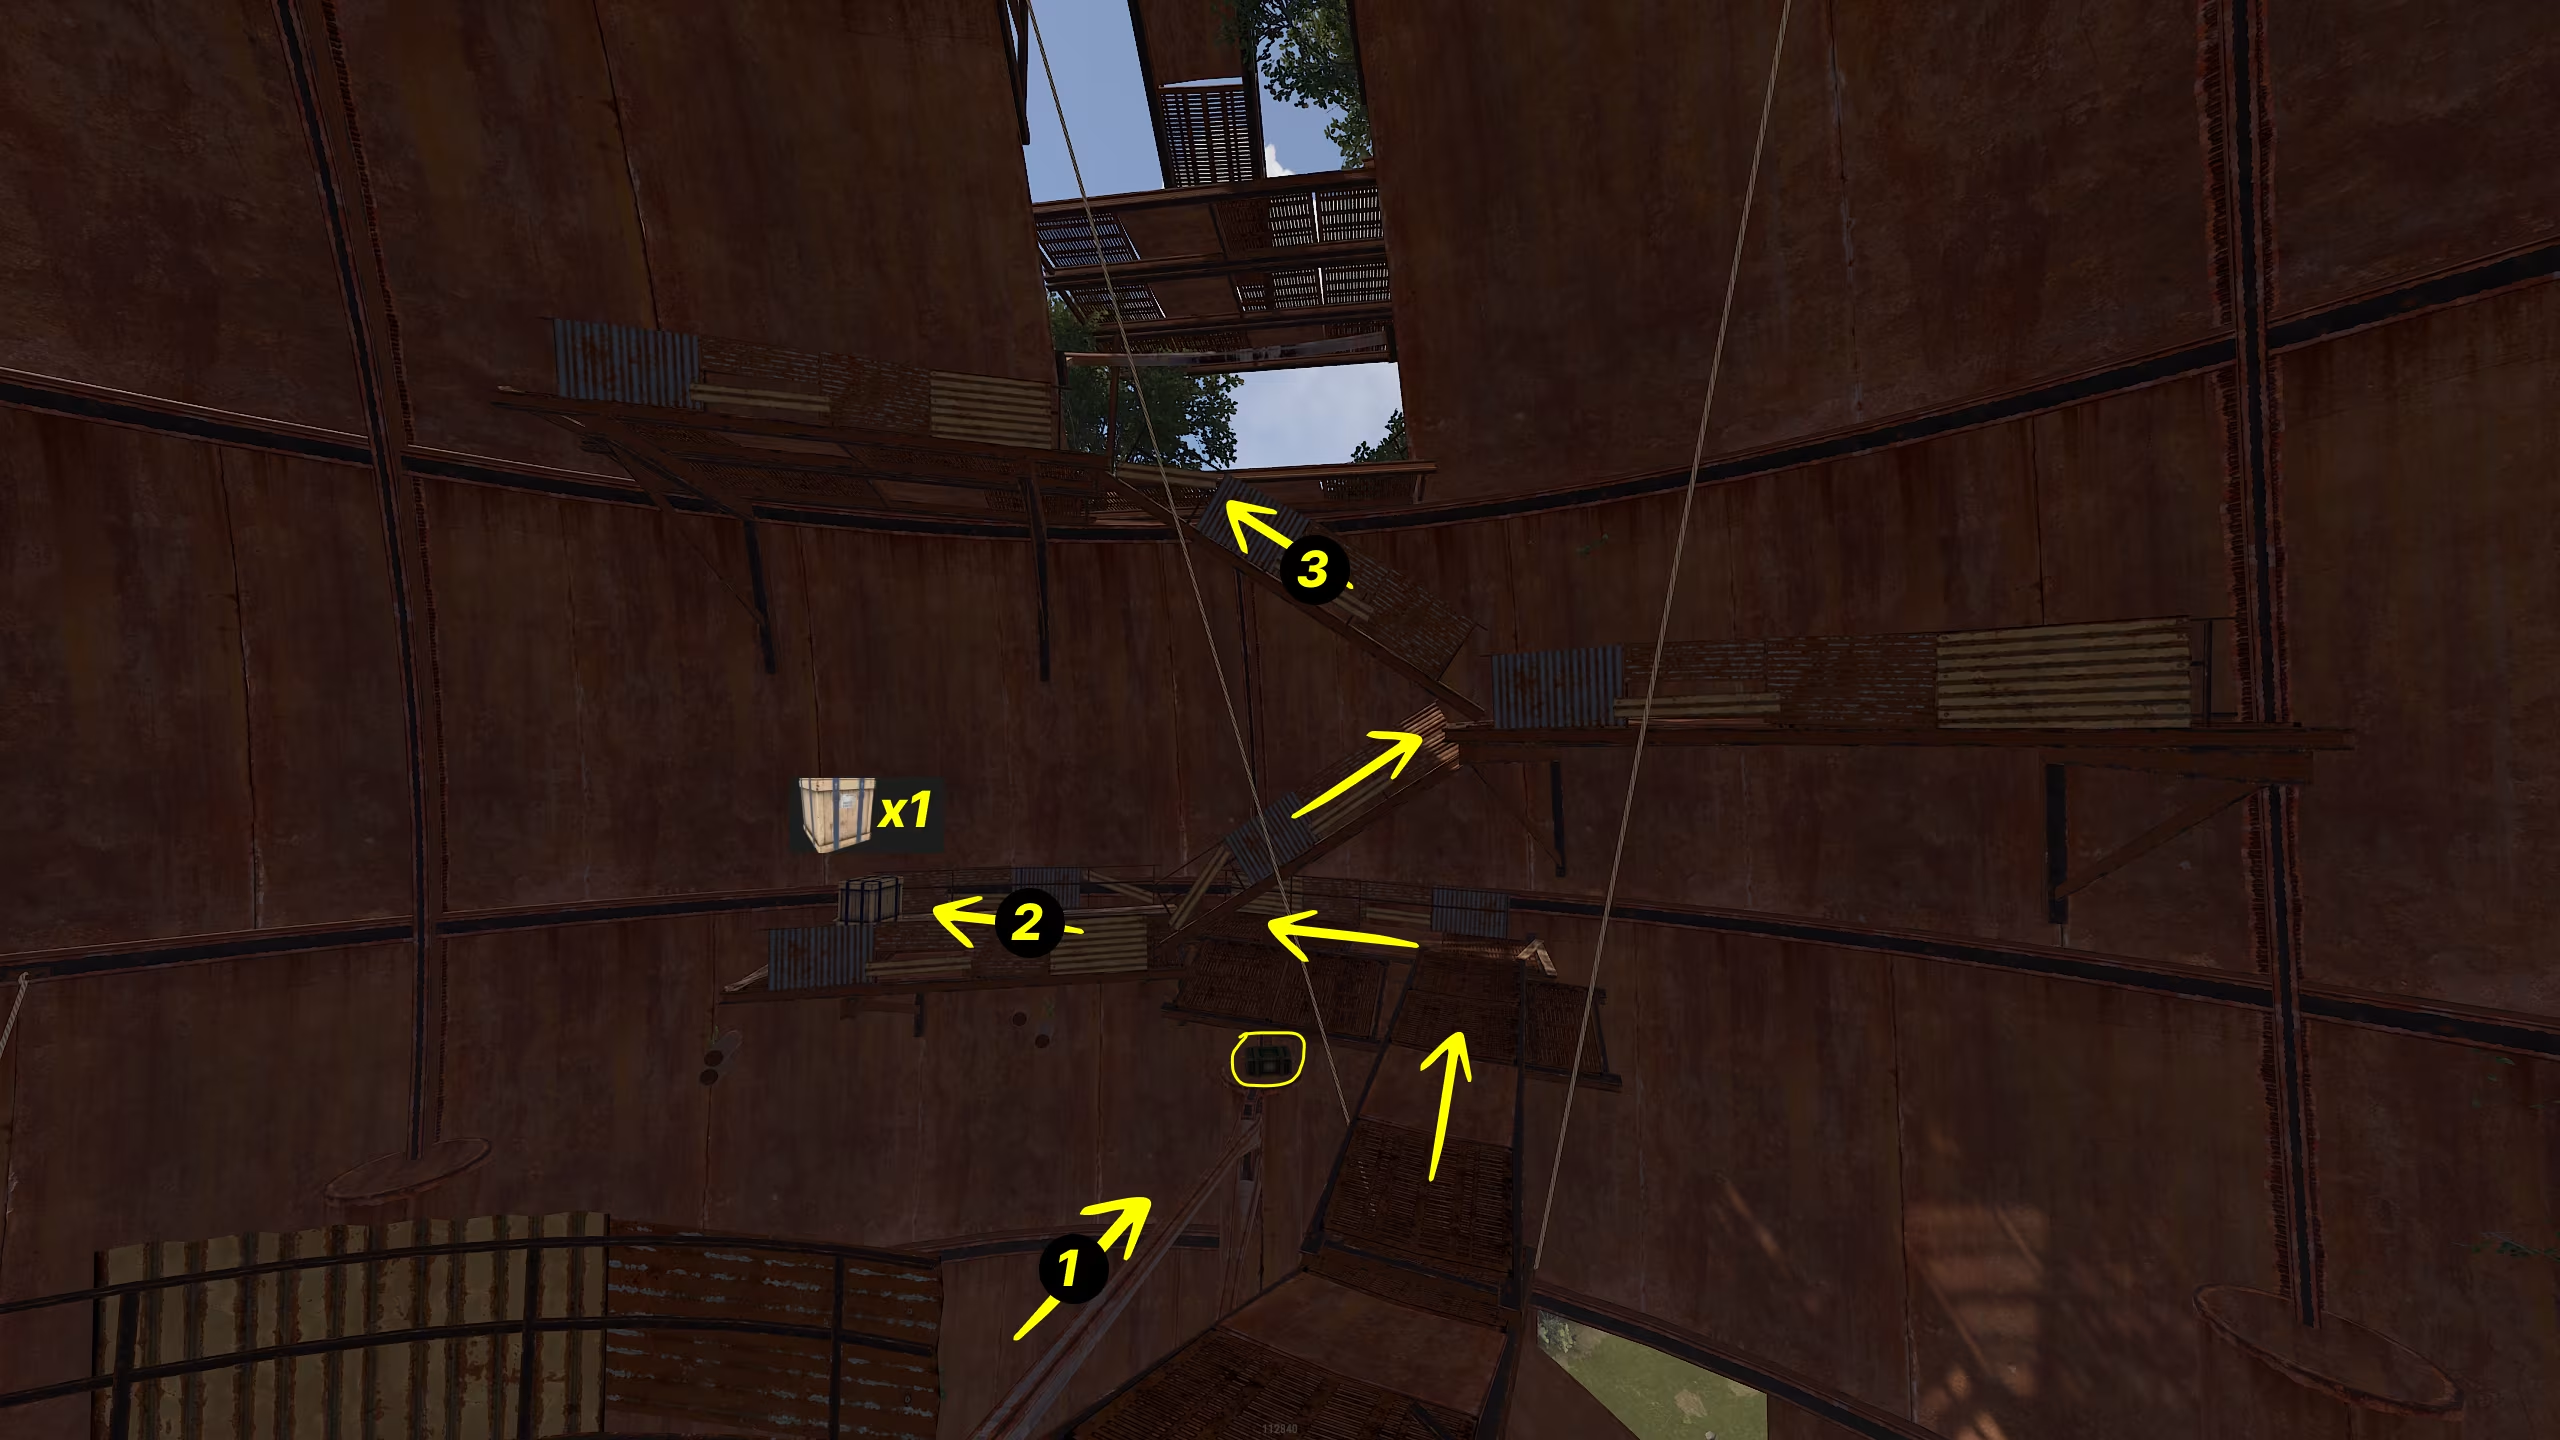
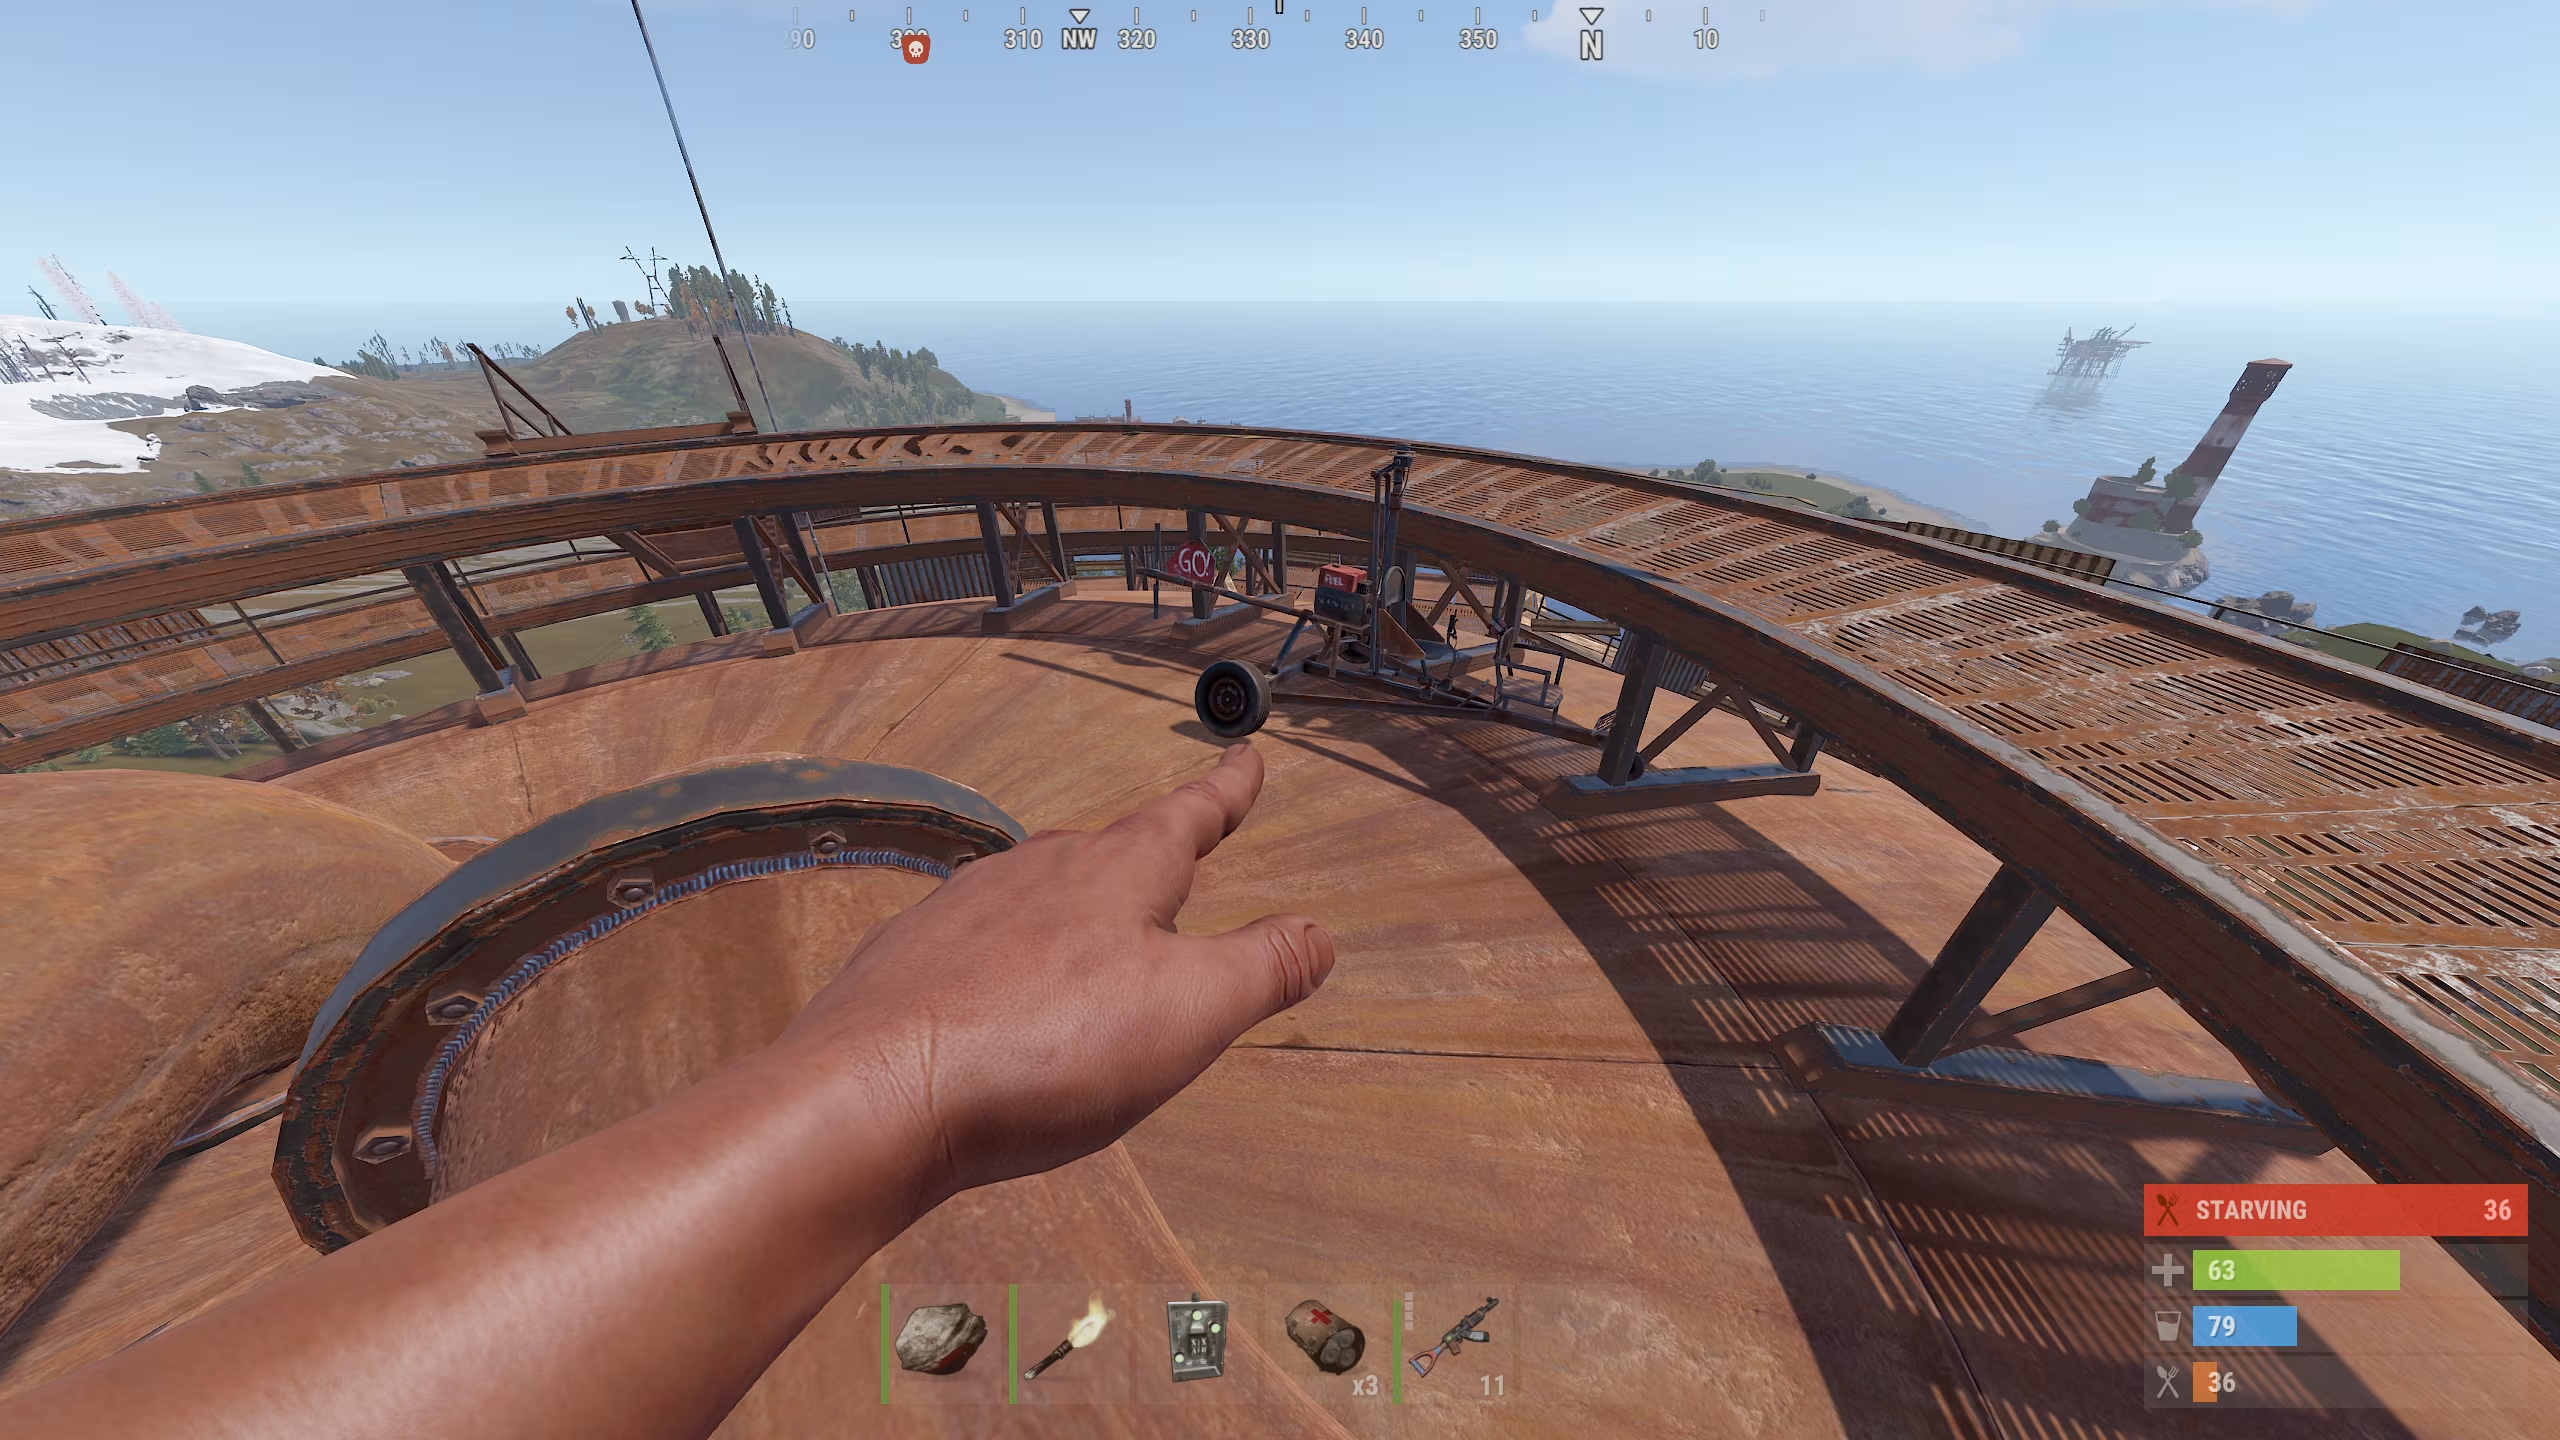
- Continue climbing to the very top of the Dome using the bridges.
- At the top, you'll find three military crates waiting for you—grab the loot!

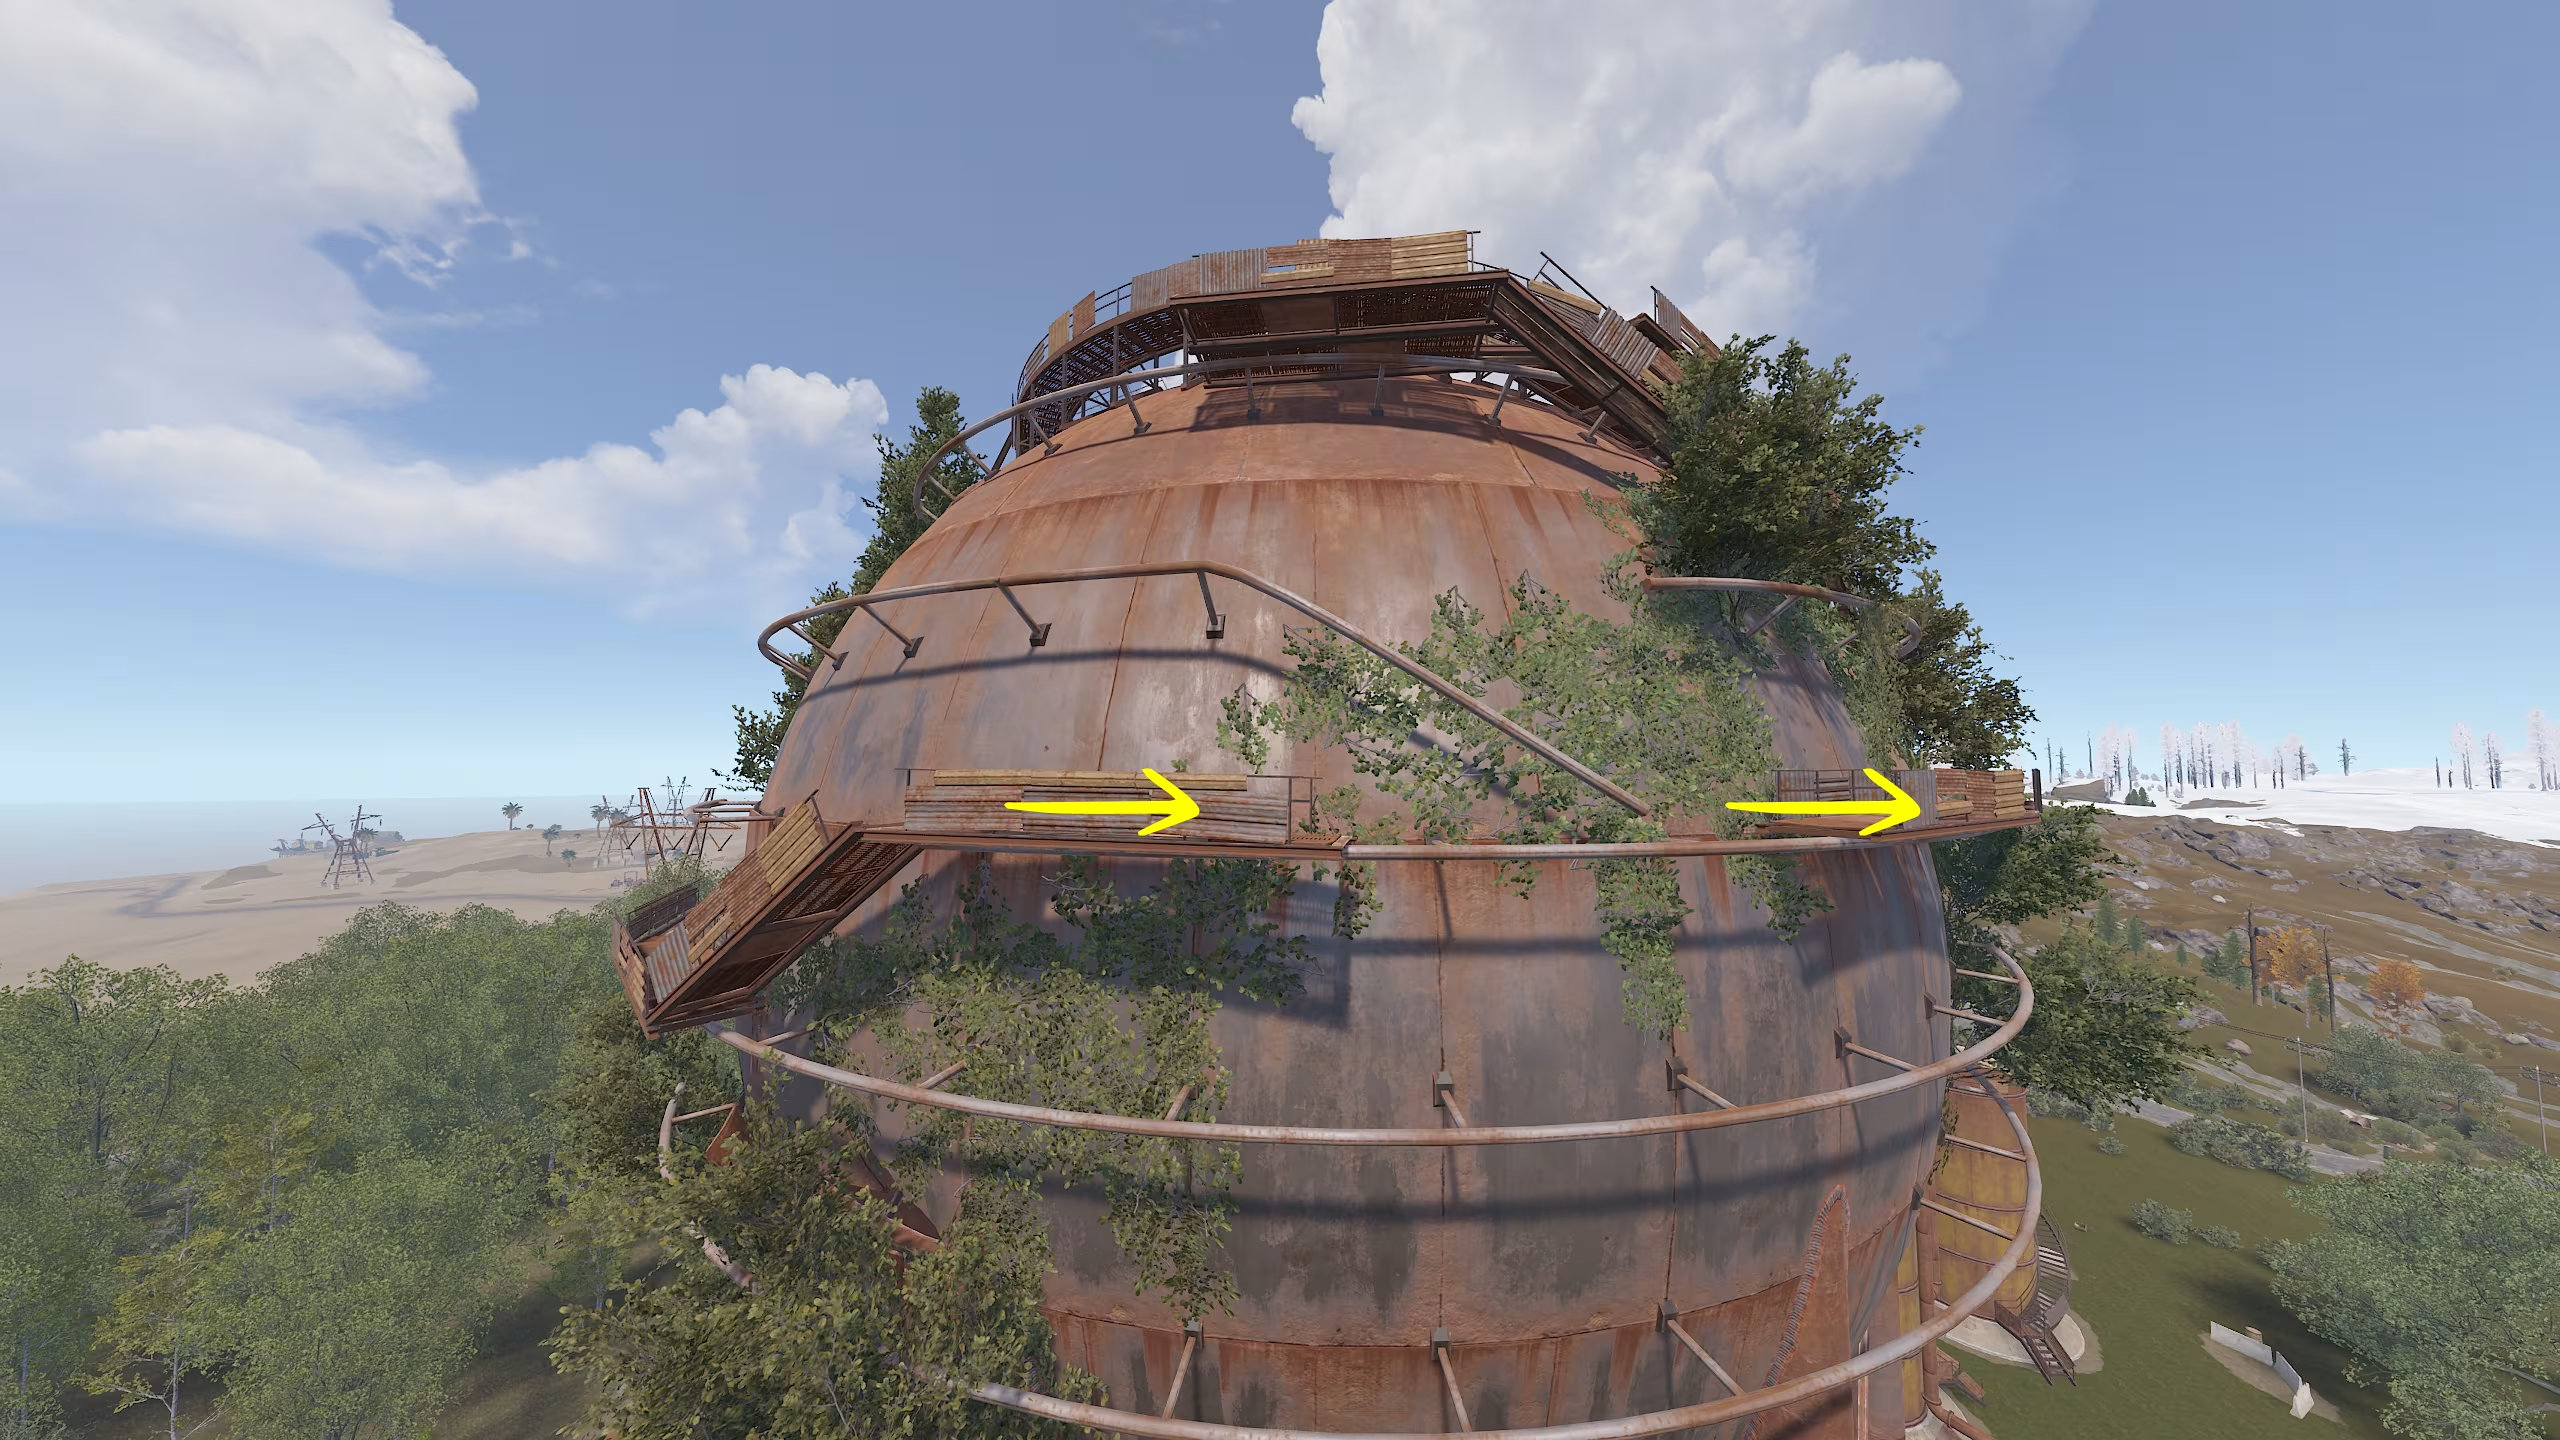
Descending from the Dome
- After looting the top of the Dome, start descending using the opposite route from your ascent.
- Along the way, collect two diesel barrels.
- Continue moving down the platforms, then transition onto a pipe.
- Walk along the pipe until you reach a beam with ropes.
- Carefully jump down onto the beam, then drop onto the lower platform.
- Walk across another pipe, then jump down again onto a balcony.
- You’ll now find yourself back at the same split from the beginning of the guide, where the three blue barrels were located.
- Parkour onto the hanging platform, then jump onto one of the cylindrical tanks.
- If you want, break all the barrels along the way for extra loot.
- Run down the spiral staircase, making your way to the ground.
- Your resource run is now complete! 🎉

Result
The looting process at the Dome is fairly straightforward. However, things can quickly change if another player is positioned above you. In such cases, your survival depends on either good aim or strong knowledge of the location to outmaneuver them.
Loot Acquired:
Additional Information & Tips
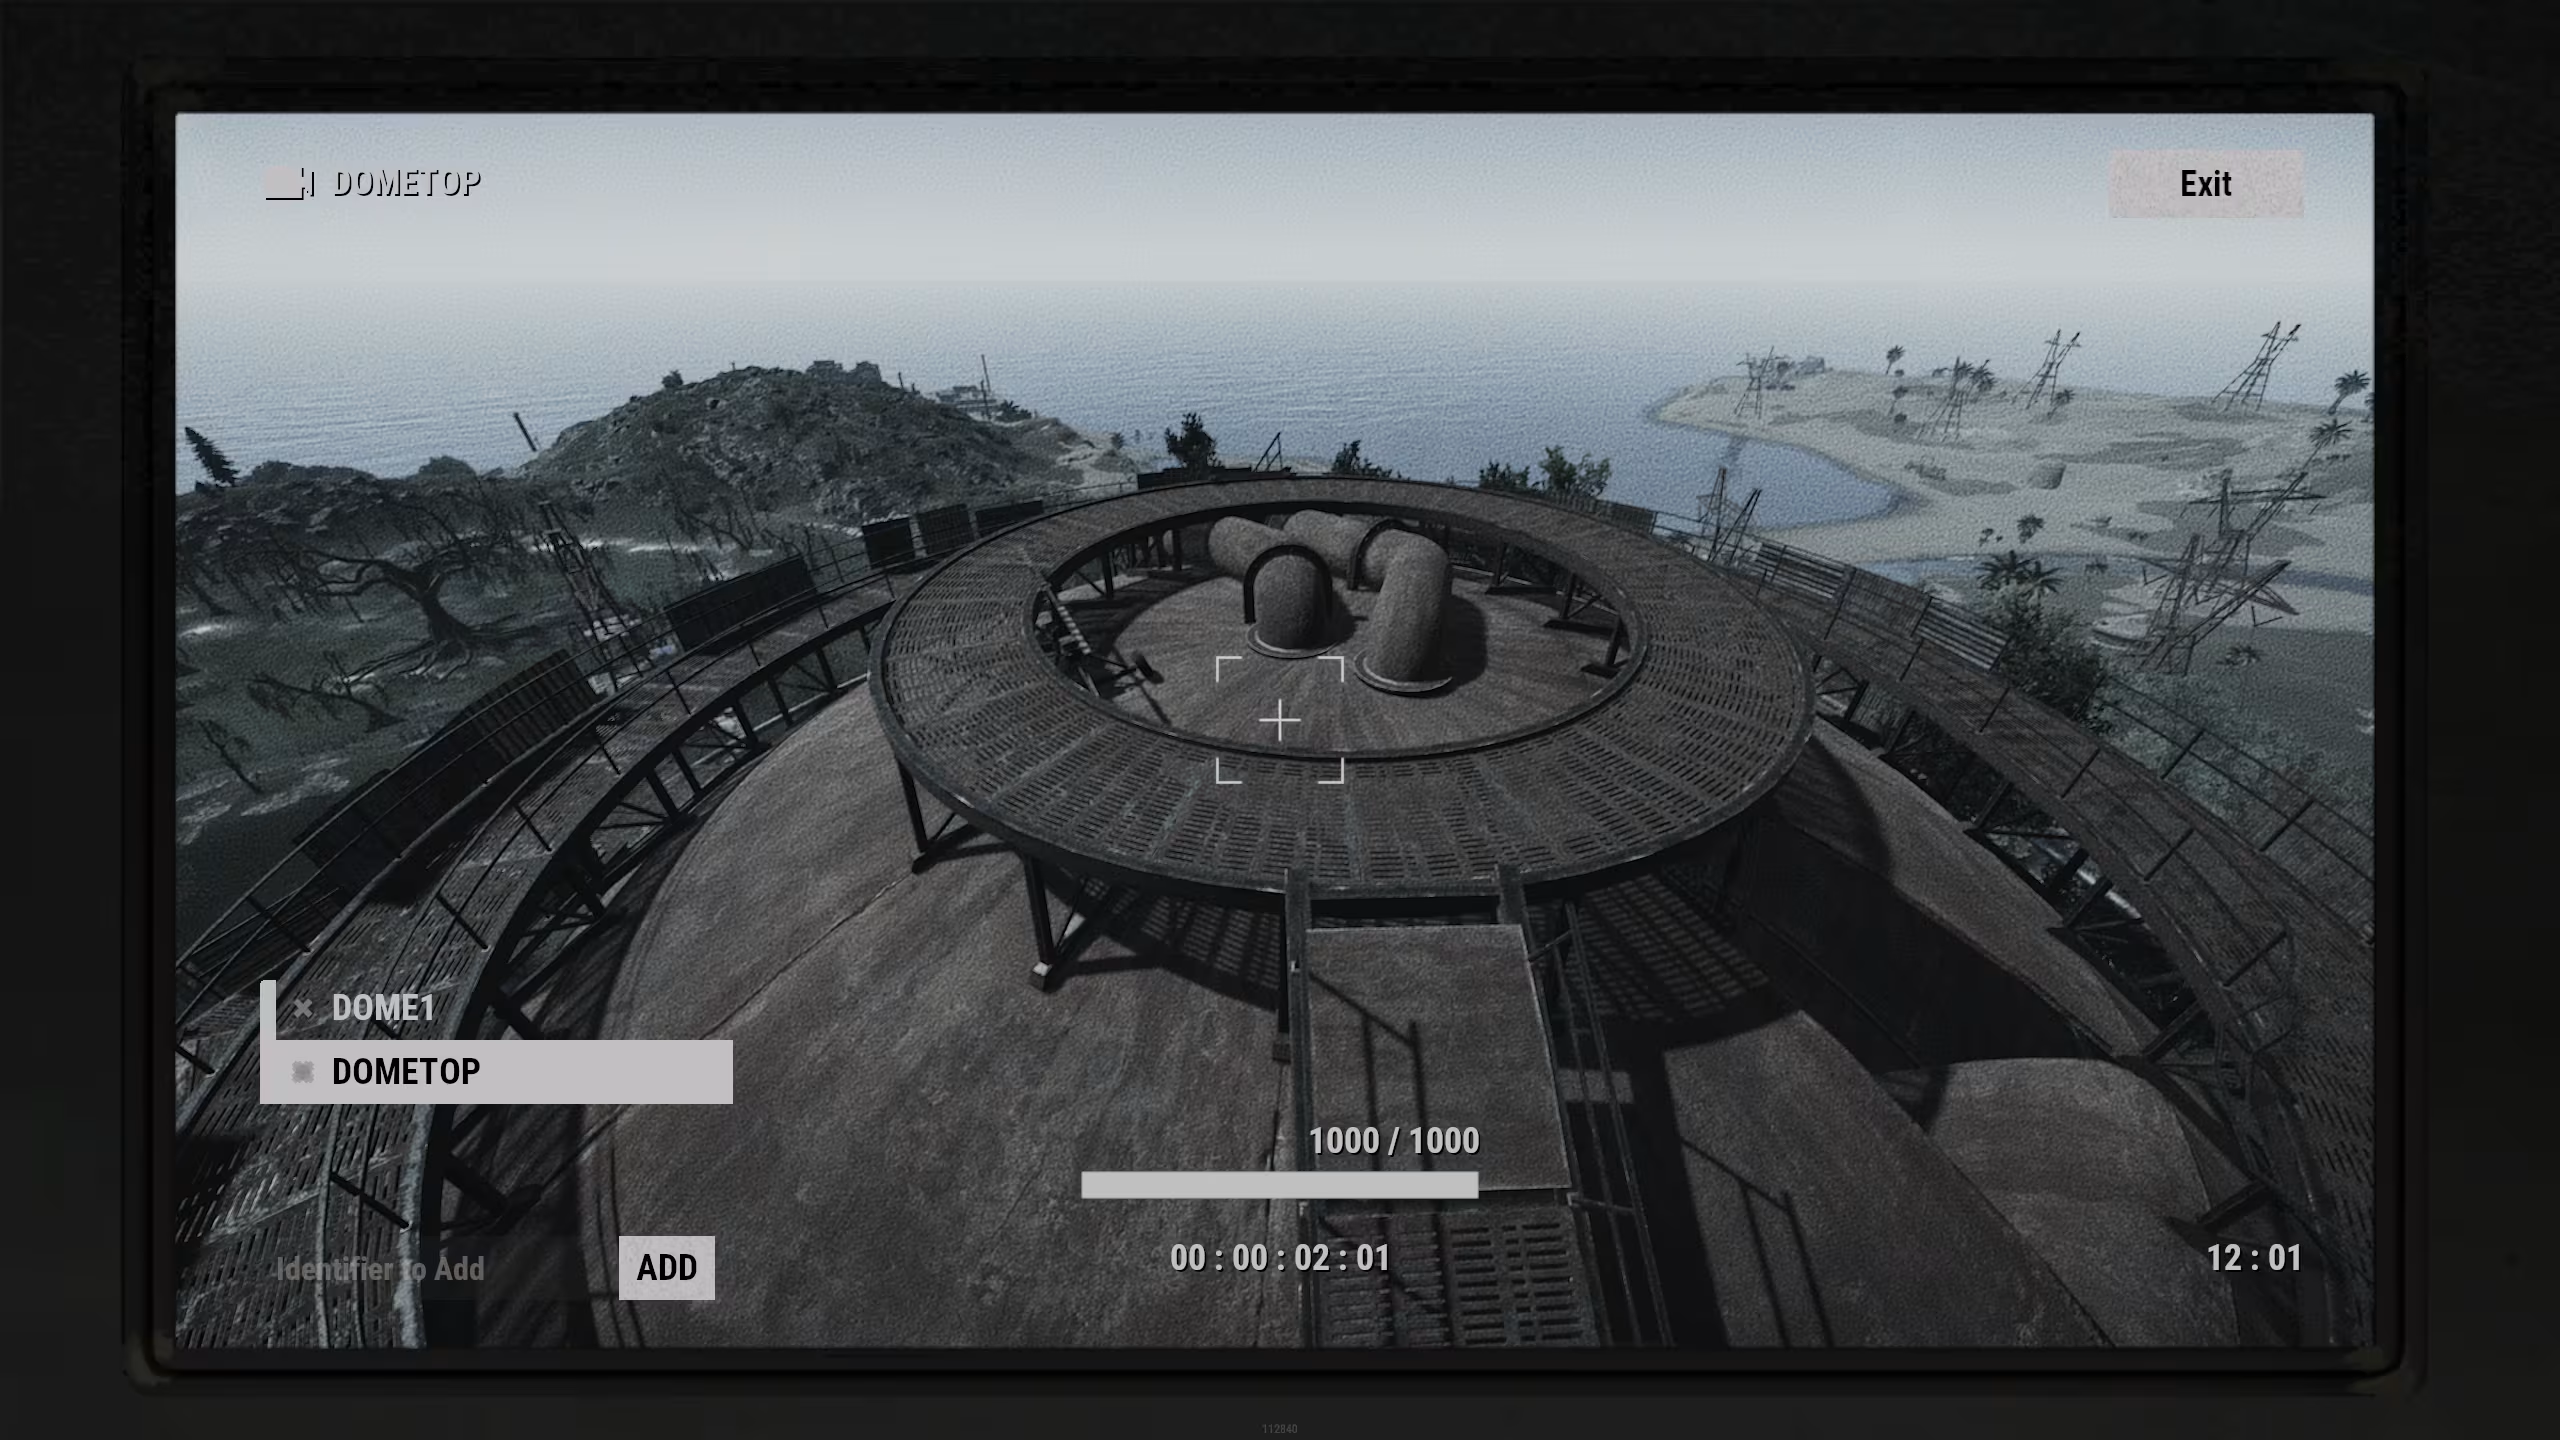
Cameras
The Dome has two surveillance cameras, which can be used to monitor the entrance and the top of the structure—a very useful feature for strategic play.
With the top camera, you can easily track the spawn of military crates, allowing you to loot them before anyone else.
- 📷
DOME1– Covers the entrance to the Dome - 📷
DOMETOP– Covers the top of the Dome

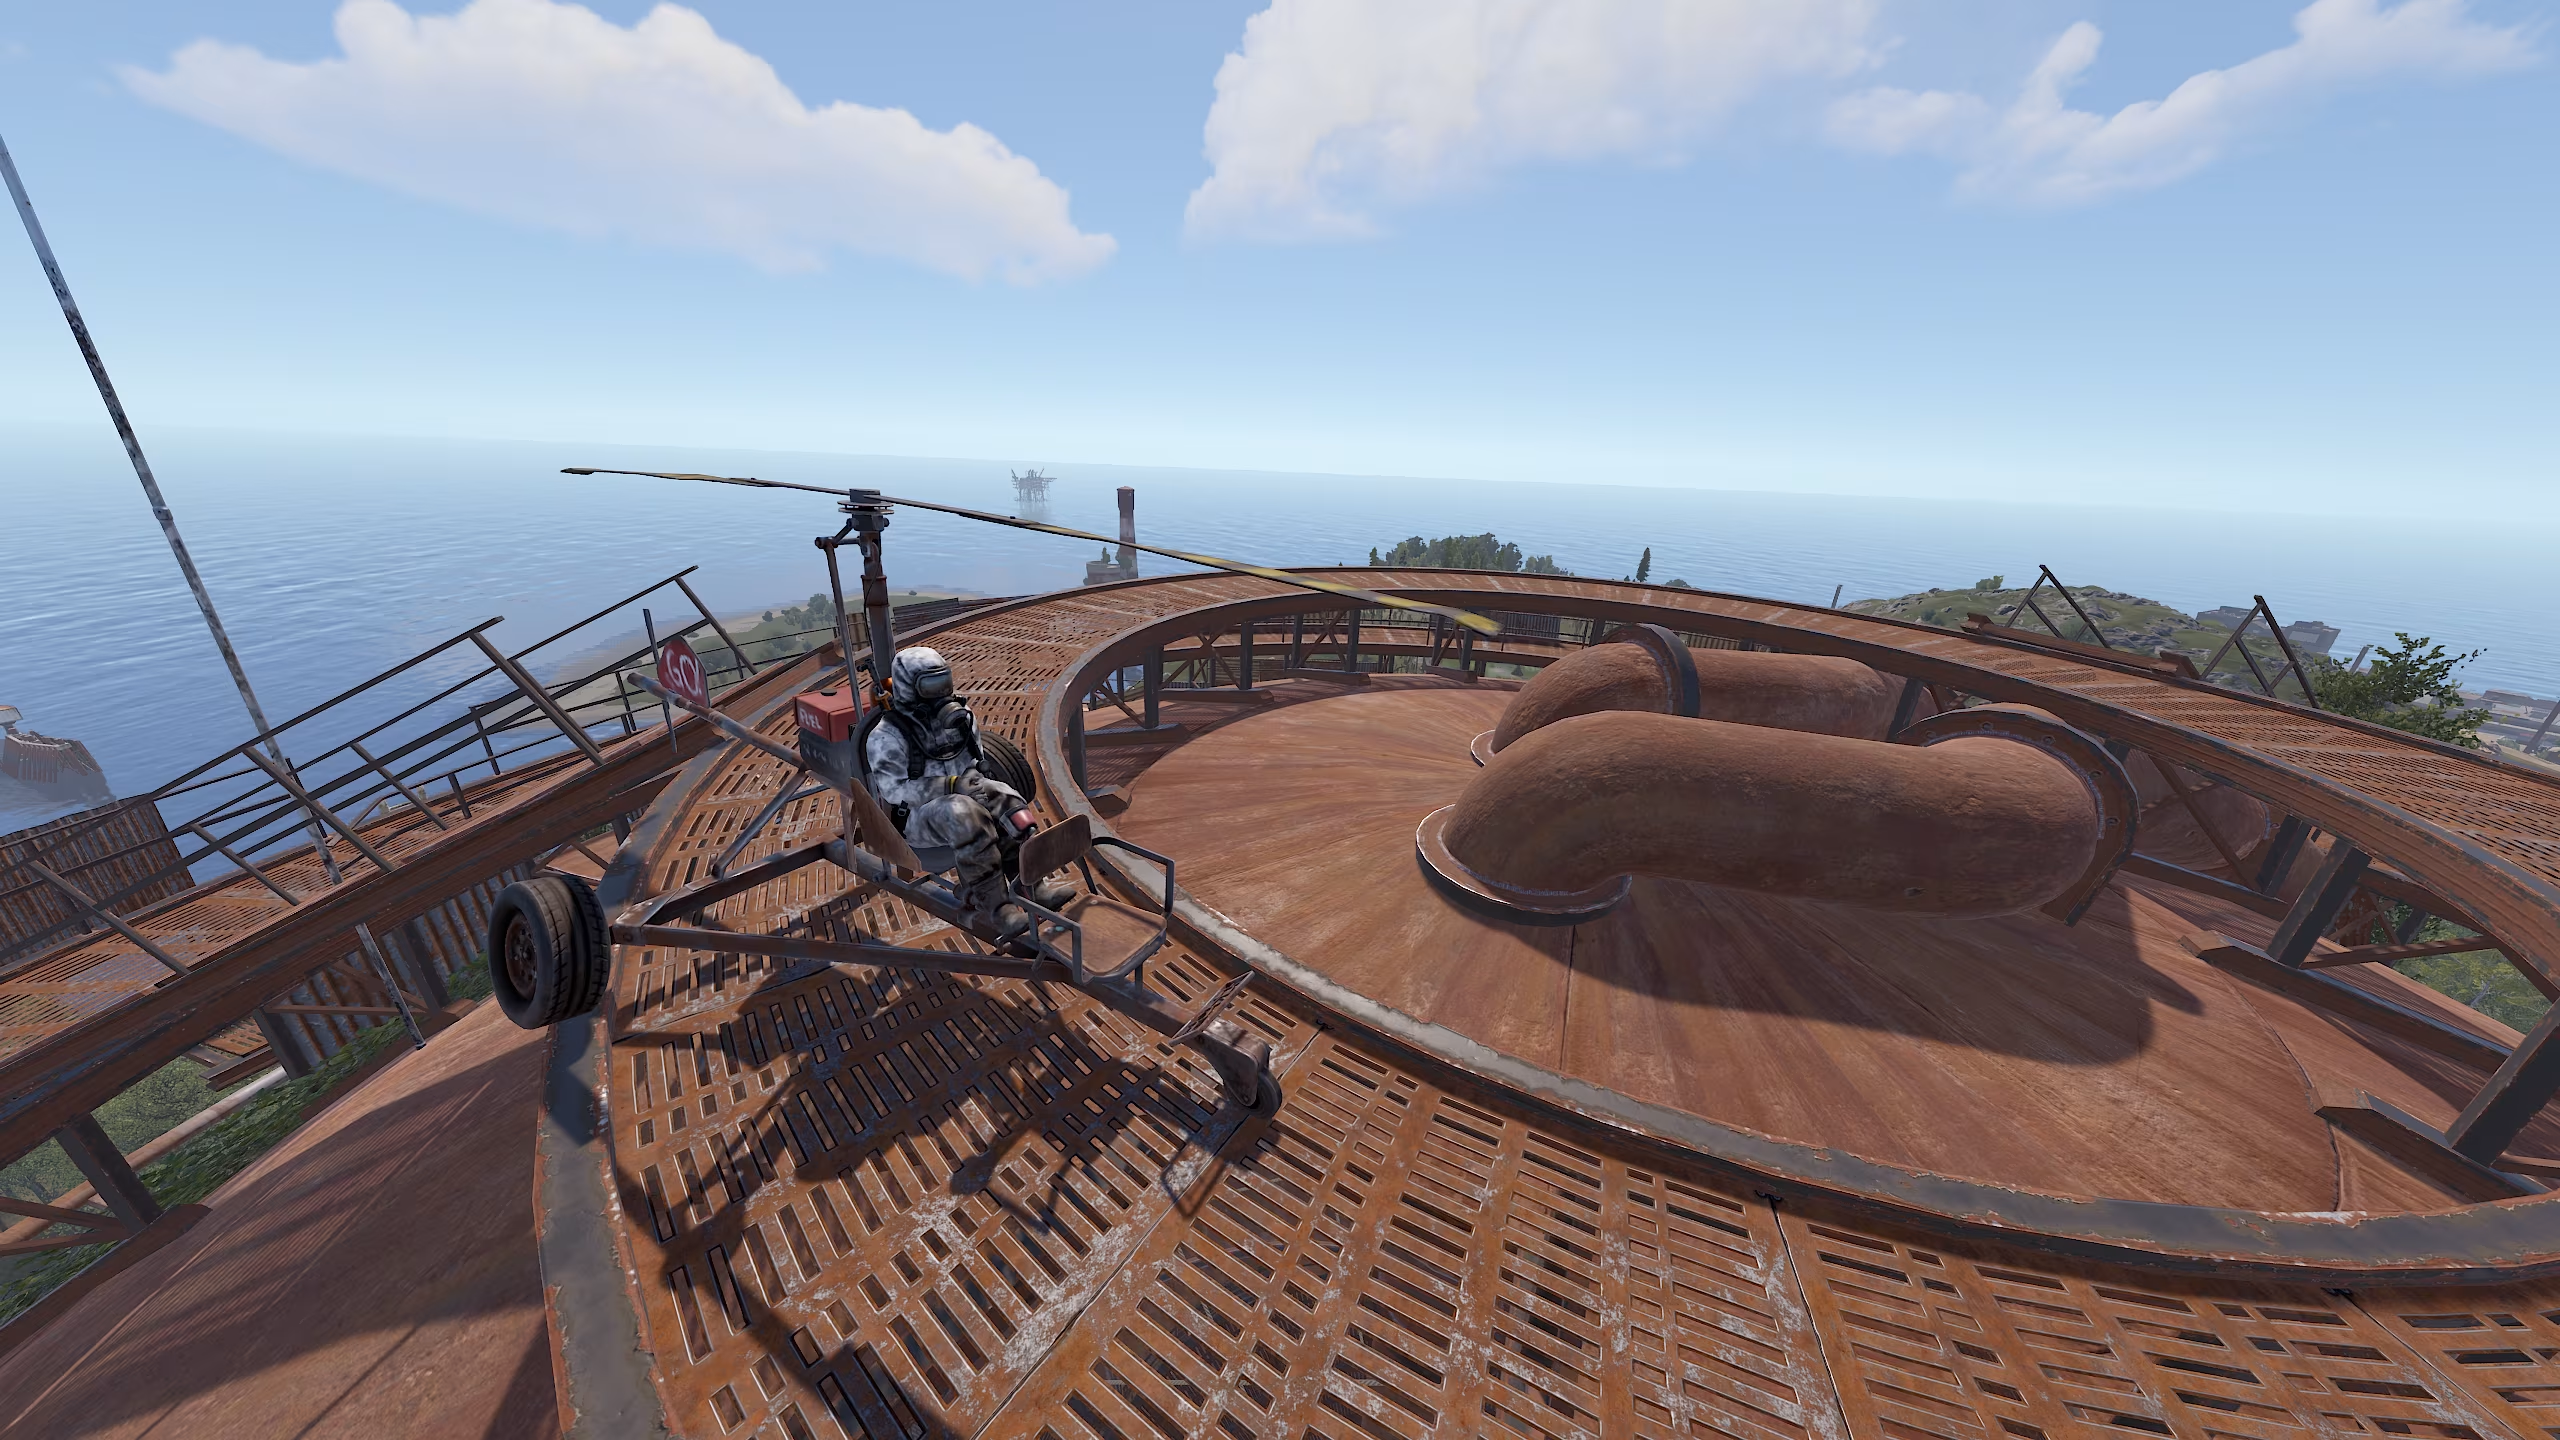
MiniCopter
Another great advantage is using a mini-copter to loot the Dome.
- Monitor the top loot spawn using the DOMETOP camera.
- Once the military crates appear, hop into your mini-copter and fly straight to the top.
- Land carefully! Make sure to touch down evenly, as a bad landing could cause your mini-copter to get stuck—forcing you to descend on foot.
Using this method, you can bypass the entire climb and quickly secure the best loot before anyone else. 🚁💨
Fast Descent
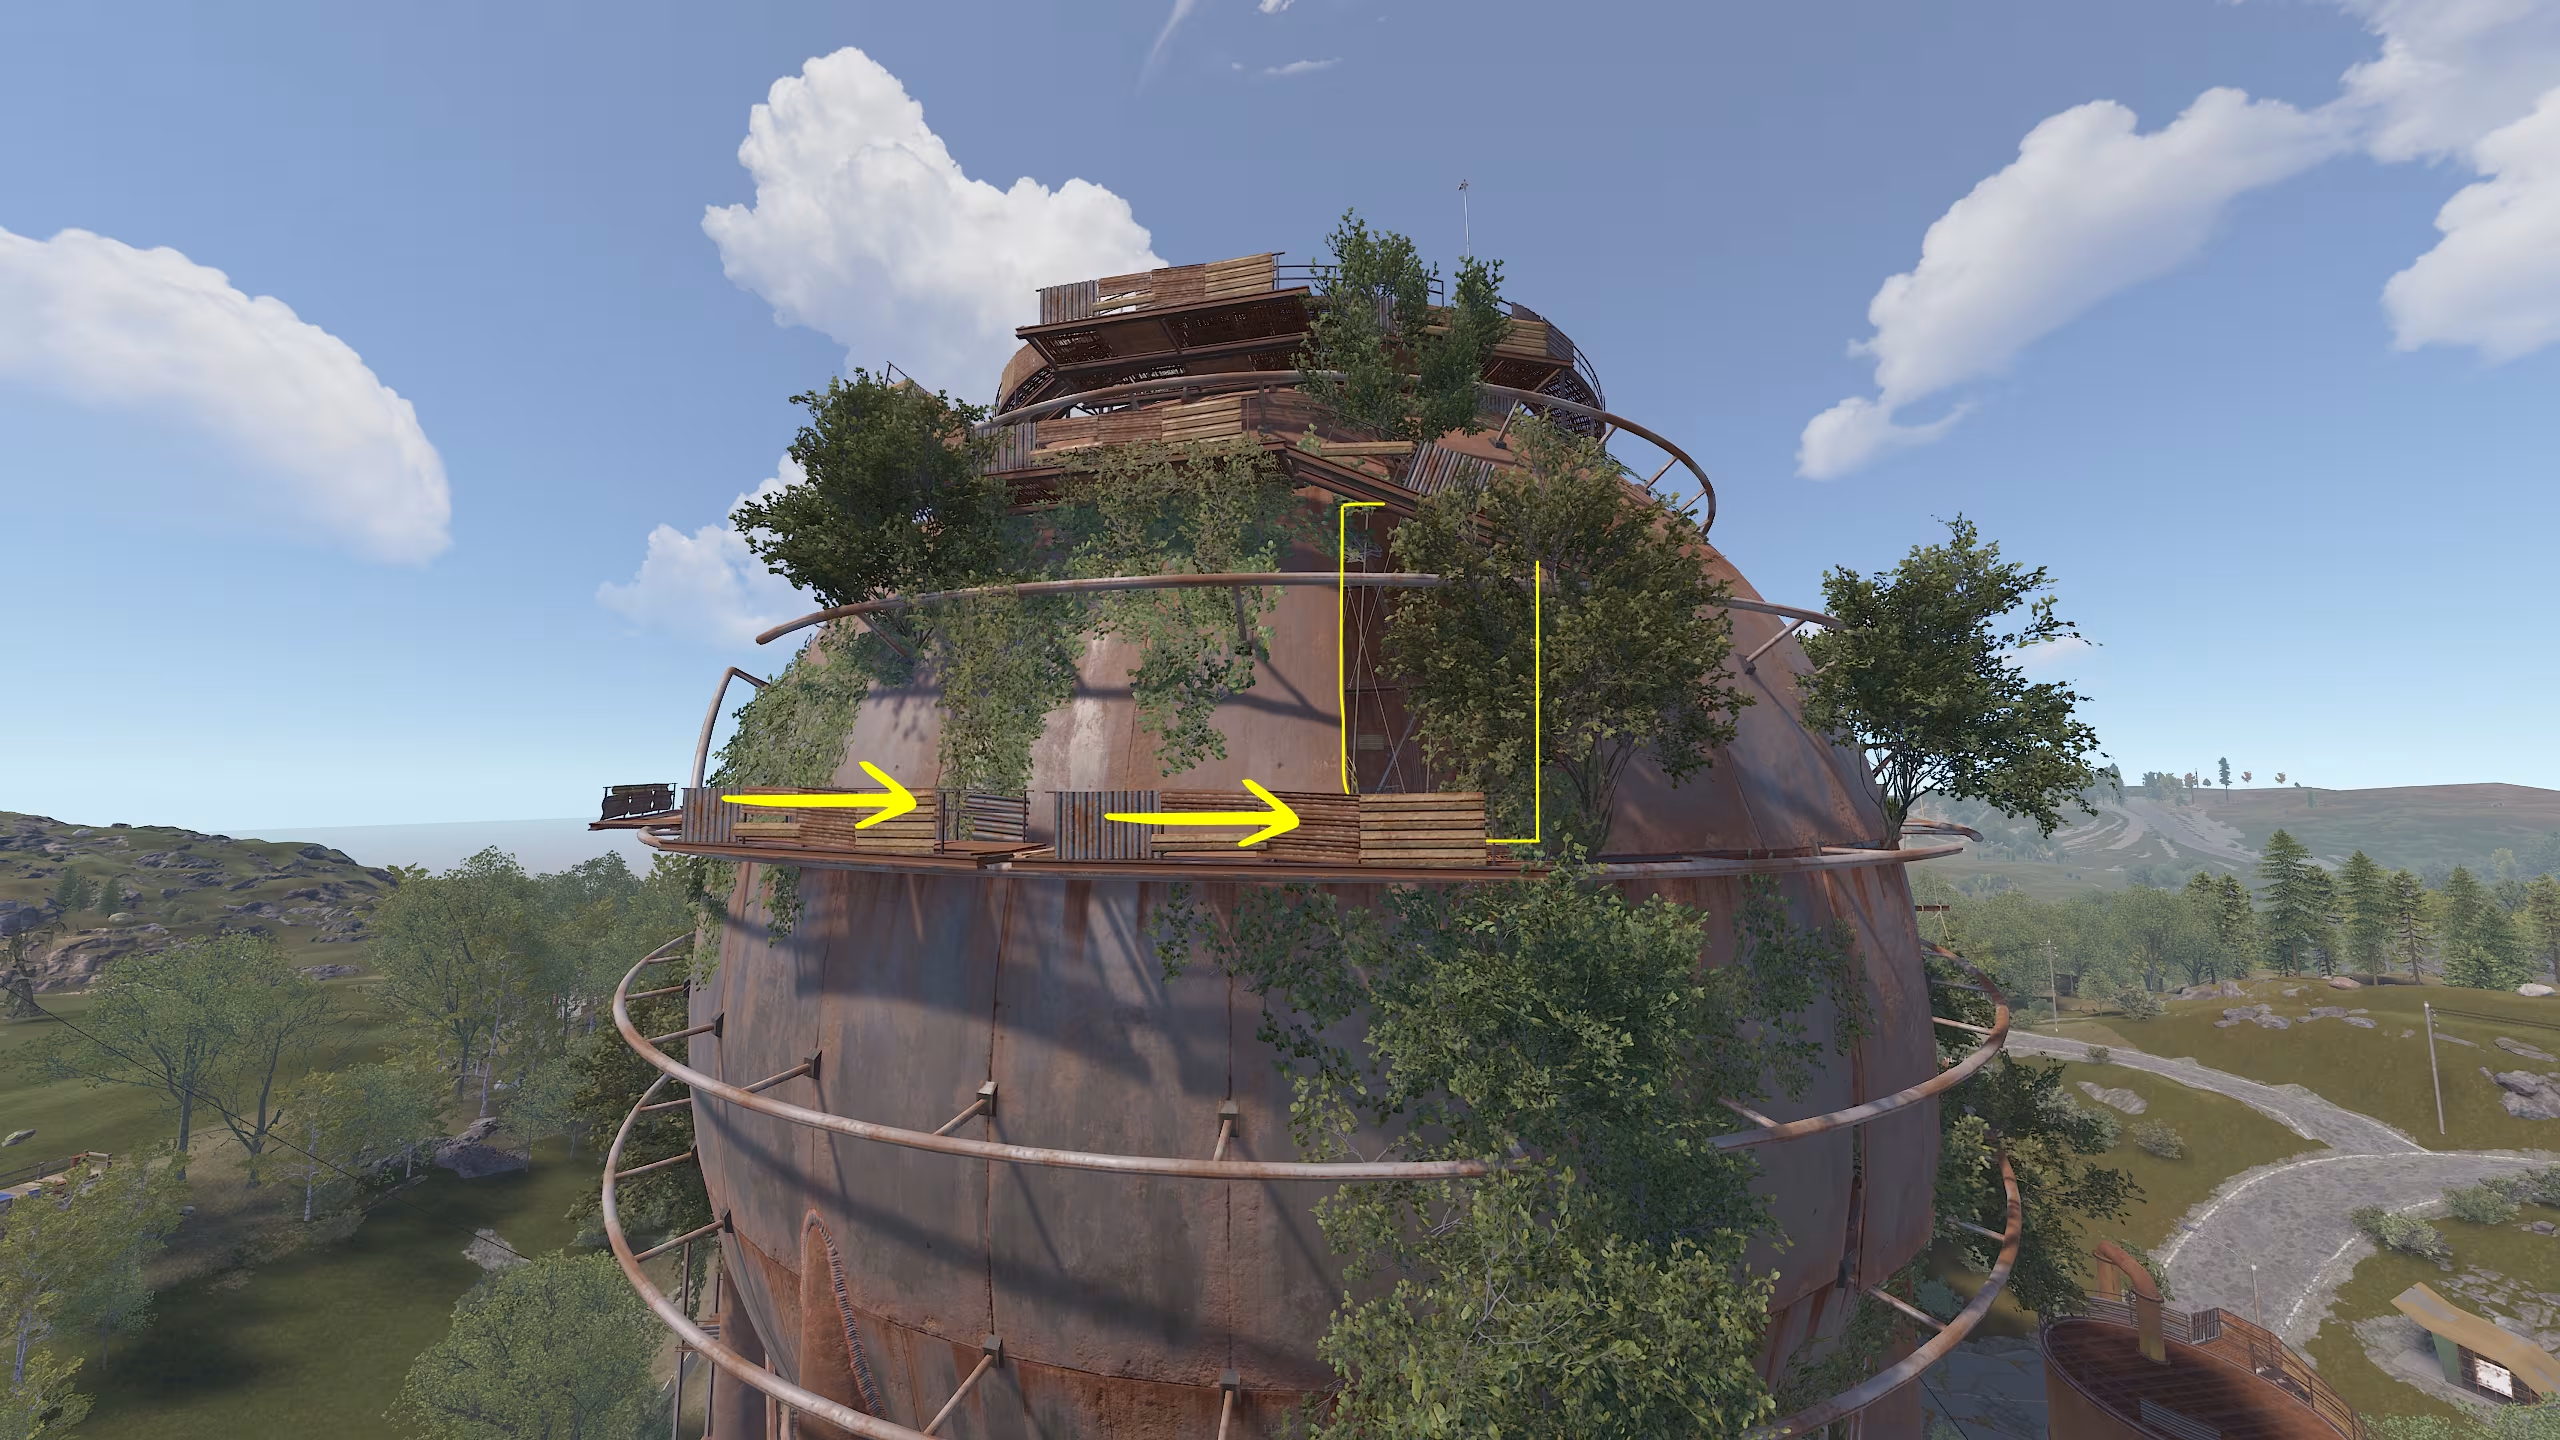
If you don’t want to waste time on the standard way down, there’s a faster method—but be aware that there's a risk of dying if done incorrectly.
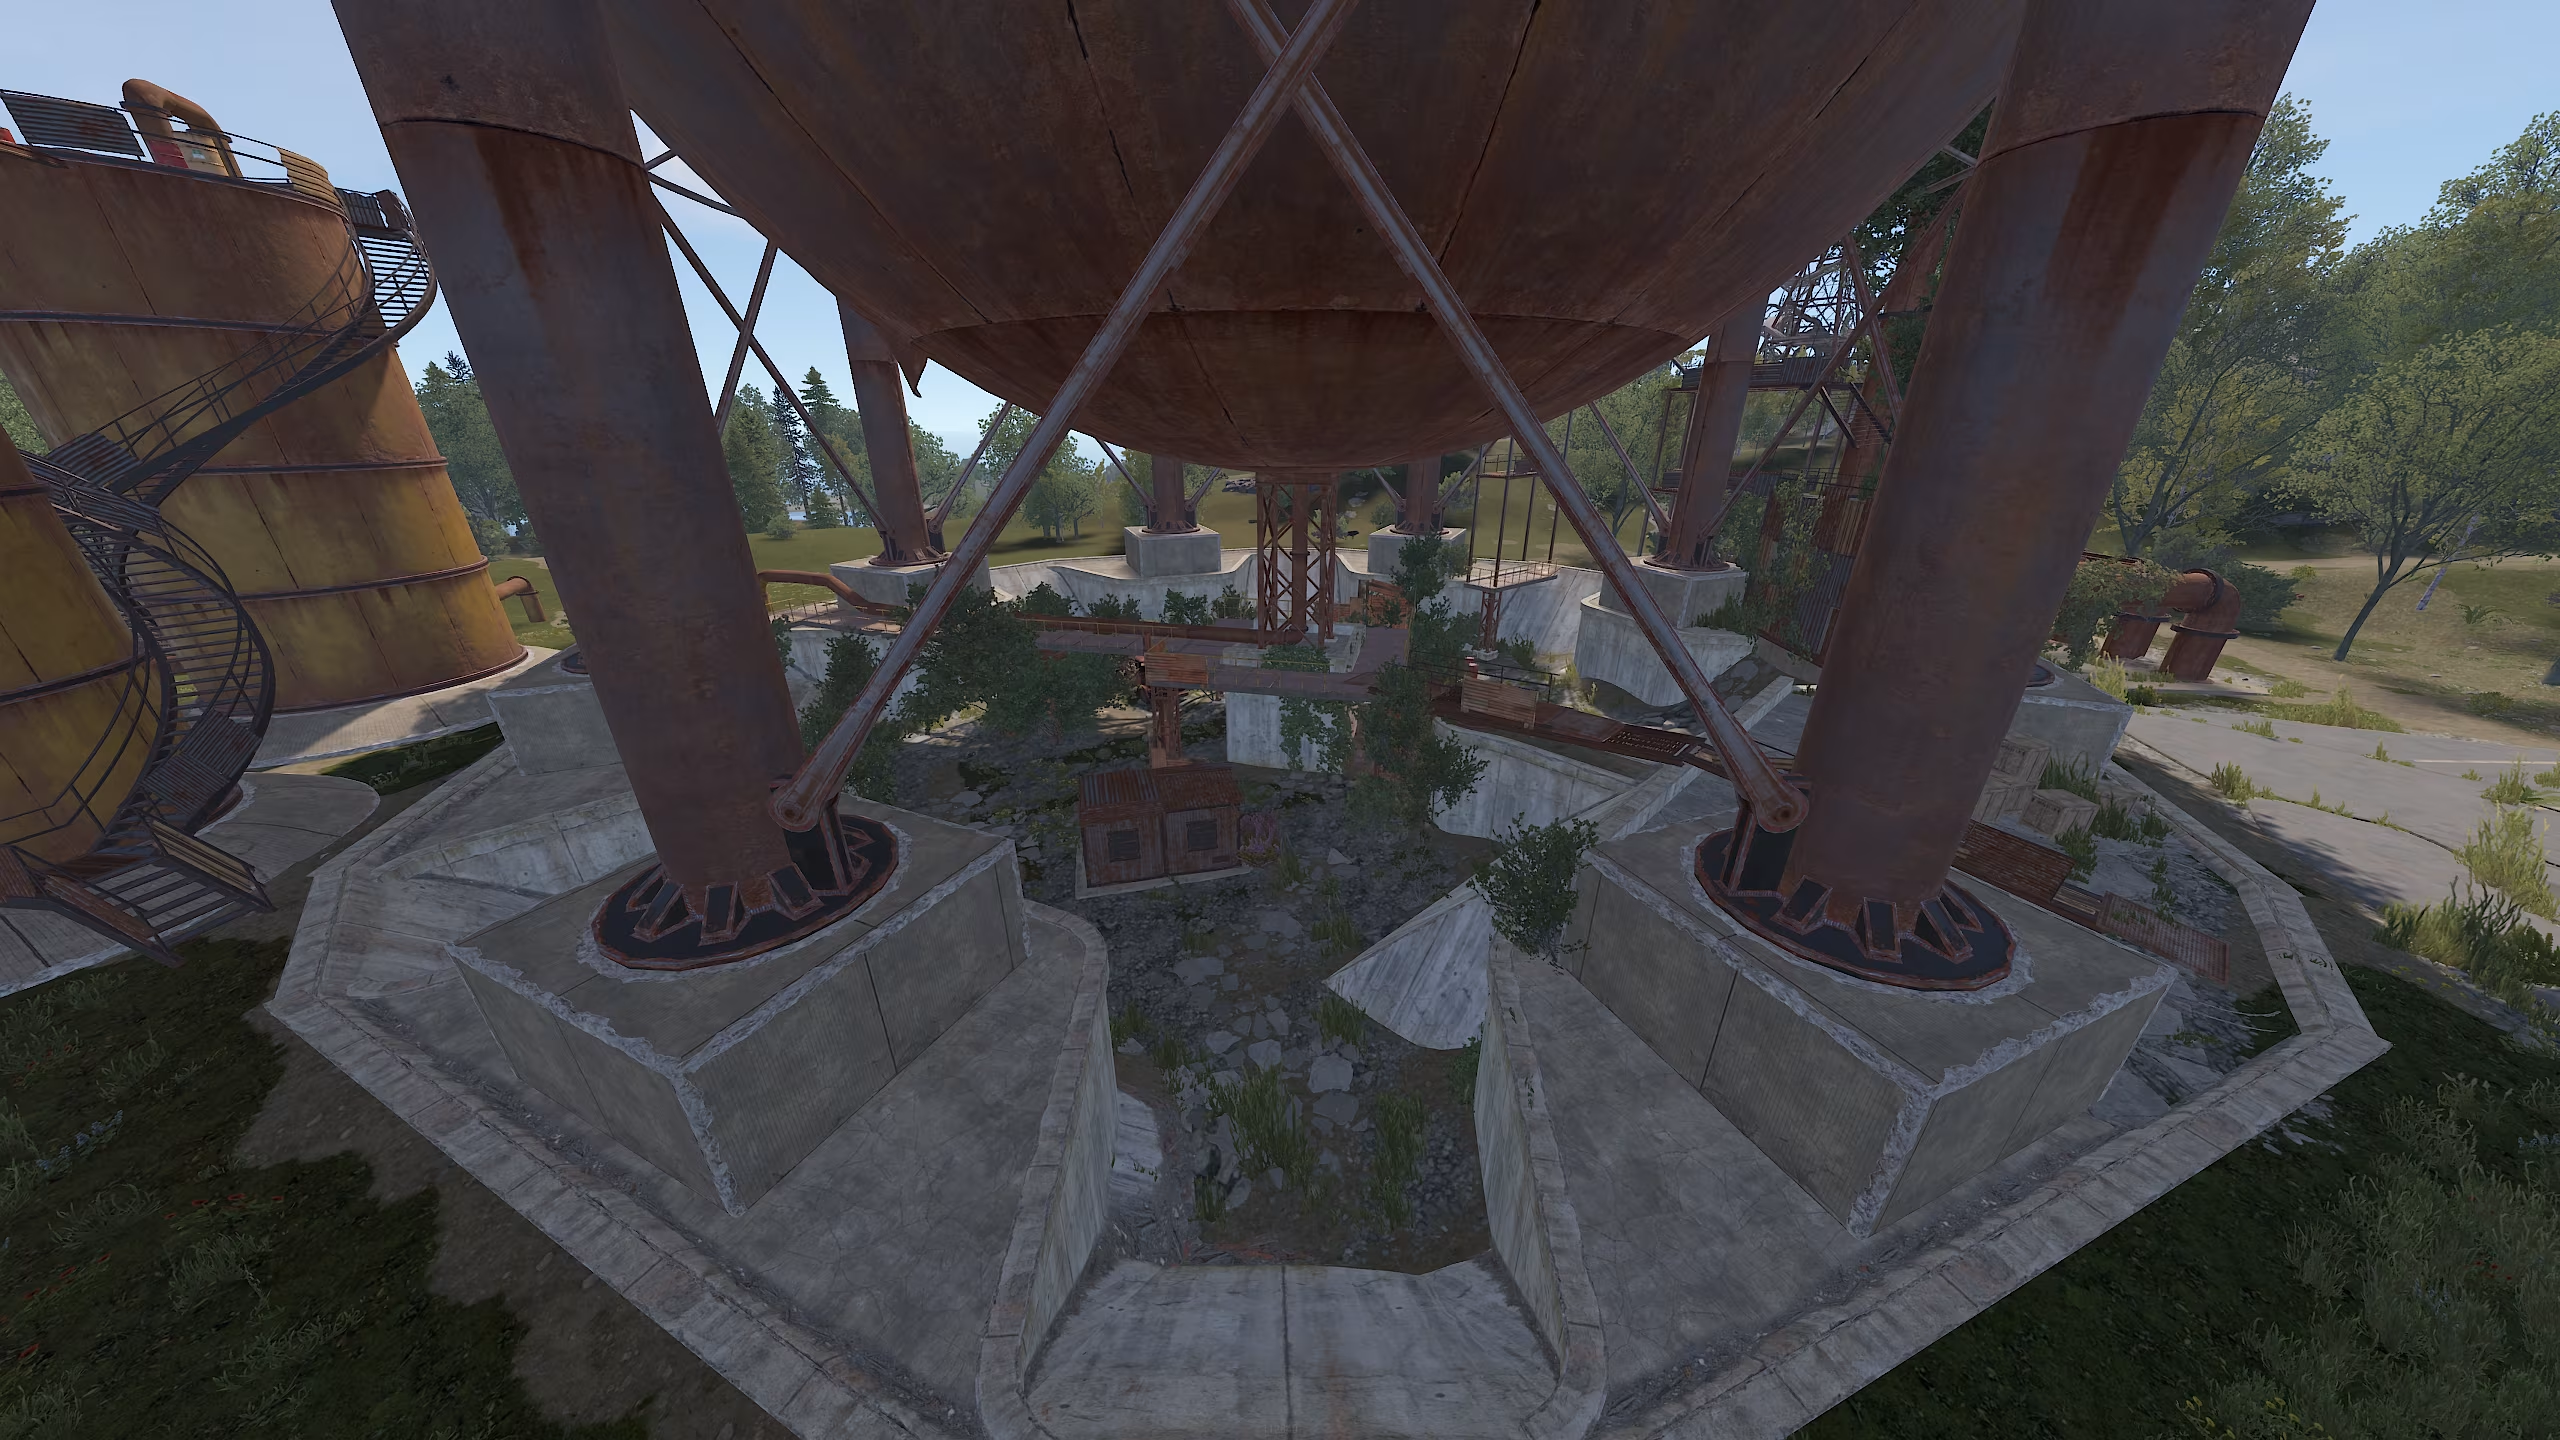
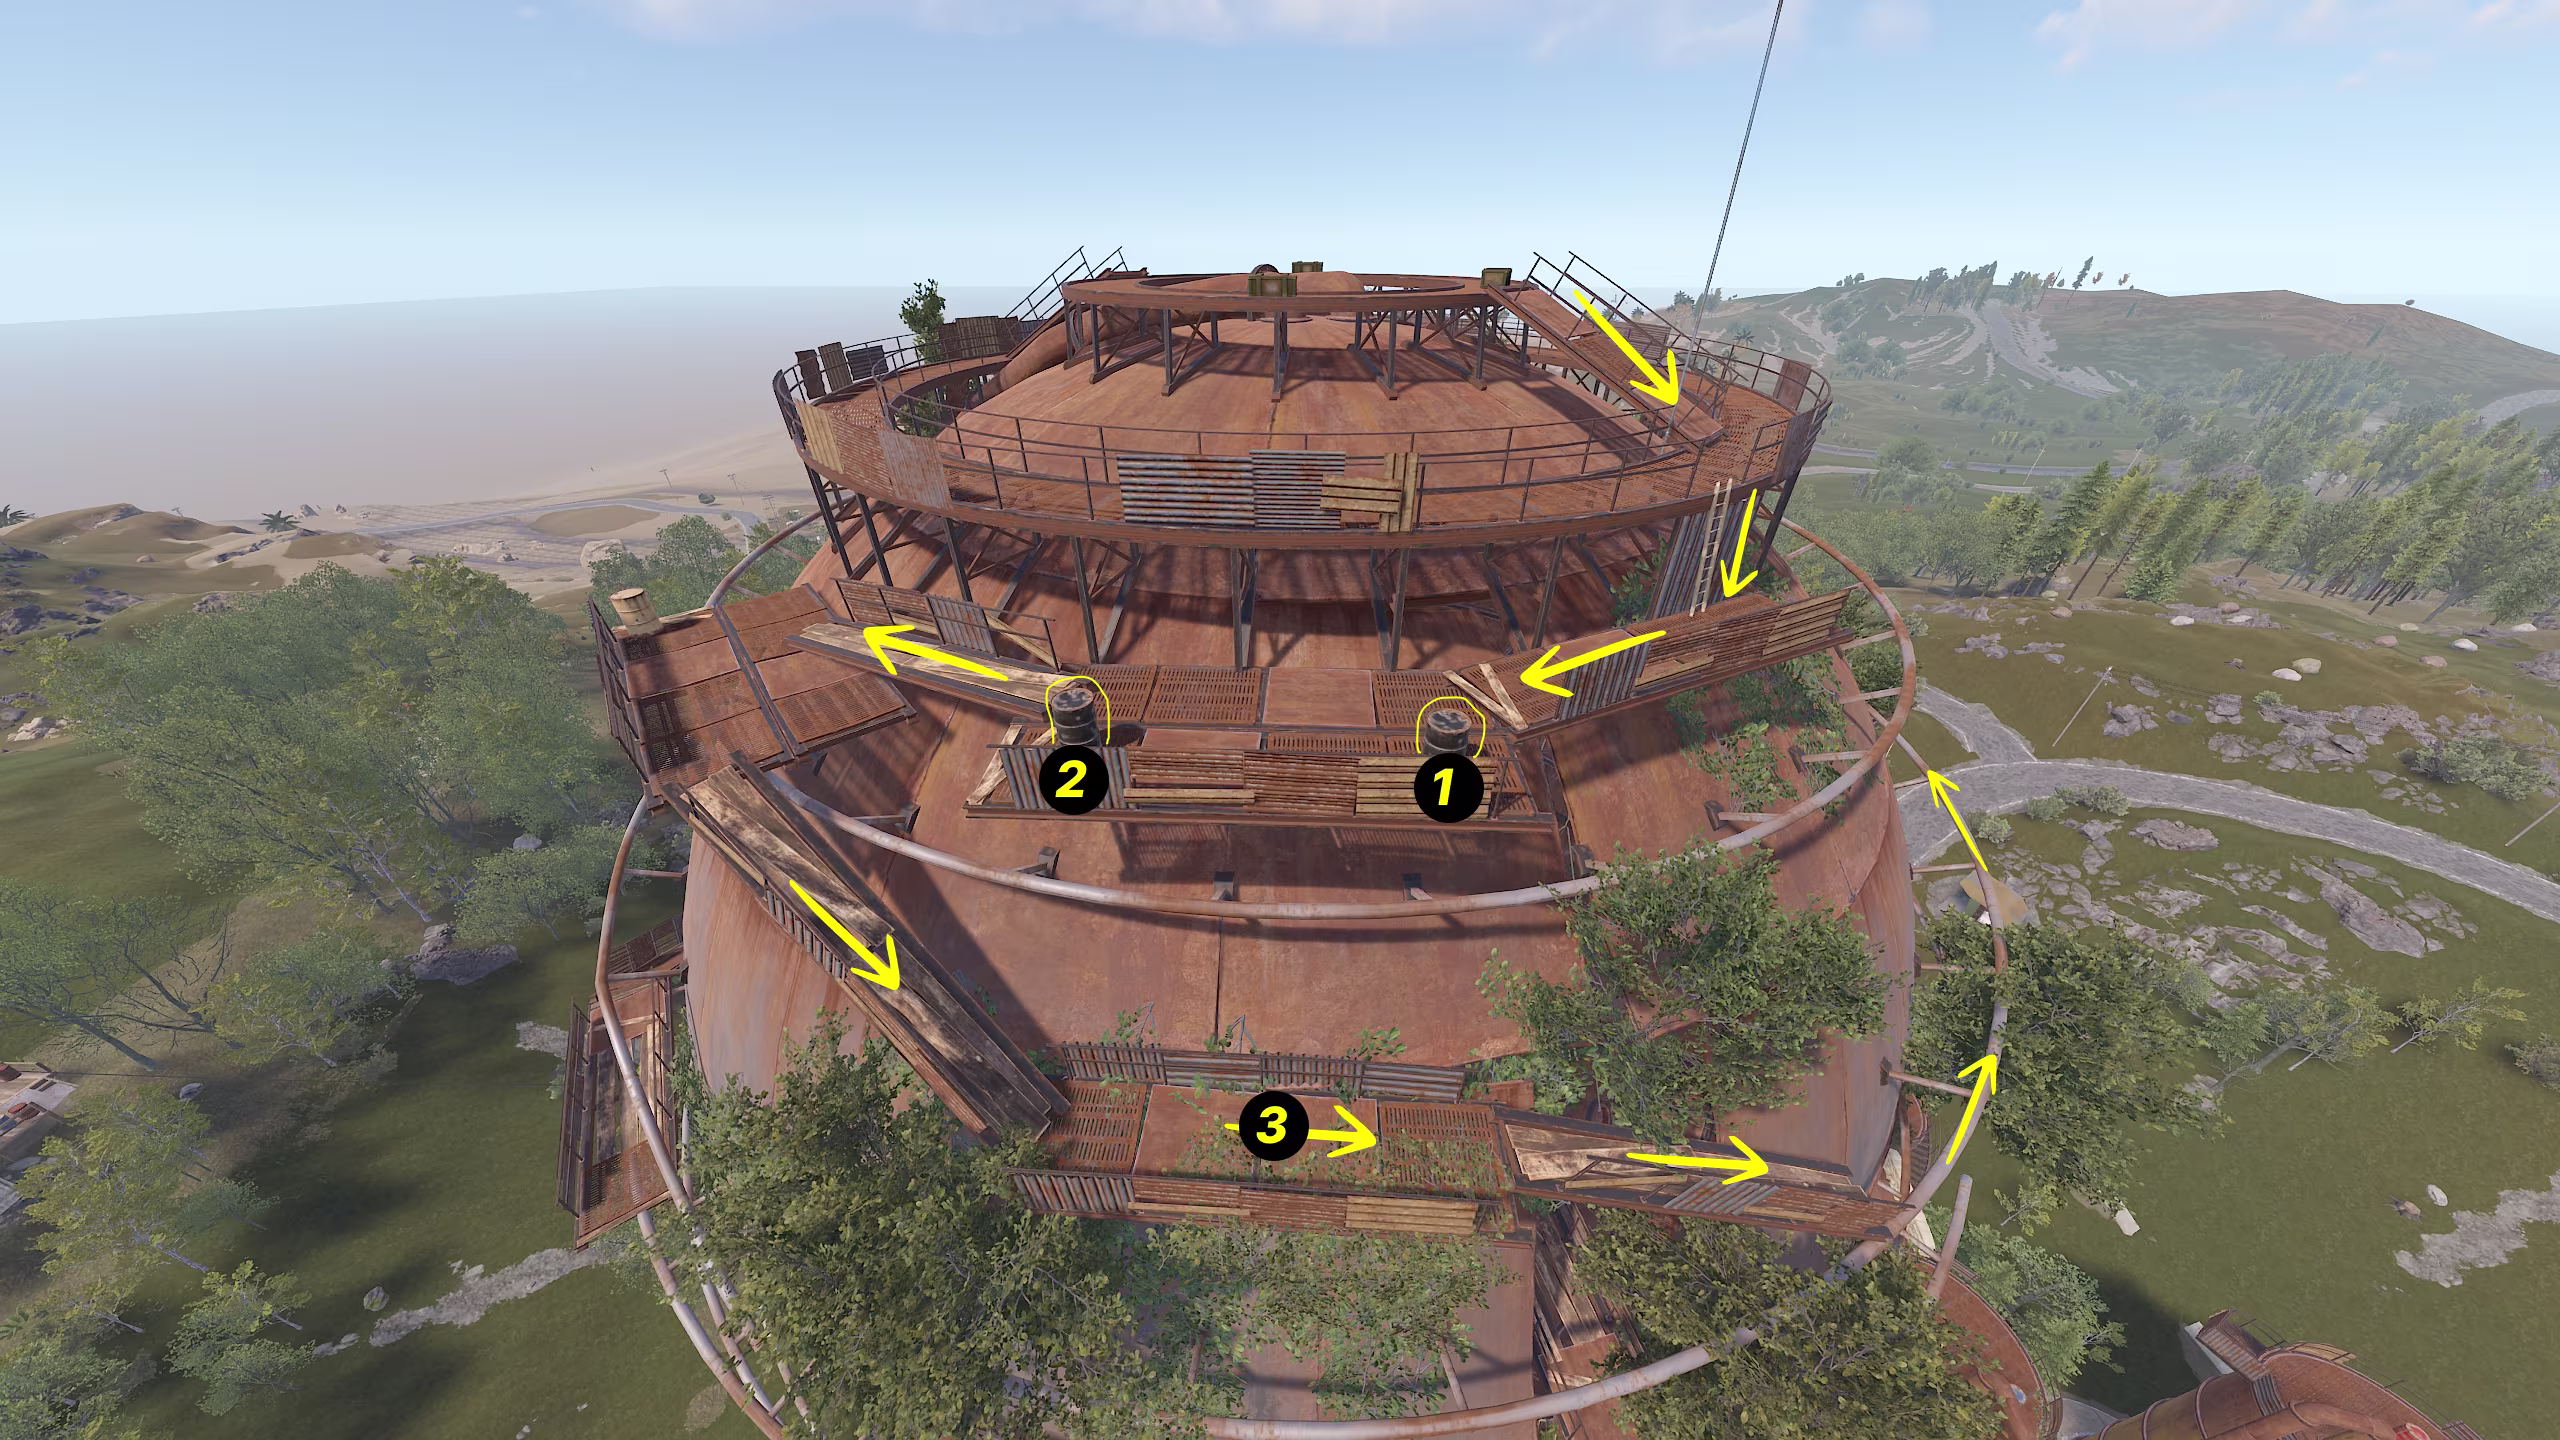
- Find the two large pipes running down the side of the Dome—these will act as your "elevator."
- Climb over the railing and descend along the pipes to the second crossbeam (marked as "2" on the schematic).
- Slowly slide down, holding "S" to press your back against the walls for better control.
- Once you get wedged between the pipes, you must stick to one side to avoid fall damage.
- For example, hold "D" continuously to stay pressed against one of the pipes.
- To start falling, press "CTRL"—this will make your character squeeze between the pipes and begin descending.
- If done correctly, you will land at the bottom safely, without taking any damage.
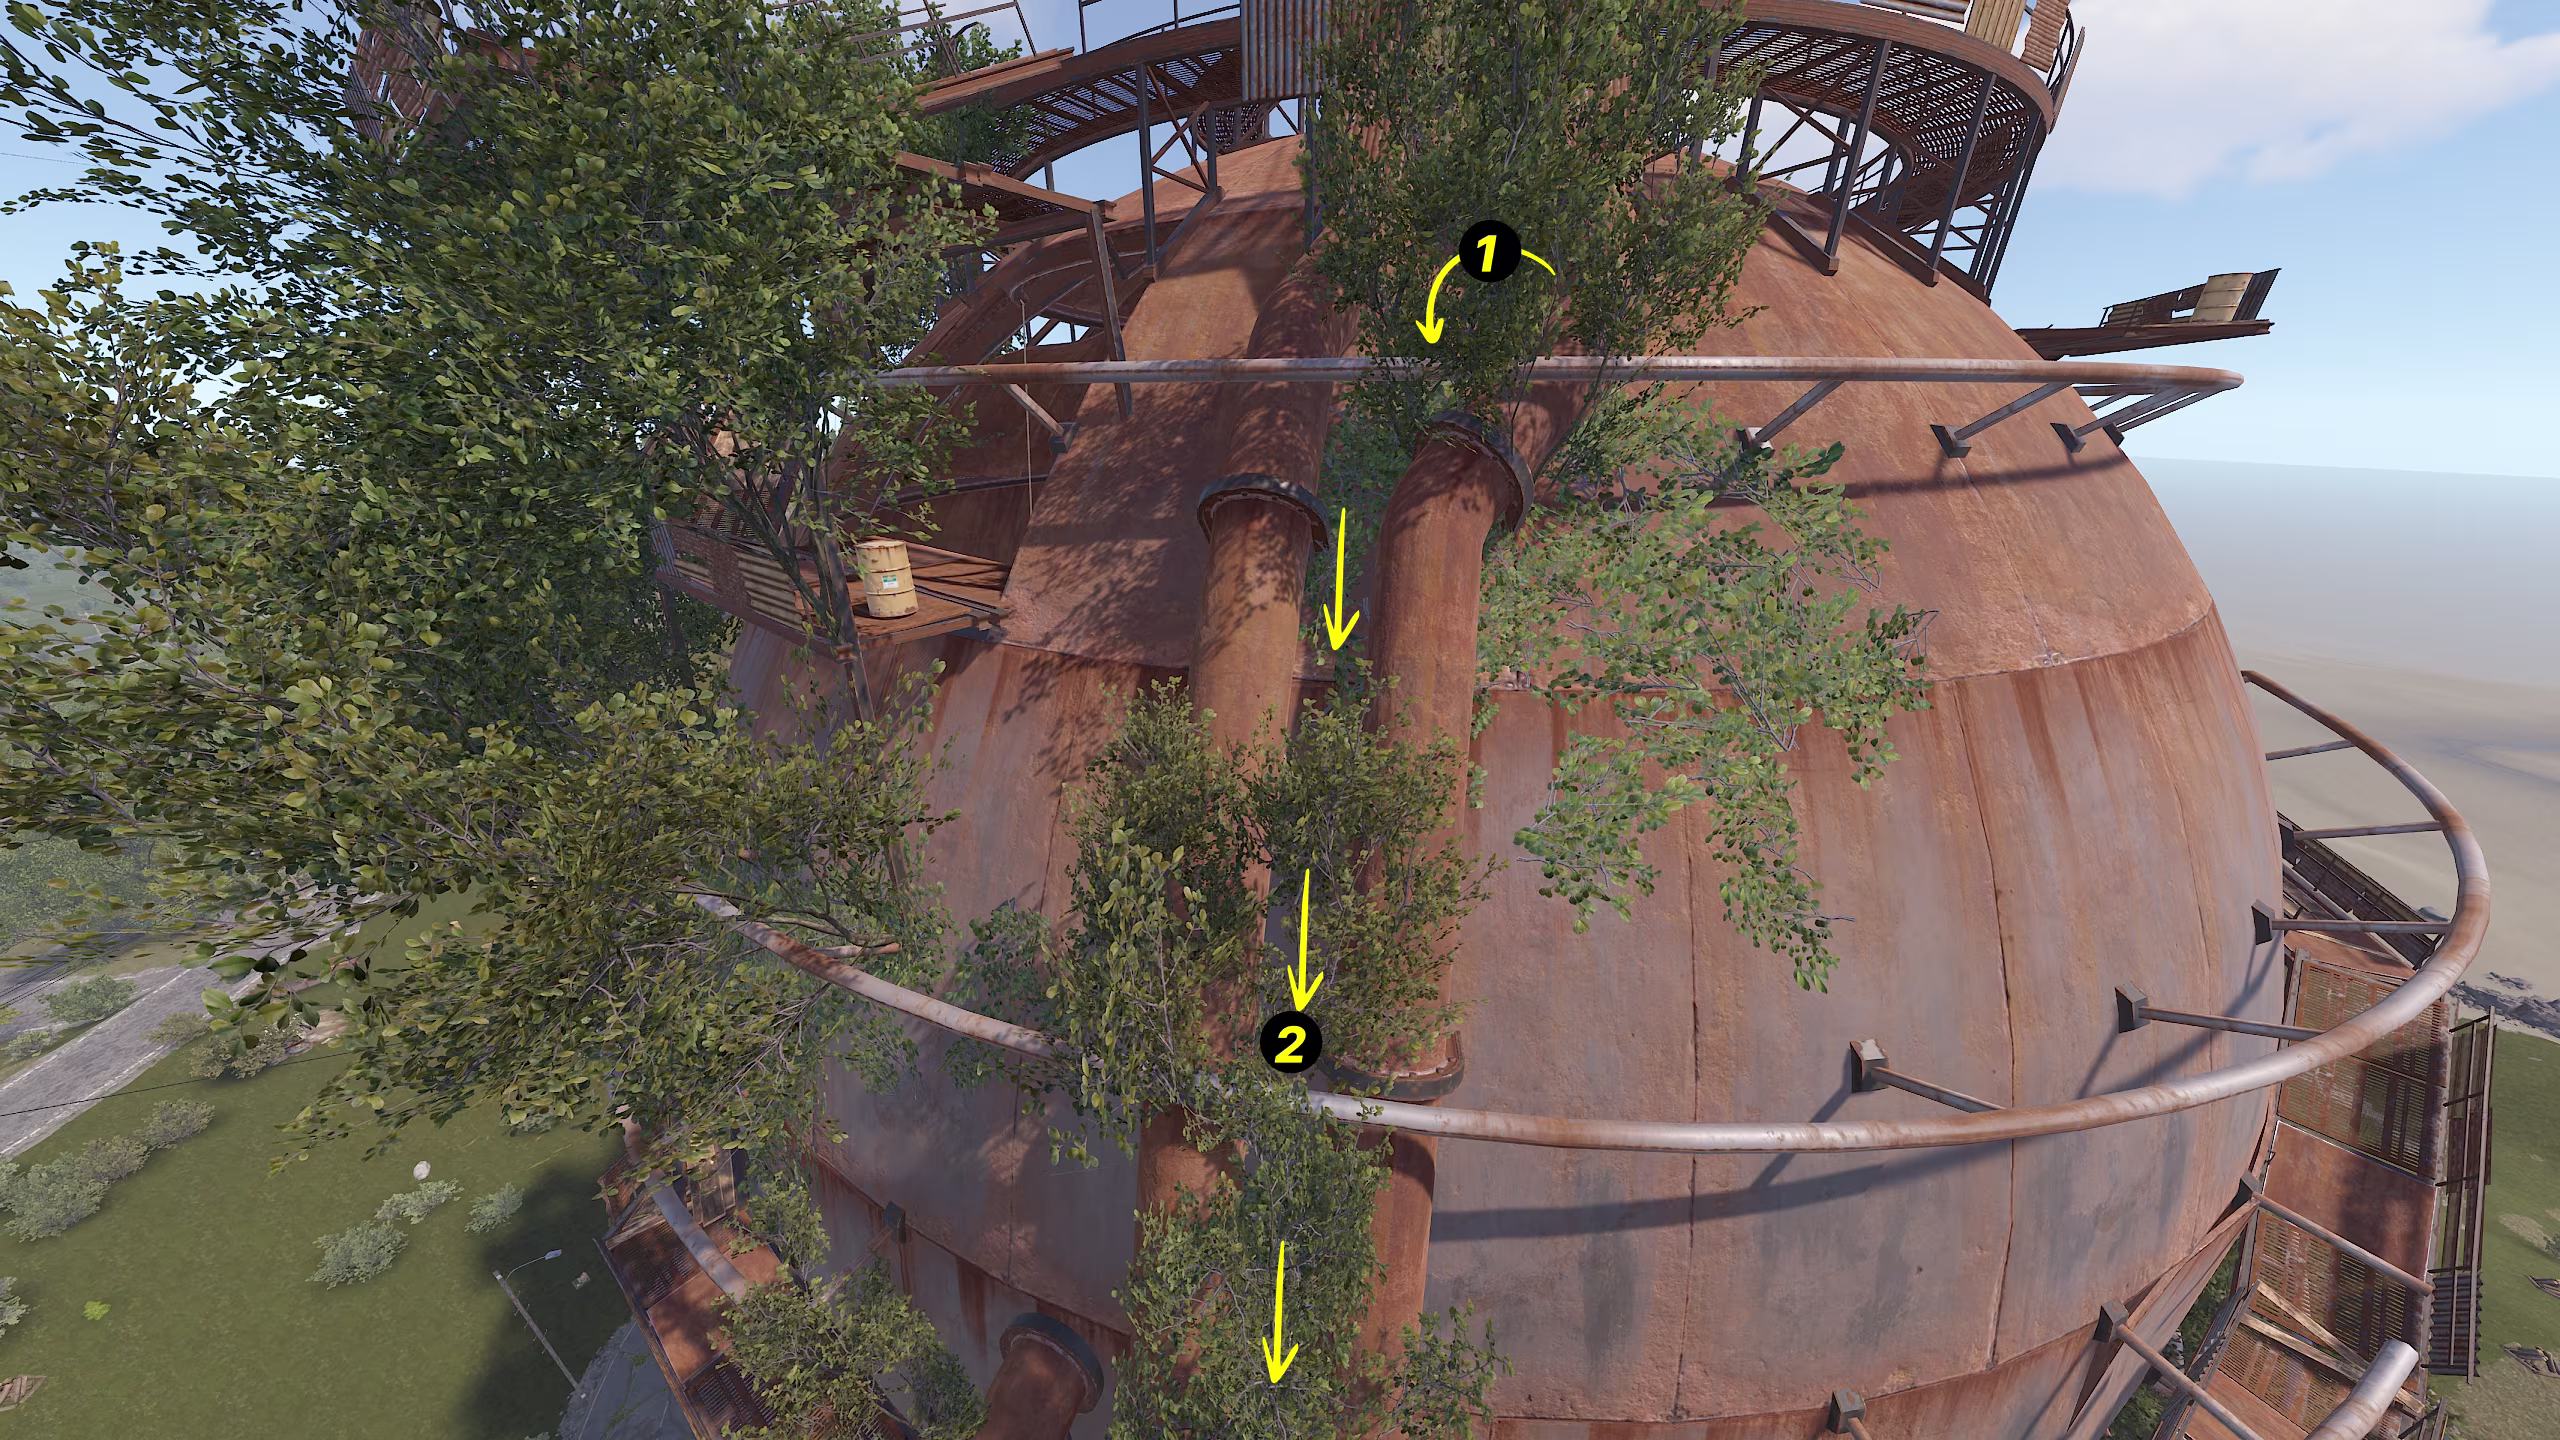

🔥 Master this trick, and you'll save tons of time while escaping the Dome!
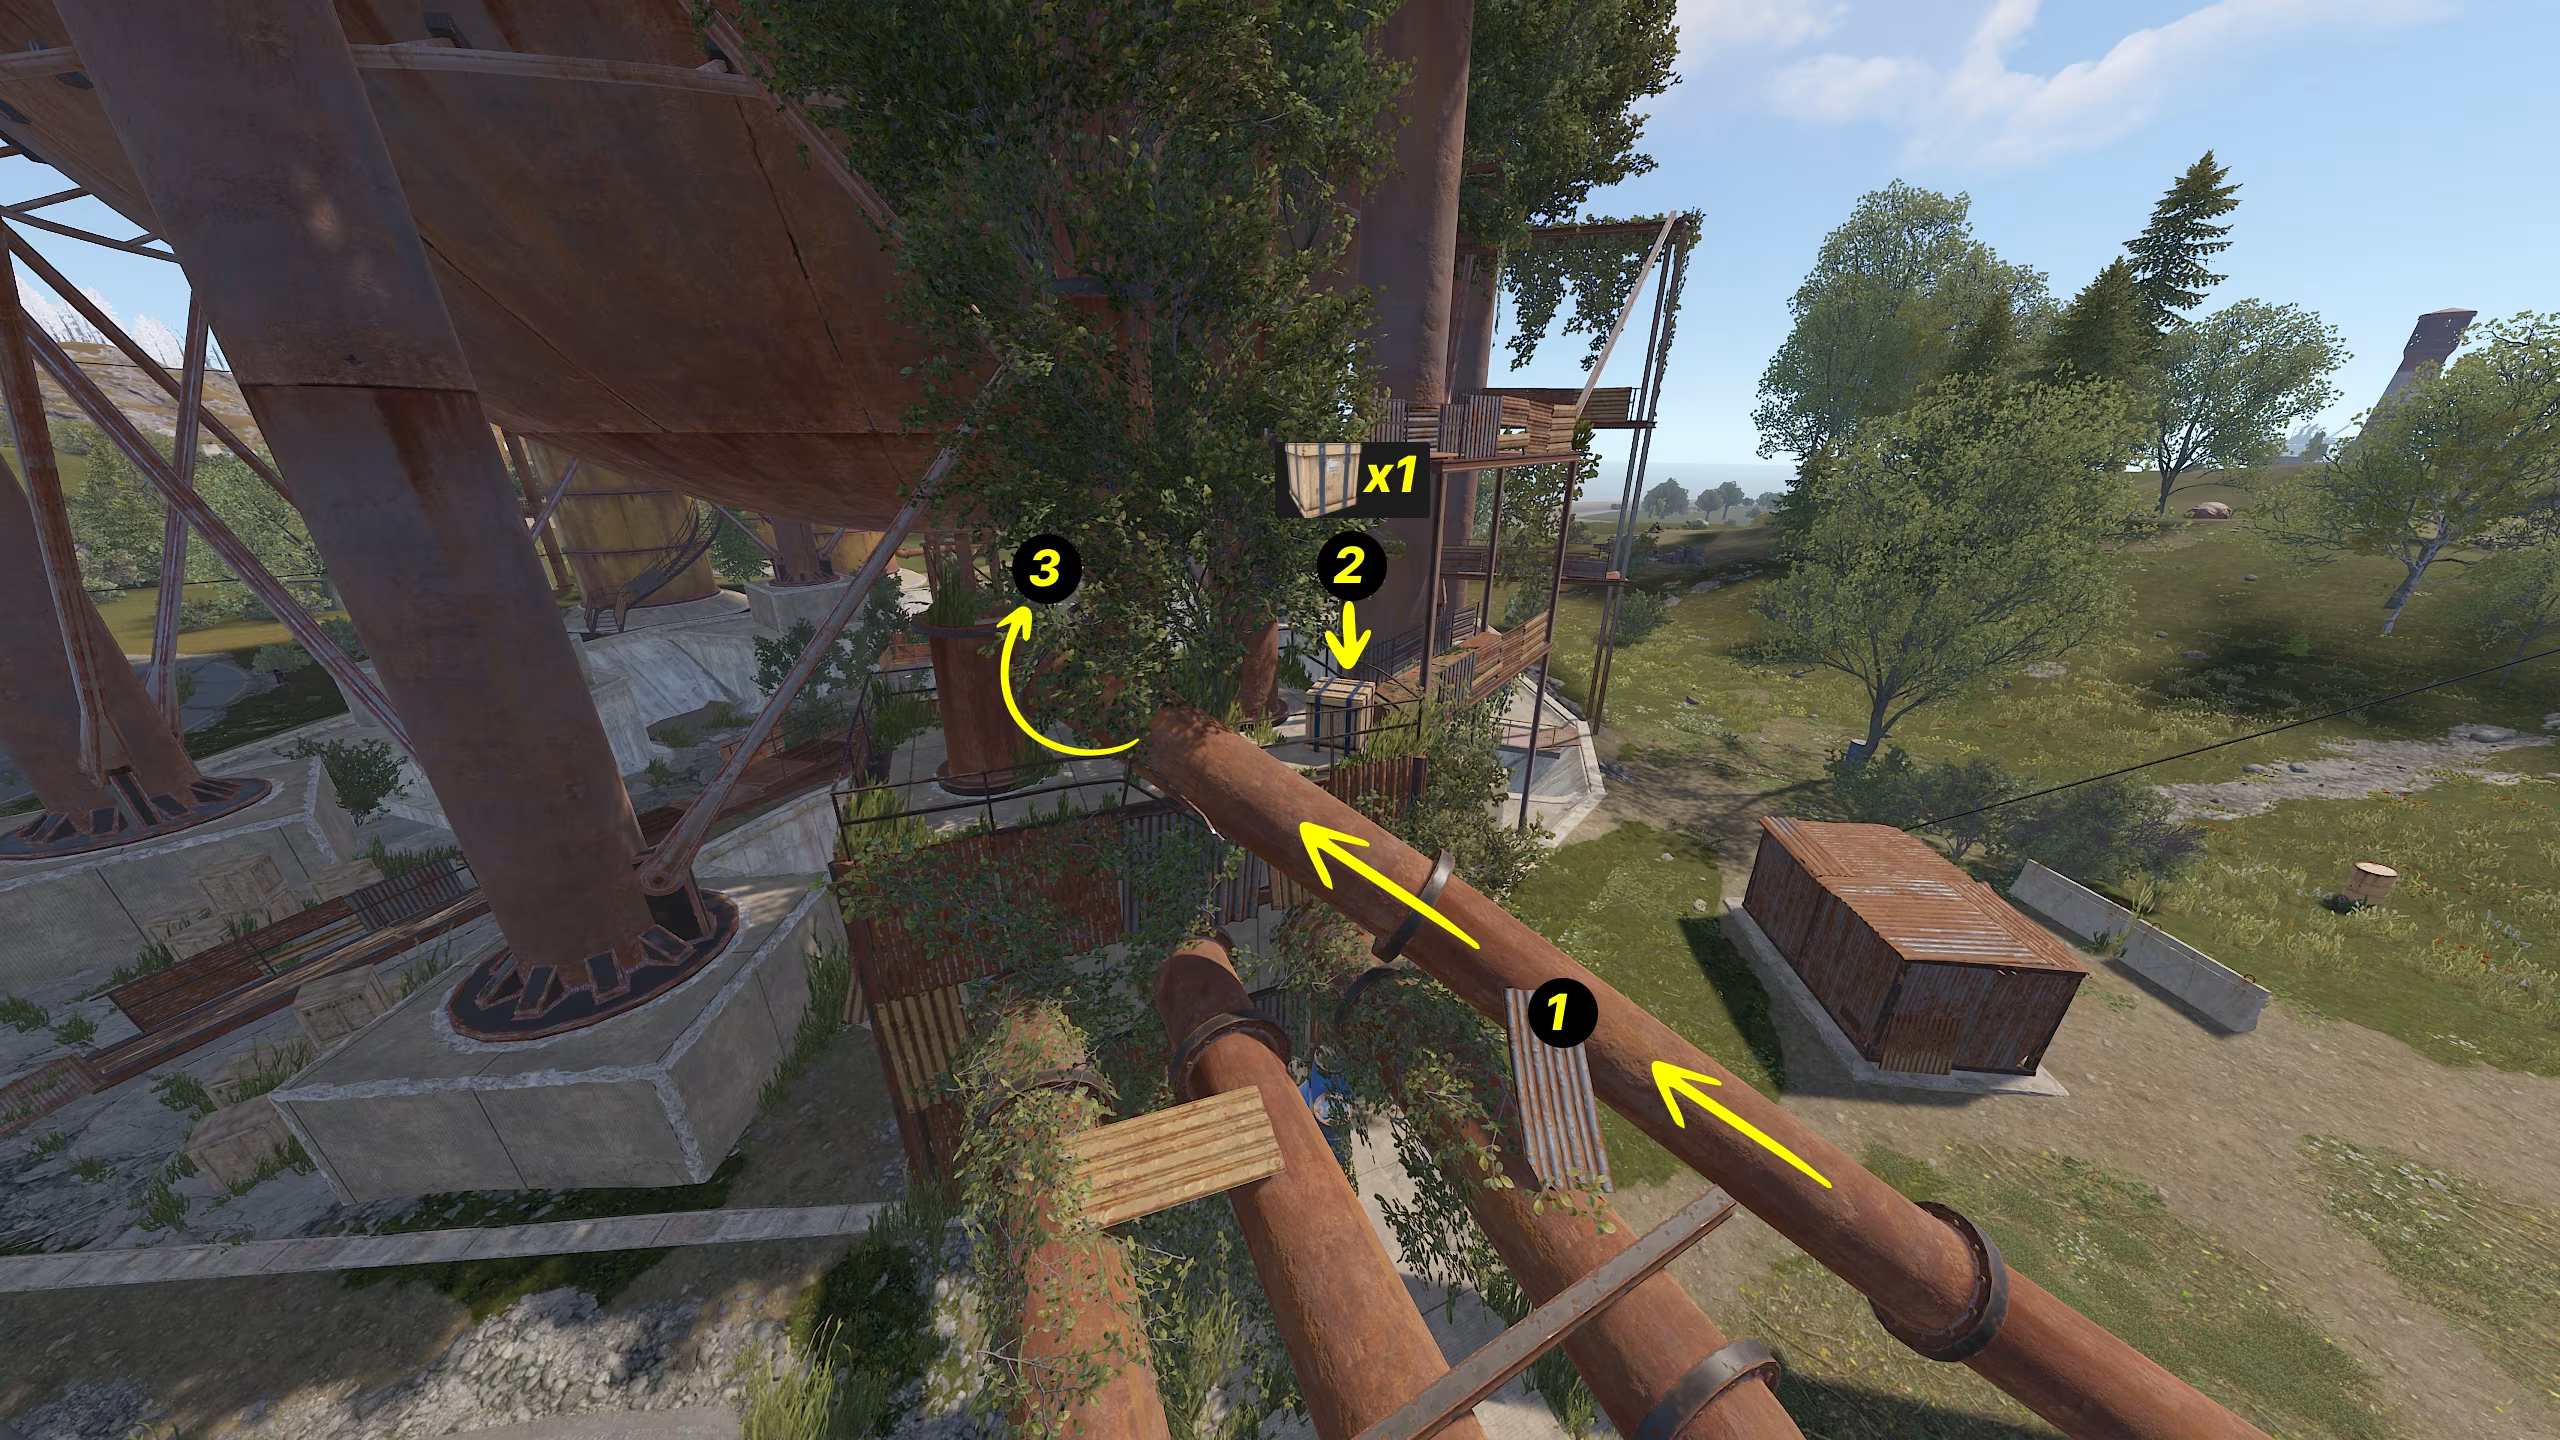
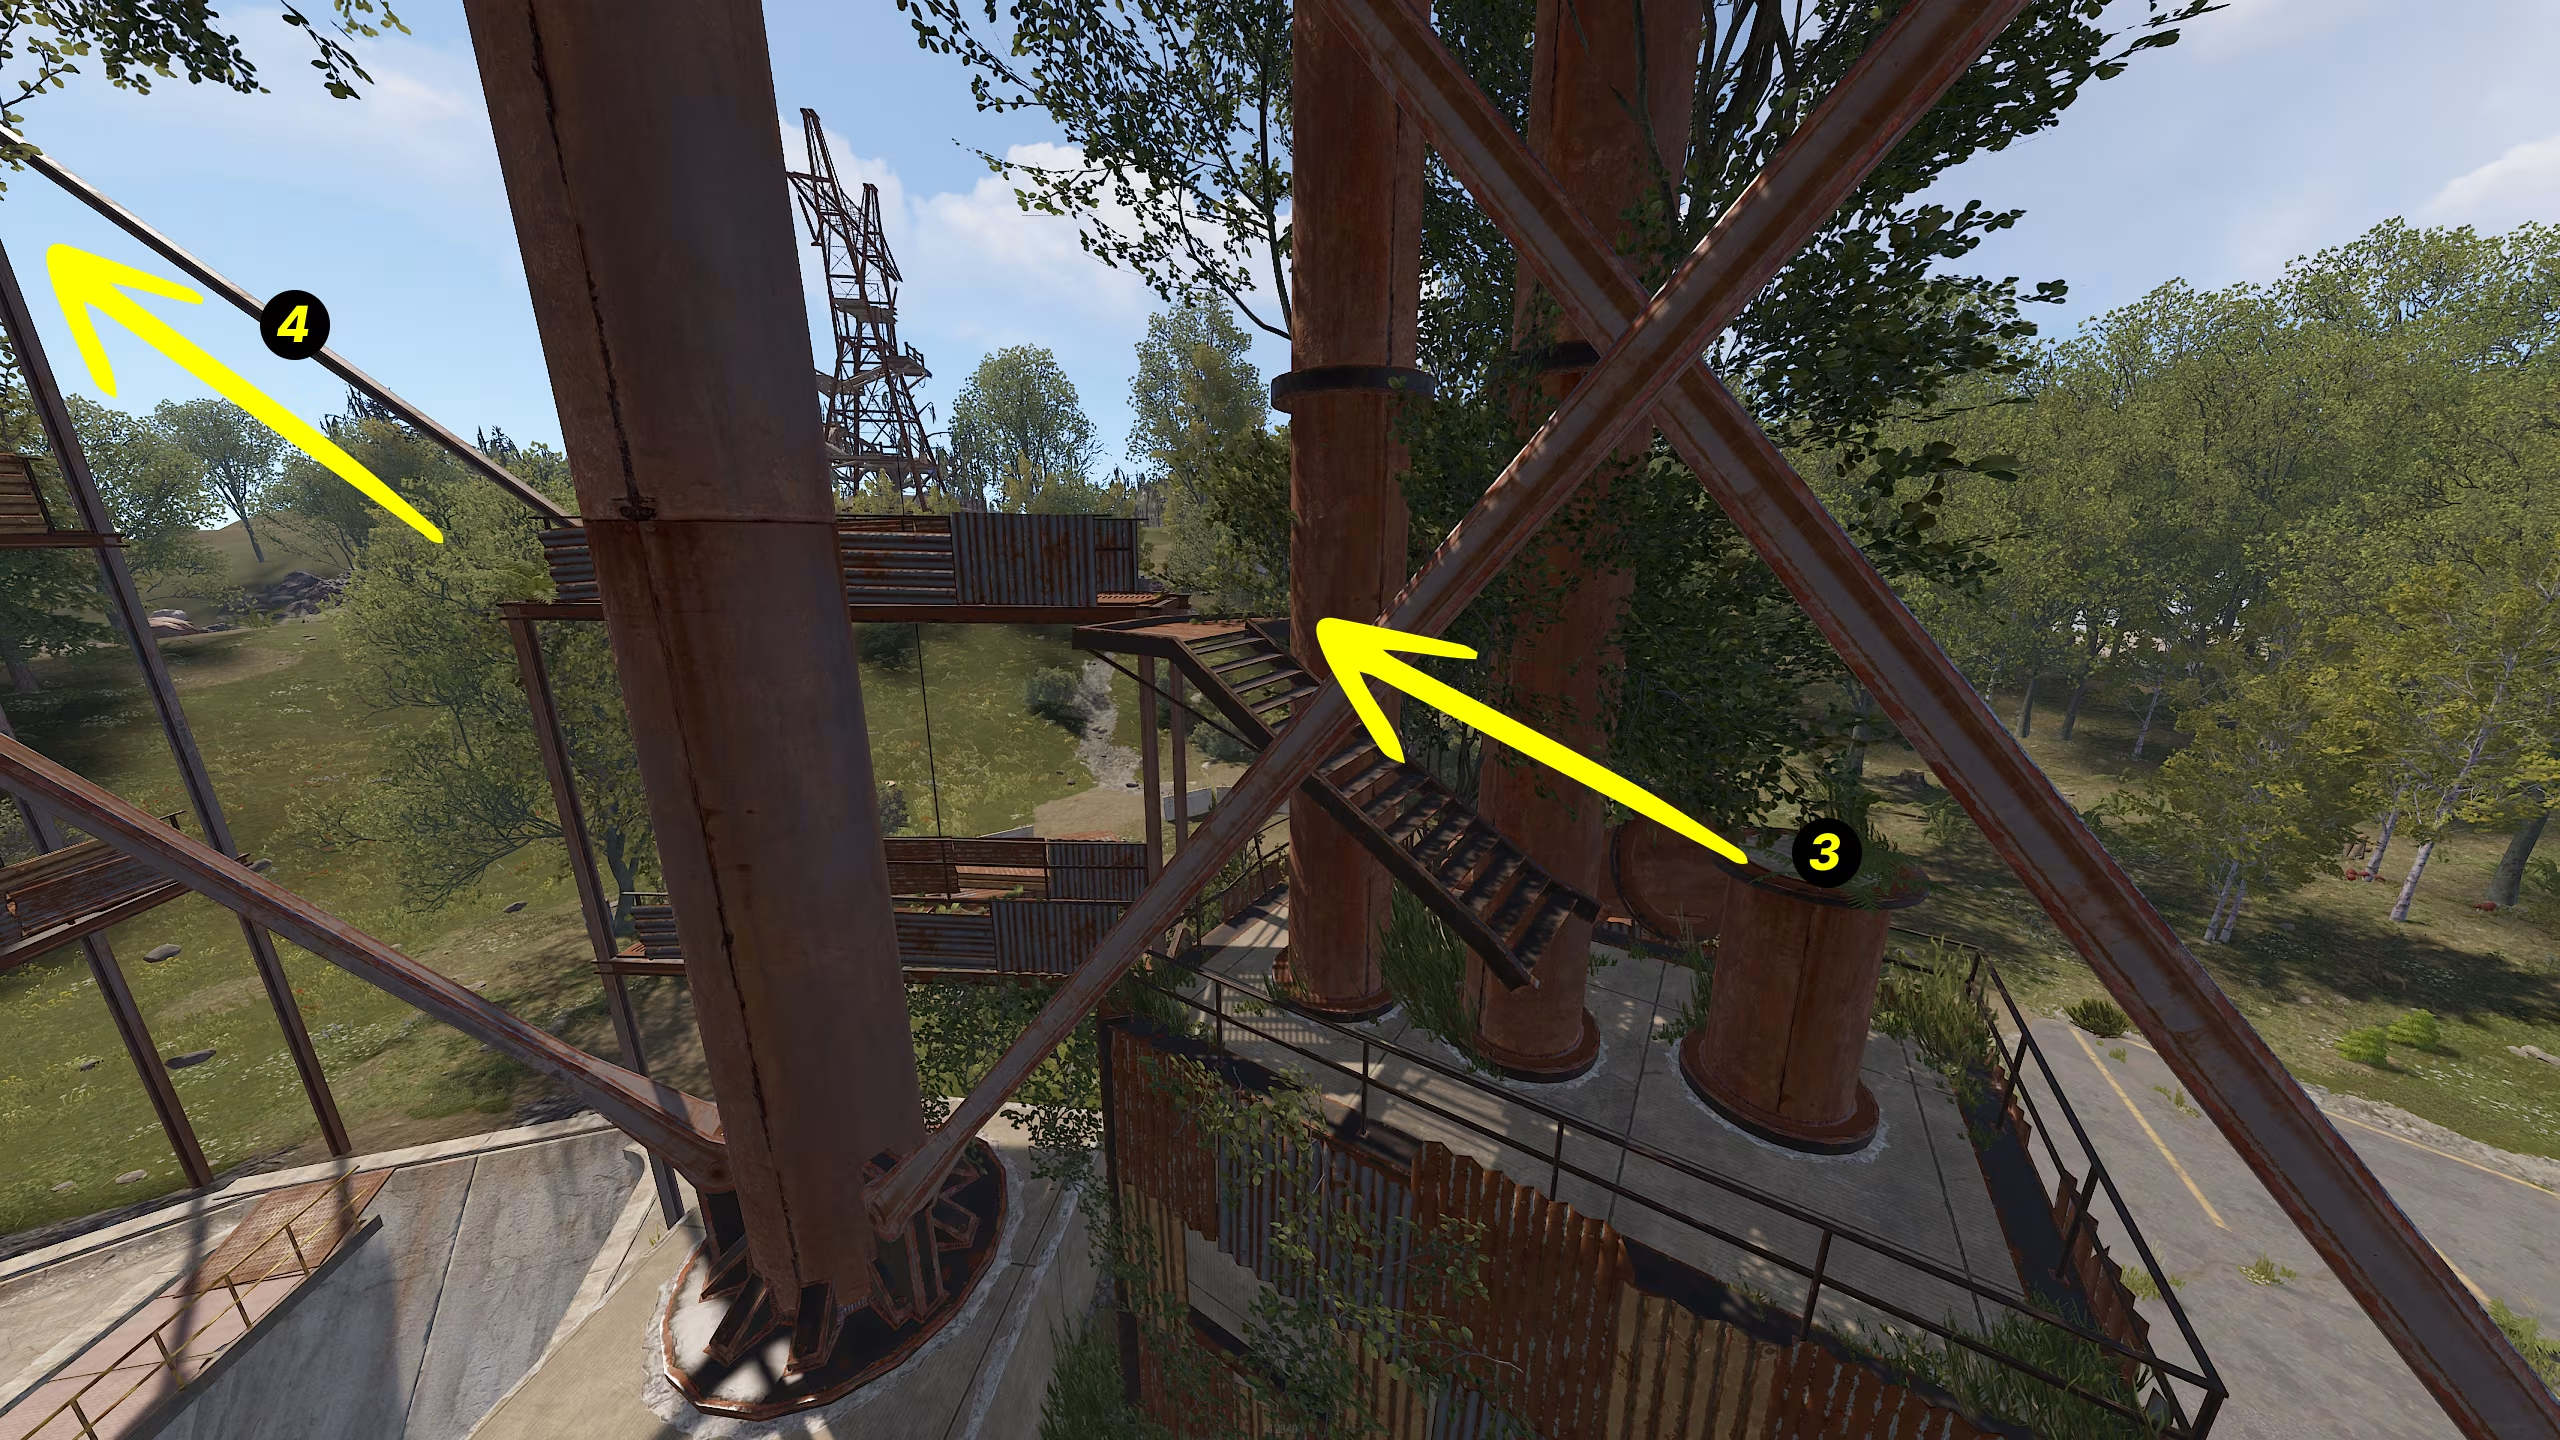
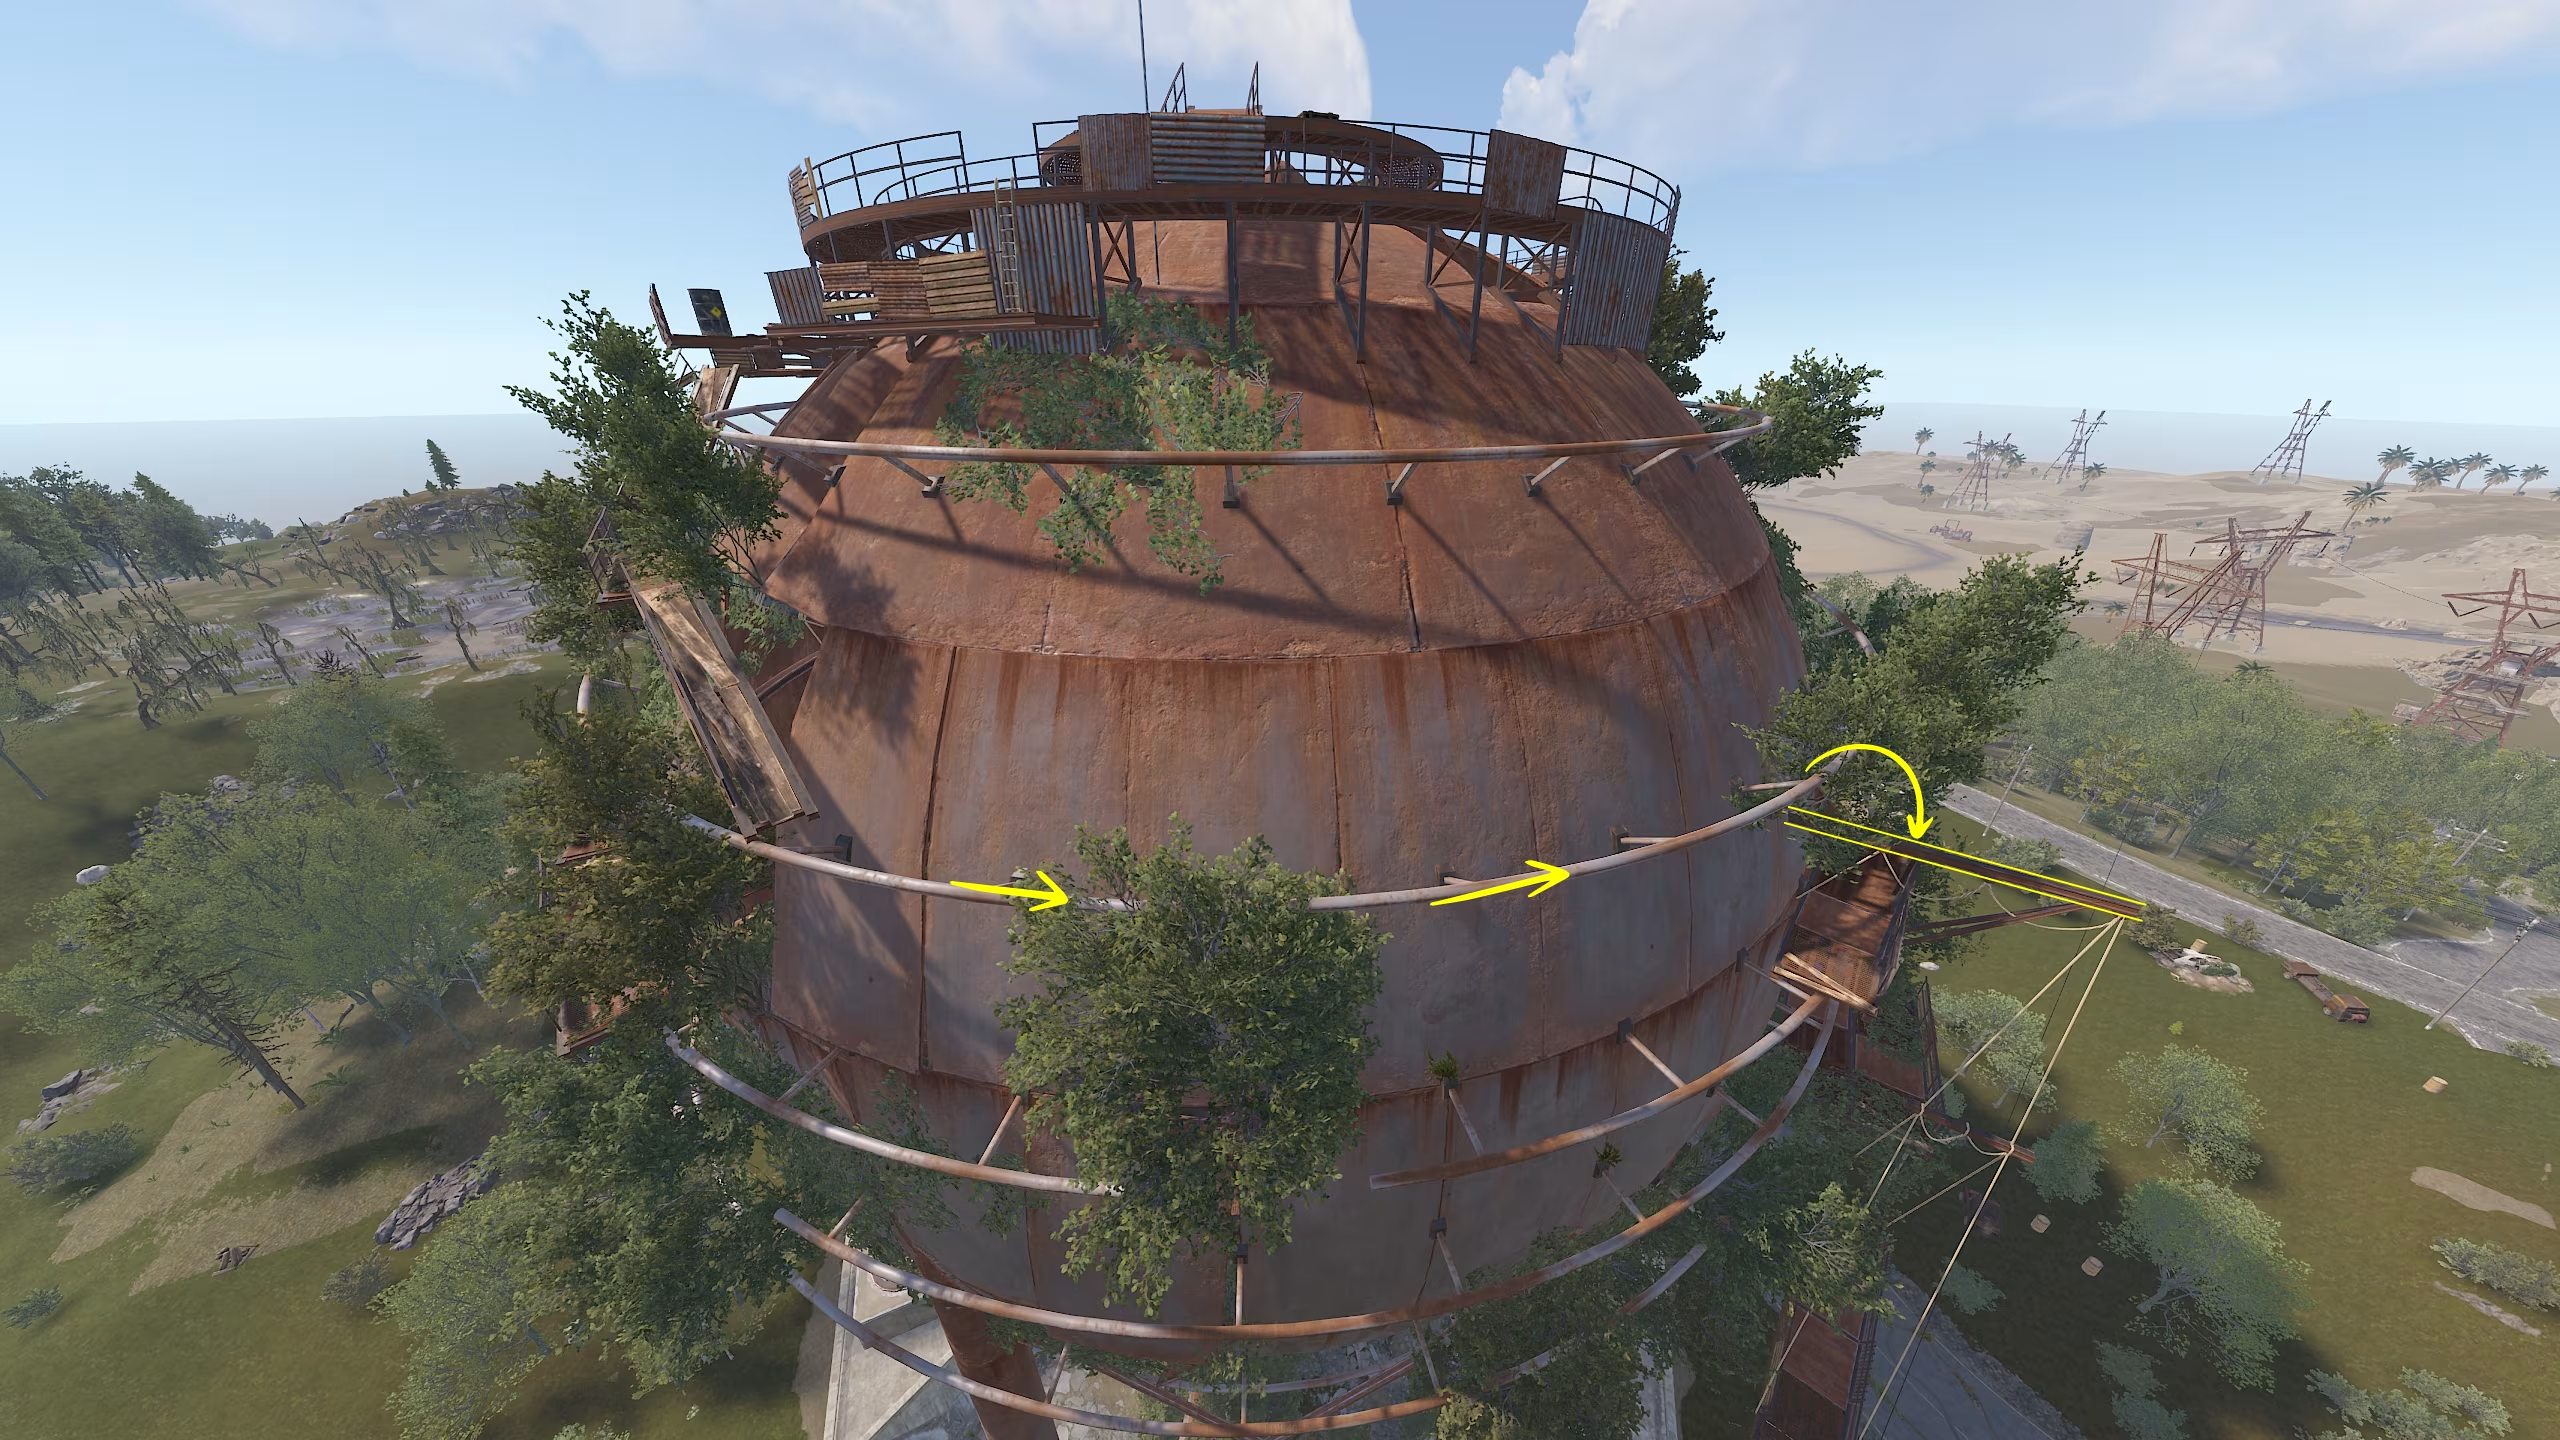
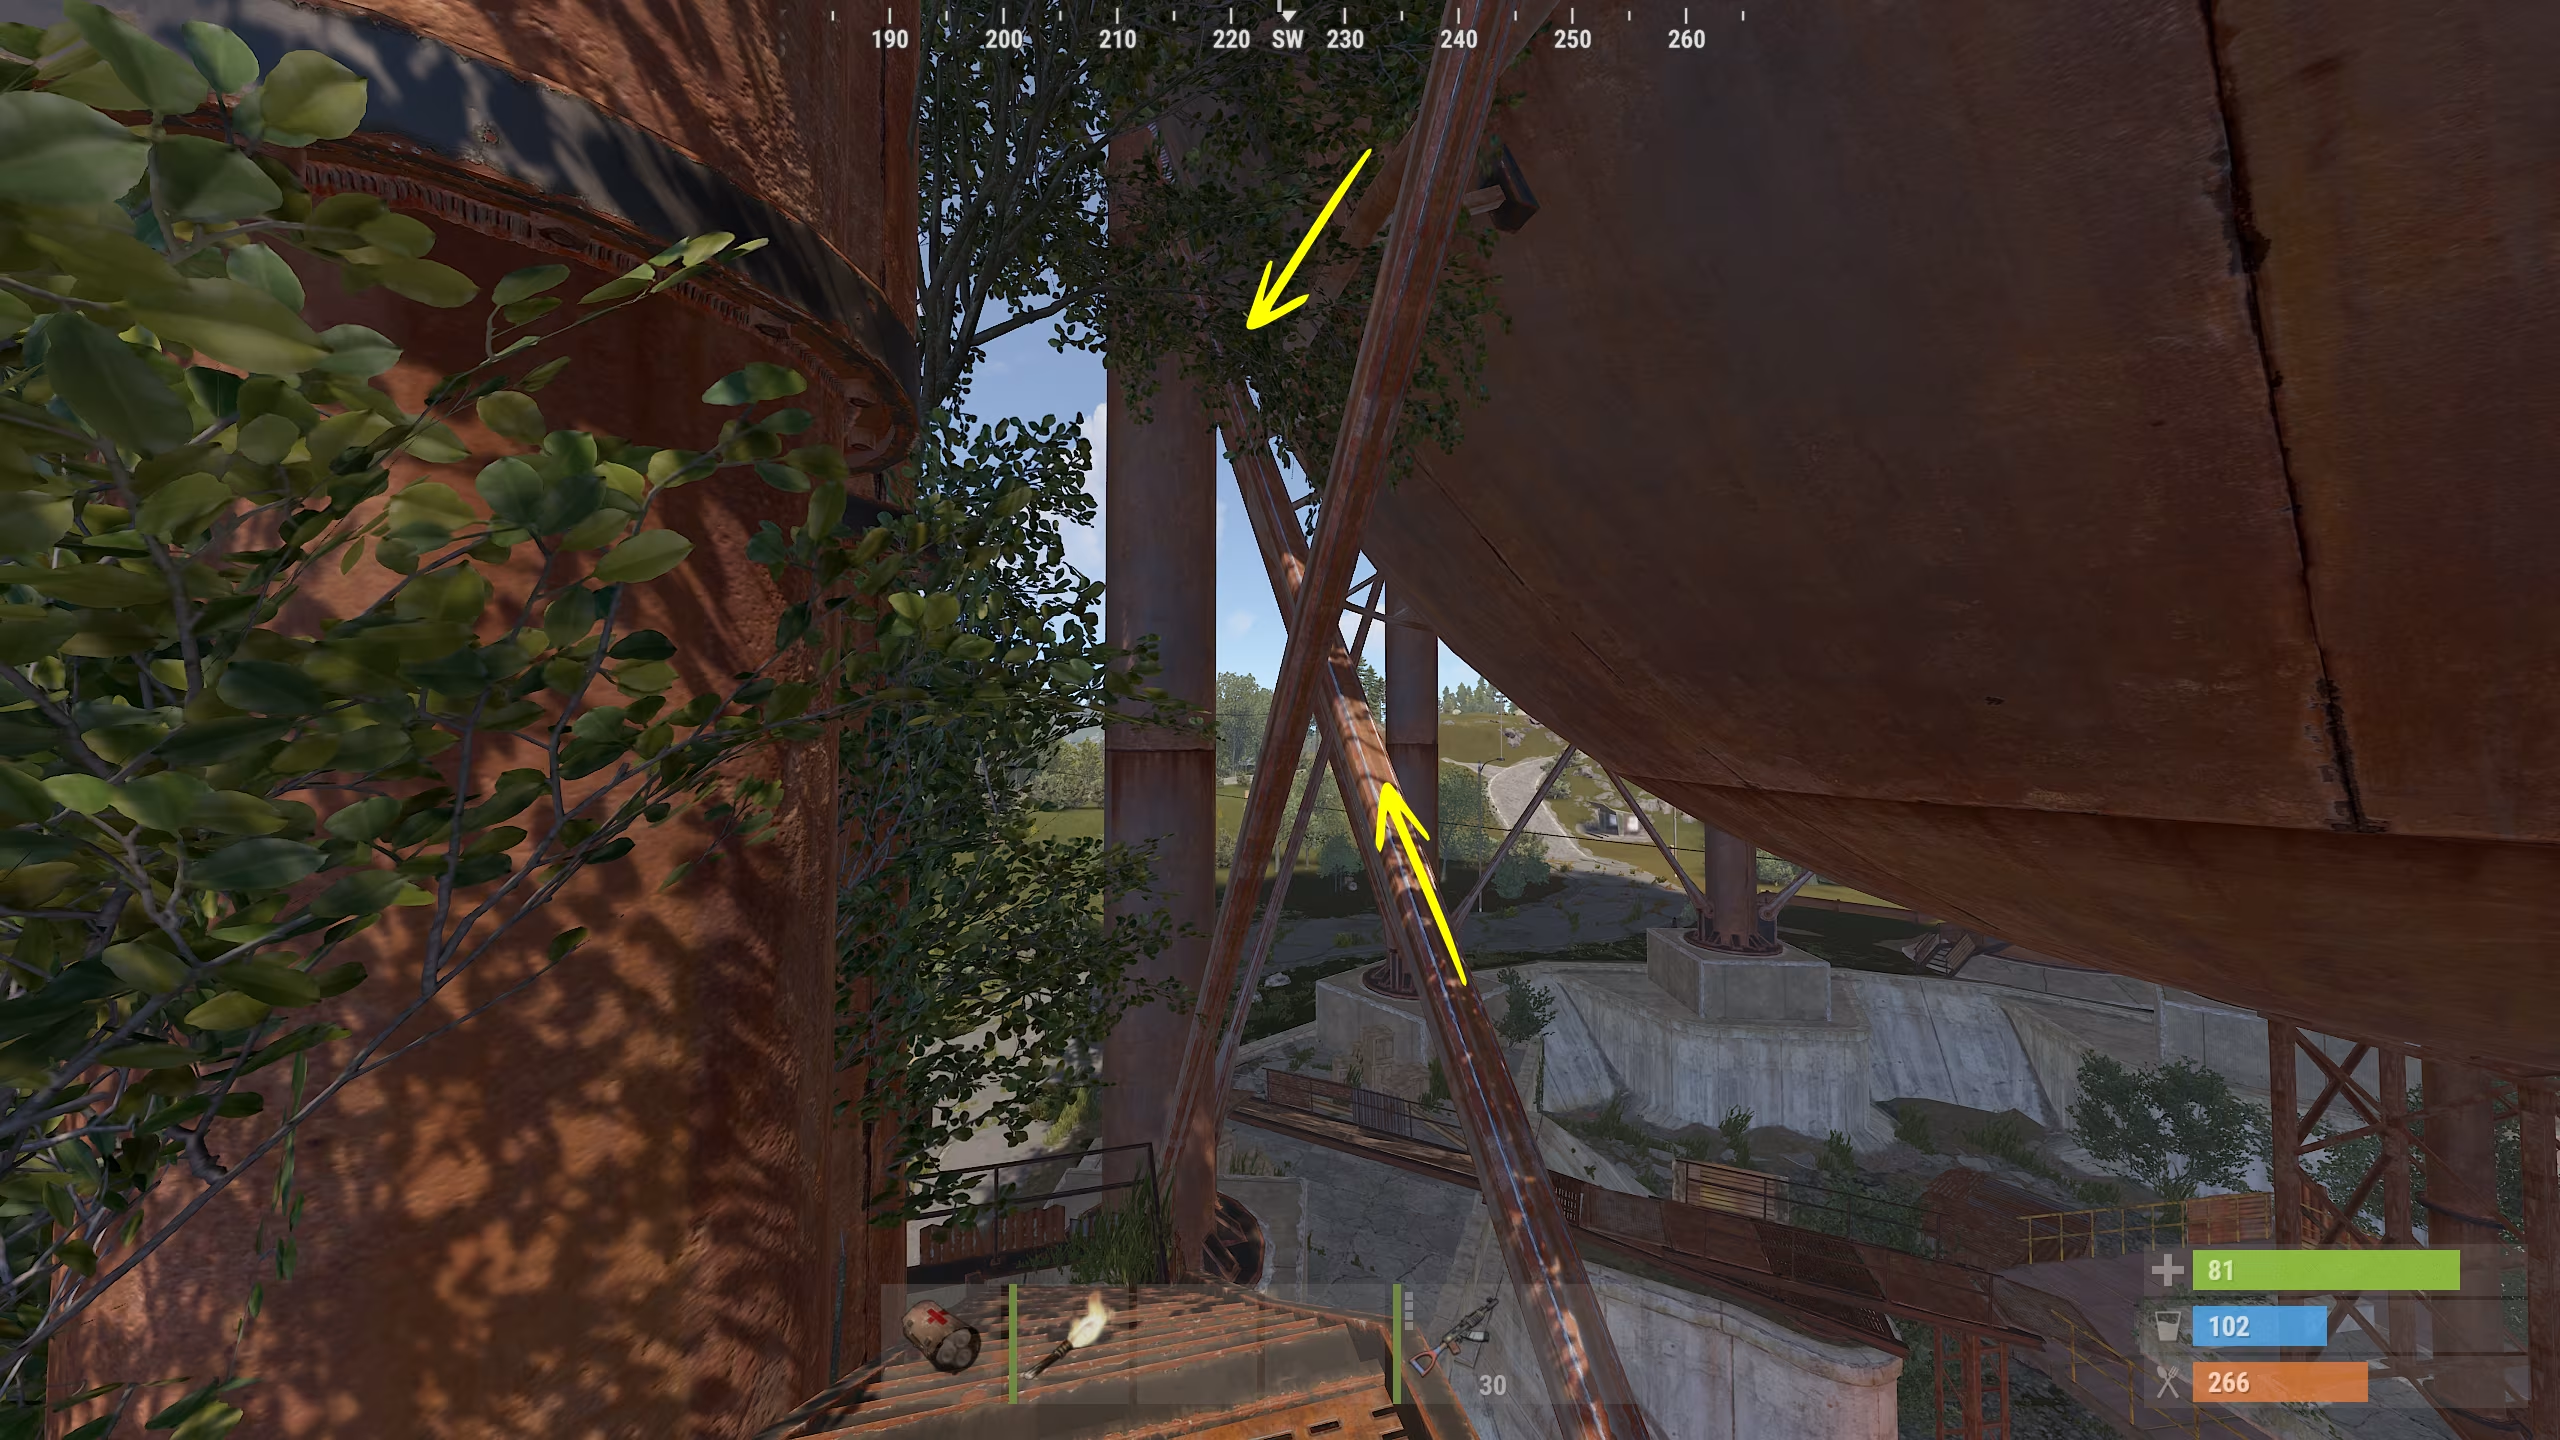
Alternative Entrance
There is also an alternative way to enter the Dome, but it requires good parkour skills. This route is useful for avoiding ambushes from players waiting at the main entrance.
- After climbing the first pipe, continue up the stairs.
- Look around and find two beams forming an "X" shape.
- Jump onto one of these beams and start climbing up.
- Once at the top, you’ll reach a pipe that wraps around the Dome.
- Follow the pipe to the left until you find a gap in the structure.
- Jump into the gap—and you’re inside! 🎉
This stealthy entry method lets you bypass campers and gain a tactical advantage over other players. 🚀
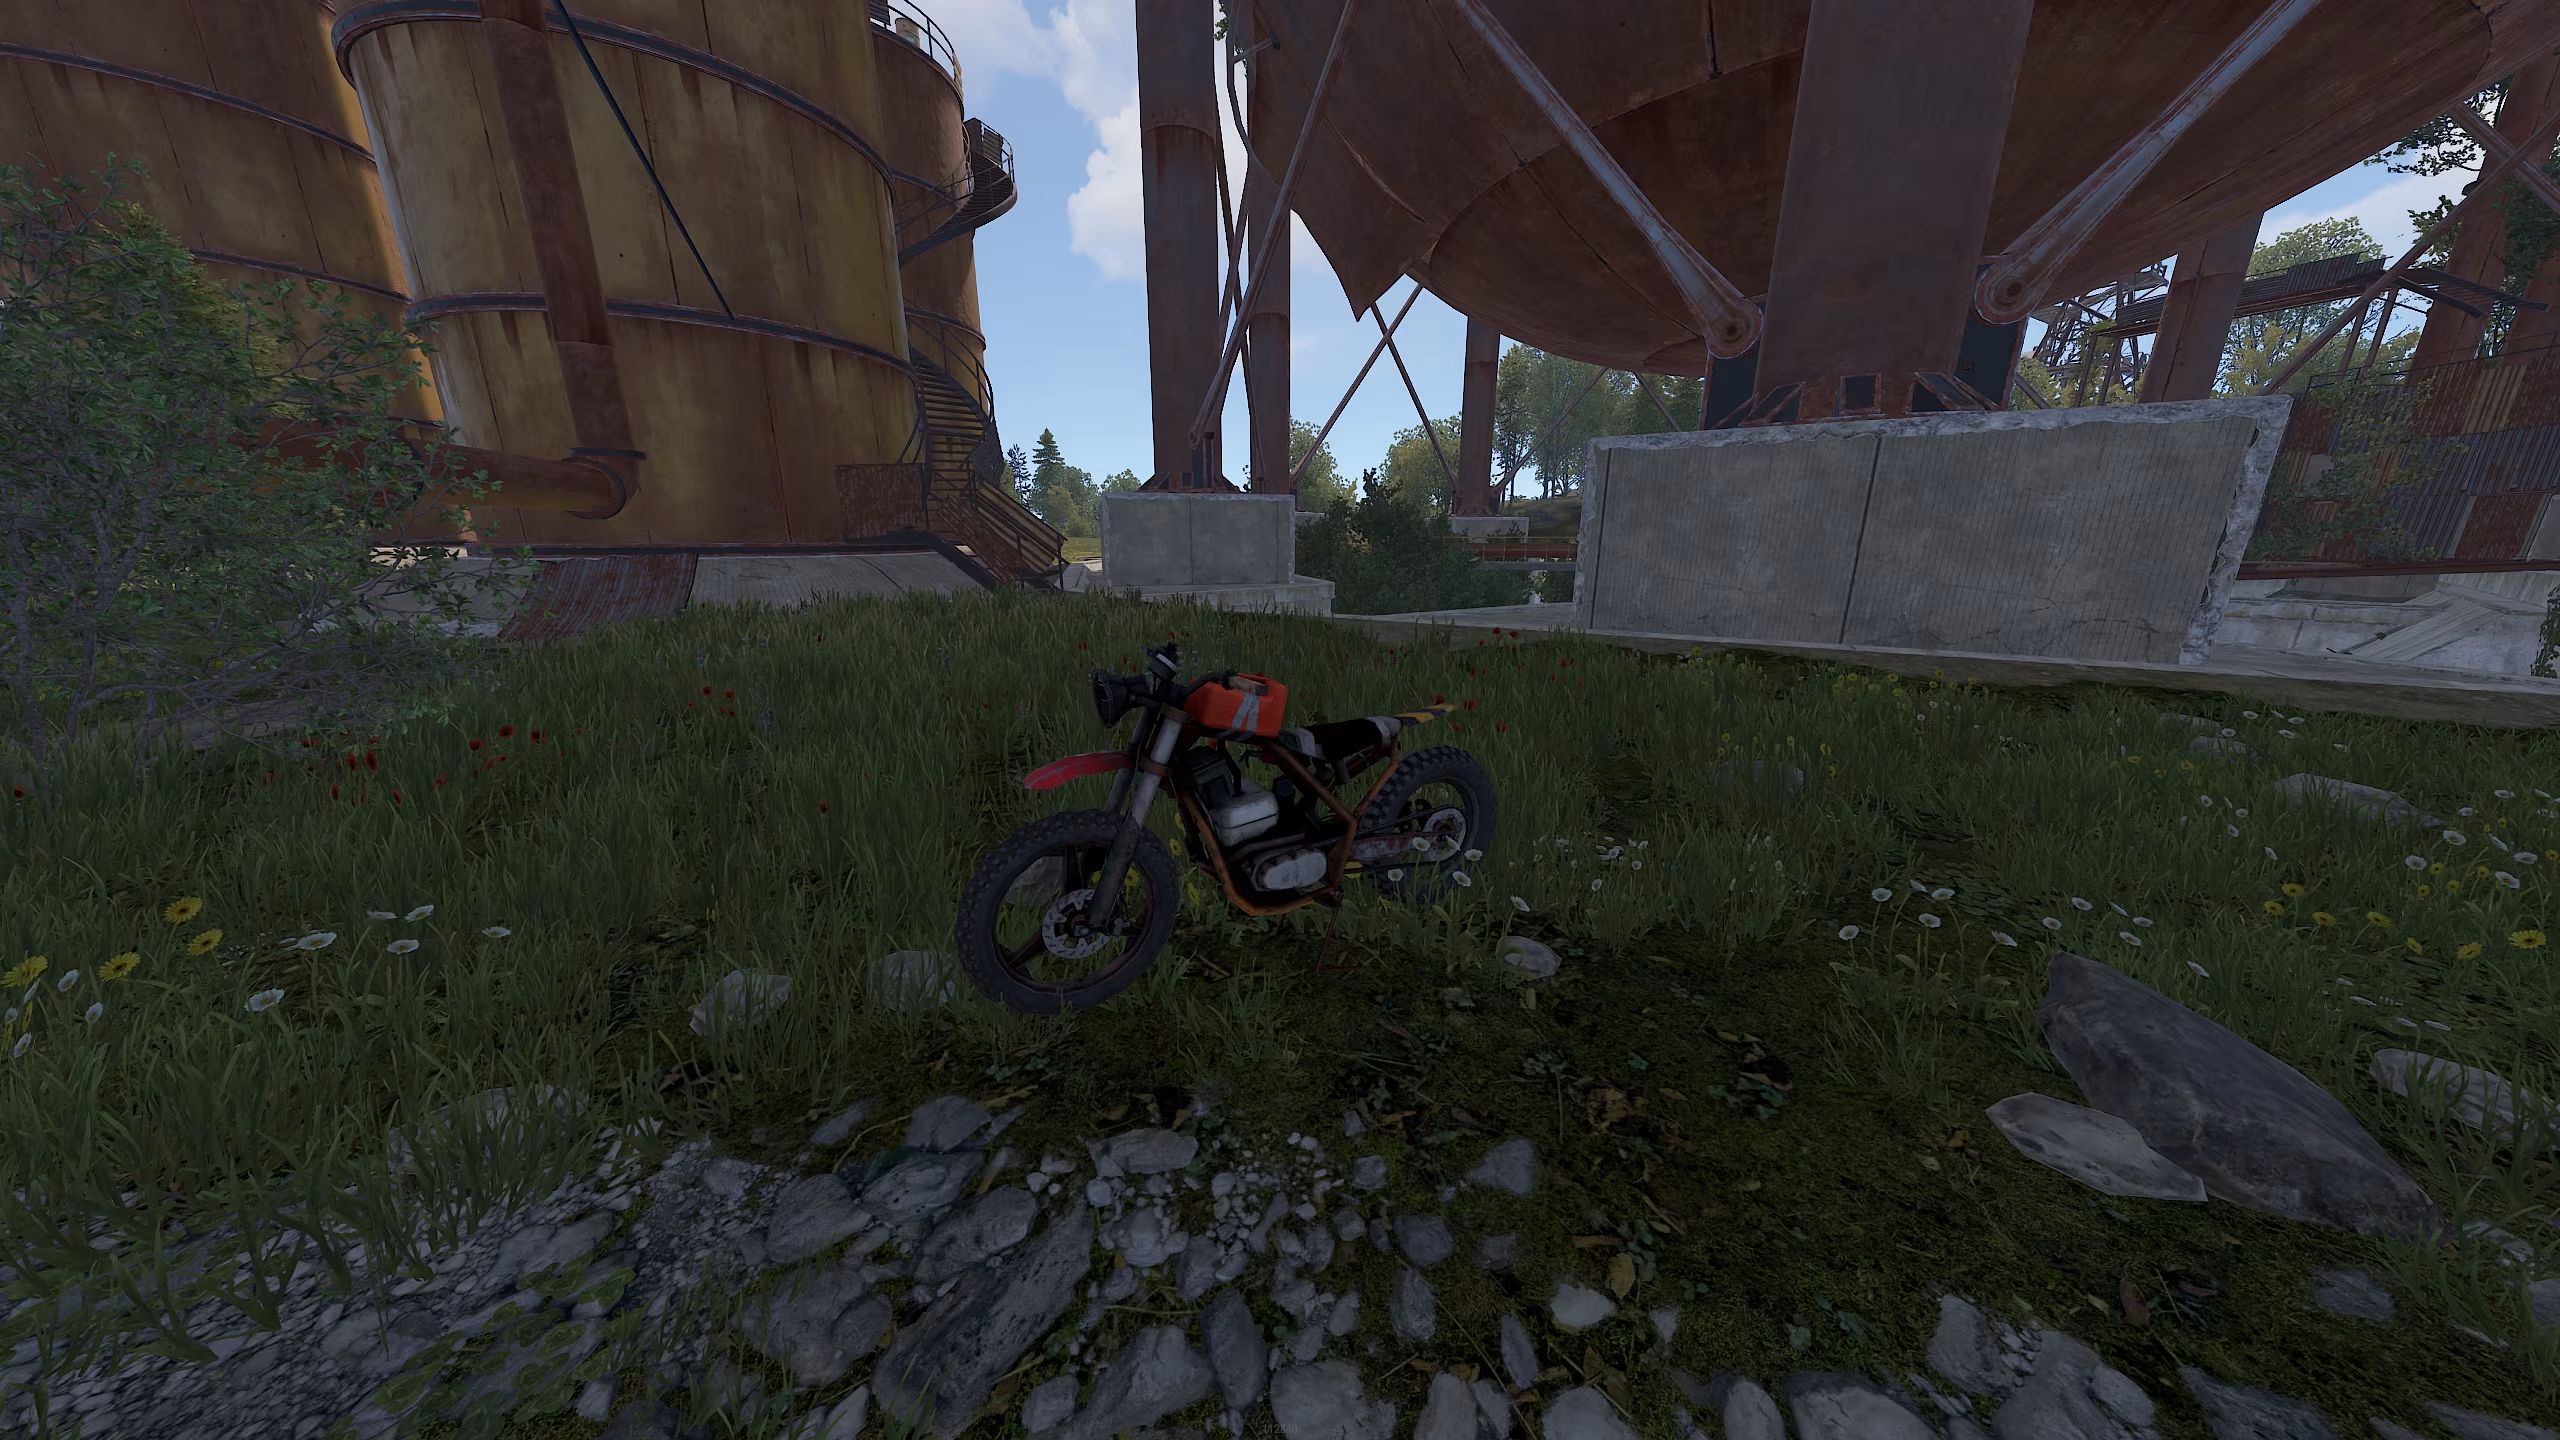
Motorcycle 🏍️
While exploring the location, it was noticed that a motorcycle often spawns near the Dome.
If you’re in the mood for a quick ride, keep an eye out—you might just speed away in style! 🚀😎